background image

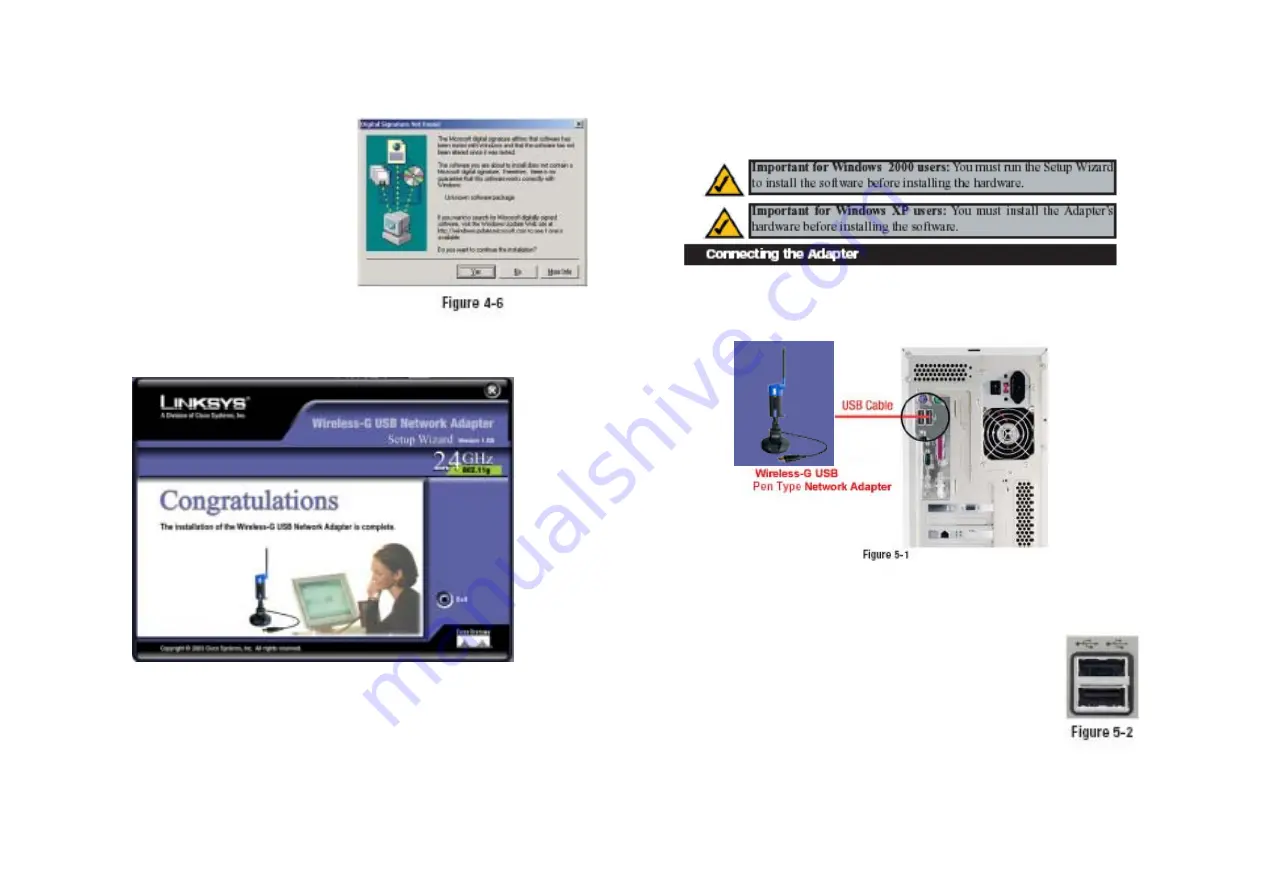
6. At this point, you may see a warning 
screen, such as that shown in 
Figure 4-6 , asking if you’d like to 
cease installation. You can click 
the Yes button to continue; the 
Adapter will function properly. 


7. After the files have been successfully copied, the screen in Figure 4-7 will 
appear. Click the 

Exit 

button. 


Proceed to “Chapter 5: Hardware Installation.” 


Chapter 5: Hardware Installation 


1. The Adapter comes with the USB cable you will use to connect the Adapter 
to your PC. (See Figure 5-1.) 


2. Connect one end of the USB cable to the USB port of the Adapter. 
 
 
3. Connect the other end of the USB cable to one of the USB 
ports on your computer (see Figure 5-2). 

Adapter 


Summary of Contents for WUSB54GP

Page 1: ......

Page 2: ...re is no guarantee that interference will not occur in a particular installation If this equipment does cause harmful interference to radio or television reception which is found by turning the equipm...

Page 3: ...tilisation int rieur Pour ce qui est des autres canaux ils peuvent tre soumis autorisation selon le d partment L utilisation en ext rieur est soumis autorisation pr alable et tr s restreint 2 4 GHz Ba...

Page 4: ...work Adapter is also compatible with the Wireless B 802 11b network standard with data rates up to 11Mbps And your wireless communications can be protected by 128 bit encryption so your data stays sec...

Page 5: ...ess network should be set up in infrastructure mode See Figure 2 1 The basis of infrastructure mode centers around an access point which serves as the main point of communications in a wireless networ...

Page 6: ...pter s LEDs Chapter 4 Software Installation and Configuration for Windows 2000 The Wireless G USB Network Adapter Setup Wizard will guide you through the installation procedure The Setup Wizard will i...

Page 7: ...ick the Next button to continue or click the Back button to return to the previous page 4 If you chose I n f r a s t r u c t u r e Mode go to Step 5 now If you chose Ad Hoc Mode select the correct ope...

Page 8: ...successfully copied the screen in Figure 4 7 will appear Click the Exit button Proceed to Chapter 5 Hardware Installation Chapter 5 Hardware Installation 1 The Adapter comes with the USB cable you wil...

Page 9: ...tional configuration changes proceed to Chapter 7 Using the WLAN Monitor Chapter 6 Driver Installation for Windows XP After connecting the Adapter to your PC as shown in Chapter 5 you ll need to insta...

Page 10: ...eless network even though it is not secure is checked Then click the Connect button and go to step 4 3 If WEP is enabled the screen in Figure 6 6 will appear Enter the WEP key of your wireless network...

Page 11: ...e wireless networks click the Site Survey tab To perform configuration changes click the Profiles tab Accessing the WLAN Monitor Overview The Link Information screen shown again in Figure 7 3 displays...

Page 12: ...twork connection Click the Back button to return to the initial Link Information screen Click the X Close button in the upper right corner to exit the WLAN Monitor The Site Survey screen shown in Figu...

Page 13: ...network devices are set WEP The status of the WEP encryption security feature Connect To connect to a wireless network using a specific profile select the profile and click the Connect button Edit Sel...

Page 14: ......

Page 15: ......

Page 16: ...Congratulations screen Figure 7 16 will appear next Click Activate new settings now to implement the new settings immediately and return to the Link Information screen Click Activate new settings lat...

Page 17: ......

Page 18: ......

Page 19: ......

Page 20: ......

Page 21: ......

Page 22: ......

Page 23: ......

Page 24: ......

Page 25: ......

Reviews: