Chapter 2
How to Use the PrintServer
4
Wireless-G PrintServer
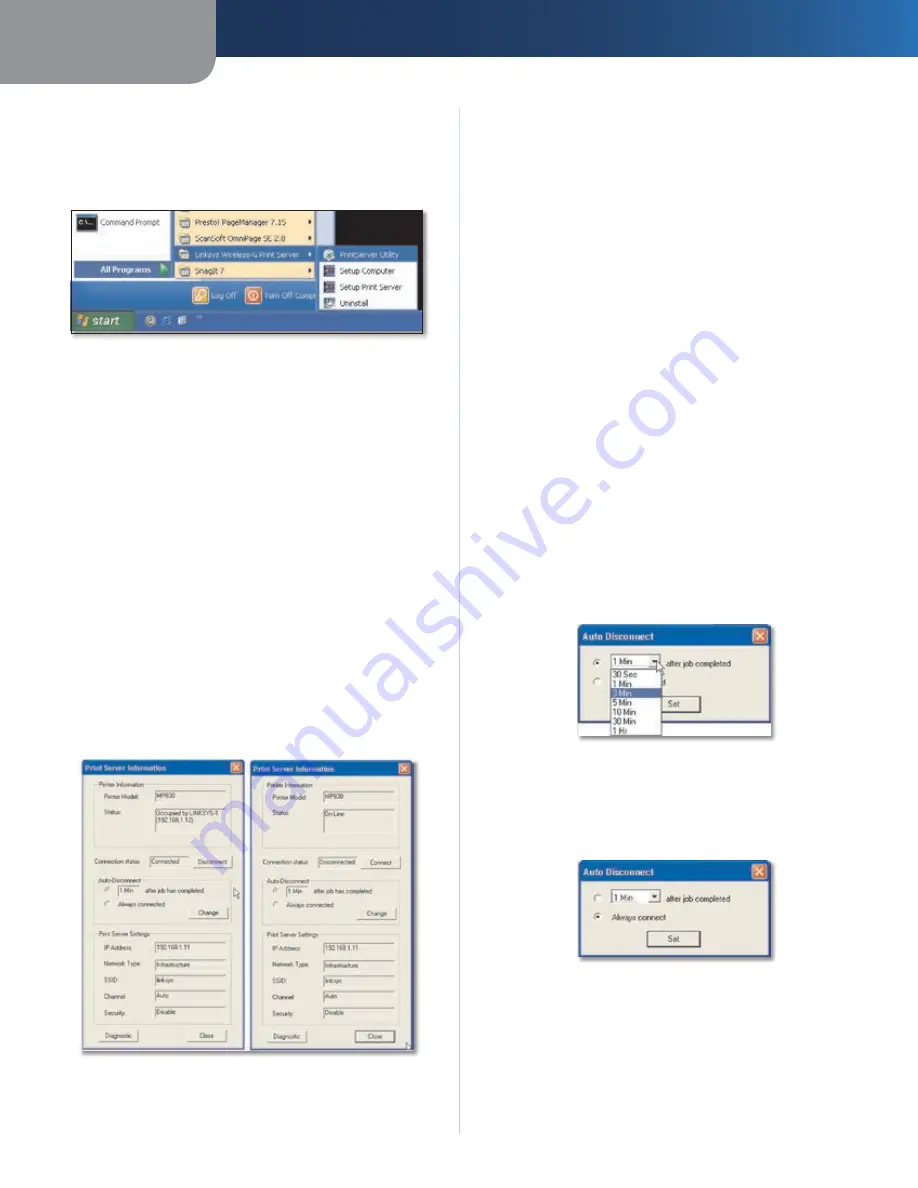
Program Icon Accessed through the Start Menu
The PrintServer program icons appear in the Start menu .
To access these icons, click
Start
. Select
Programs
. Select
Linksys PrintServer
.
Start Menu > Programs >PrintServer Program Icons
You will have four options available:
PrintServer Utility
To access the PrintServer Utility, click
PrintServer Utility
. Refer to the following section, “About
the PrintServer Information Screen”, for details .
Setup Computer
To run the wizard that sets up the
PrintServer driver, click
Setup Computer
. Refer to the
Quick Installation for details .
Setup PrintServer
To run the wizard that sets up the
PrintServer, click
Setup PrintServer
. Refer to the Quick
Installation for details .
Uninstall
To uninstall the PrintServer from your computer,
click
Uninstall
.
About the Print Server Information Screen
The
Print Server Information
screen shows status
information for the PrintServer . Use this screen to connect
your computer to the printer for scans, faxes, or usage of
a memory card .
Print Server Information
Connected Disconnected
Printer Information
Printer Model
The model number of the connected
printer .
Status
This section shows the printer’s status information .
When a computer is connected to the printer, the
Status
field states the name and IP address of the computer that
is currently connected . When a computer is not connected
to the printer, the
Status
field says, “On-Line” .
Also shown is the number of seconds before the current
computer is disconnected from the printer .
Connection status
To scan, fax, or read information from a memory card, your
computer must be connected to the printer, indicated by
the message, “Connected” . To allow another computer to
use the printer, click the
Disconnect
button . To manually
re-connect to the printer, click the
Connect
button .
Auto-Disconnect
By default, the computer will be disconnected one minute
after the print job, scan, or fax is completed . To change
the length of time before the computer is disconnected
from the printer, click the
Change
button . Select the
appropriate length of time from the drop-down menu,
and then click the
Set
button .
Auto-Disconnect, time
If you want the computer to always be connected to the
printer, such as when you have only one computer using
the printer, select
Always connect
, and then click the
Set
button .
Auto-Disconnect, Always connect
Summary of Contents for WPSM54G - Wireless-G PrintServer With Multifunction Printer Support Print Server
Page 1: ...USER GUIDE Wireless G PrintServer Model WPSM54G EU ...
Page 36: ...BENUTZERHANDBUCH Wireless G Druckserver Modell WPSM54G DE ...
Page 71: ...GUÍA DEL USUARIO Servidor de impresión Wireless G Modelo WPSM54G ES ...
Page 106: ...GUIDE DE L UTILISATEUR Serveur d impression sans fil G Modèle WPSM54G FR ...
Page 141: ...GUIDA PER L UTENTE Wireless G PrintServer Modello WPSM54G IT ...
Page 176: ...GEBRUIKERSHANDLEIDING Wireless G afdrukserver Model WPSM54G NL ...
Page 211: ...MANUAL DO UTILIZADOR Servidor de impressão sem fios G Modelo WPSM54G PT ...


