28
29
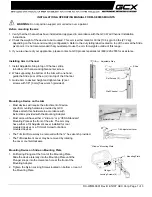
Model: CLSX (Integrity Series)
Tools Required:
Metric Hex Key Set, Screwdriver, Side Cutters, T-45 Torx Wrench
Note:
Proceed with the following steps before attaching the DISPLAY CONSOLE as described in the
CLSX
Assembly
Instructions.
1. Remove the four SCREWS (a) and COVER PLATE (b) located on the CONSOLE SUPPORT BRACKET TUBE (c).
Note:
Some models may have a plastic end cap instead of a cover plate.
2. Unwrap the power SUPPLY CORD (d) and COAXIAL CABLE (e) located within the
CONSOLE SUPPORT BRACKET TUBE (c). Route these cables through the
OPENING (f) of the TV MOUNTING BRACKET (g).
3. Locate the AUDIO / VIDEO / I-R REMOTE CONTROL CABLE (h). Route this
CABLE ASSEMBLY through the TV MOUNTING BRACKET with the 2-connector
end coming out the OPENING (f) of the TV MOUNTING BRACKET (g).
4. Secure the TV MOUNTING BRACKET (g) with four SOCKET HEAD SCREWS (s)
onto the CONSOLE SUPPORT TUBE (c).
CAUTION:
Do not pinch any cables when inserting the TV MOUNTING BRACKET
into
the
CONSOLE SUPPORT TUBE.
5. Install the ATTACHABLE TV (i) onto the TV MOUNTING BRACKET (g) using four
nylon SHOULDER WASHERS (j), four FLAT WASHERS (k) and four SCREWS (l).
6. Insert other end of the AUDIO / VIDEO / I-R REMOTE CONTROL CABLE
ASSEMBLY (h) into the console connector.
a
b
c
i
d
e
h
f
g
s
c
h
j
k
l
7. Install the DISPLAY CONSOLE (m) as instructed in the
Assembly Instructions using the four new SCREWS (n)
supplied. Tighten the SCREWS to 6-8 in-lbs. Do not
overtighten the SCREWS.
CAUTION:
Do not pinch any wires when assembling the
DISPLAY CONSOLE (m) to the CONSOLE SUPPORT
BRACKET TUBE (c).
8. Connect the COAXIAL CABLE, POWER CORD and I-R
REMOTE CONTROL CABLE to the rear of the ATTACHABLE
TV. See the
Media Connections
page in this manual for
detailed information.
9. Cable tie any excess cable together behind the
ATTACHABLE TV and position the cables between the TV
MOUNTING BRACKET (g) and the DISPLAY CONSOLE (m).
10. Locate the new TOP CAP (o). Place the new top cap into
position at the top of the TV MOUNTING BRACKET (g).
Be sure the top cap snaps securely in place.
11. Secure the POWER ADAPTER (p) to the FRONT
STABILIZER (q) using two CABLE TIES (r) as shown. Be sure
the cable ties are pulled tight. Trim the excess cable ties.
Connect the SCREW-TYPE CONNECTOR of the power SUPPLY CORD (d) to the underside receptacle. Bundle any
excess POWER SUPPLY CORD and store under the unit. Connect the COAXIAL CABLE (e) to the broadcast supply
cable in similar fashion.
12. Connect the POWER SUPPLY CORD to the POWER ADAPTER (p).
13. Continue with the remainder of assembly as instructed in the Assembly Instructions. Plug the power supply cord
into an electrical outlet upon completion. See the
Media Connections
pages in this manual for detailed informa-
tion.
r
p
q
d
e
d
e
i
m
o
n
g
j
k
l
f
h
c
d
e
h
Summary of Contents for ATV15-XXXA-02
Page 1: ...1008767 0001 AA 15 ATTACHABLE TV ASSEMBLY INSTRUCTIONS ...
Page 2: ......


