Operation and settings
31
4
Oper
ation and se
ttings
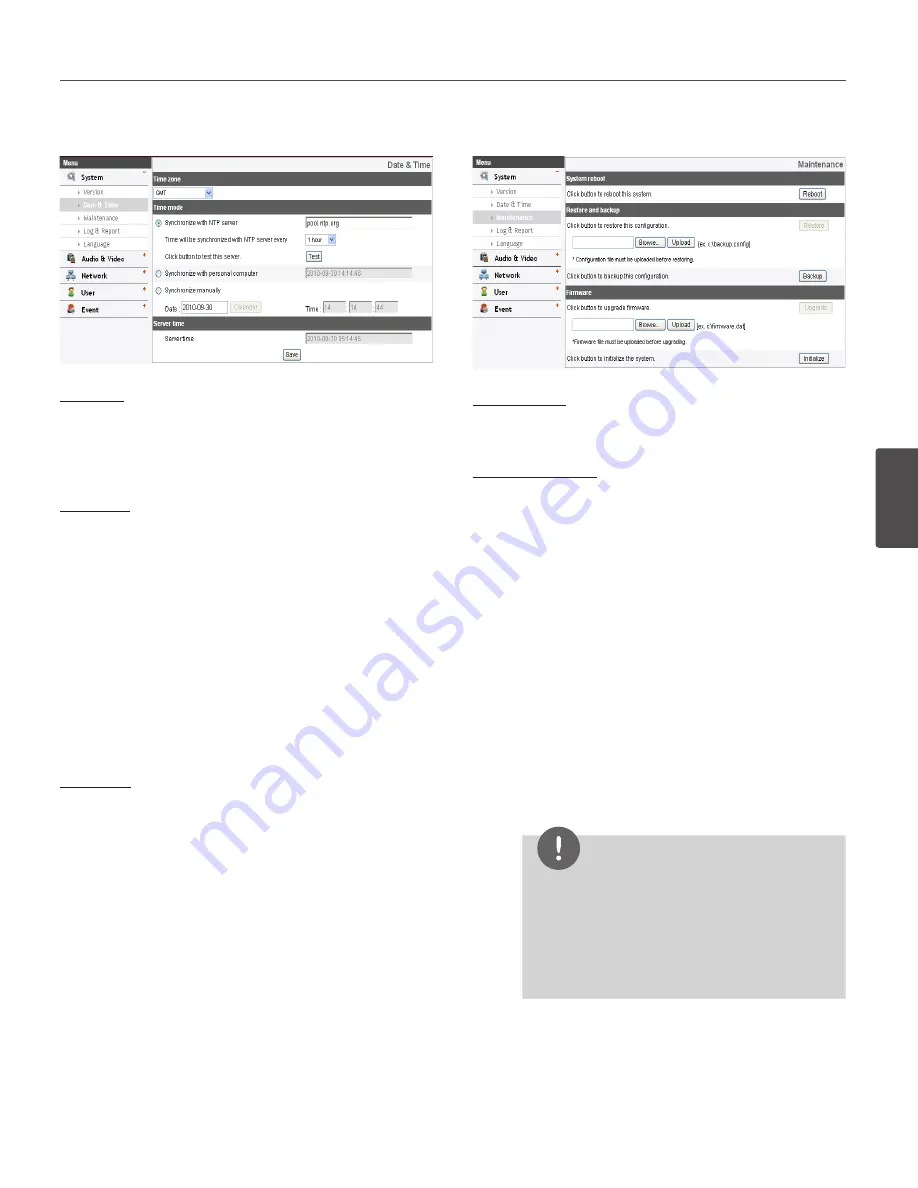
Date & Time
Time zone
Set the time difference from GMT in the area where the IP
device is installed.
Select the time zone in the area where the IP device is
installed from the drop down list.
Time mode
› Synchronize with NTP Server: Select if you want
to synchronize the IP device’s date and time with
those of the time server called NTP (Network Time
Protocol). Specify the NTP server’s name. Click the
[Test] button for connection test to the server.
› Synchronize with personal computer: Select if you
want to synchronize the IP device’s date and time
with your computer.
› Synchronize manually: Select if you want to set the
IP device’s date and time manually. Select the year,
month and date by clicking the calendar button.
Set hour, minutes and seconds in the edit boxes.
Server time
› Server time: Displays the current date and time of
the IP device.
• Save: Click this button to confirm the settings.
Maintenance
System reboot
Click the [Reboot] button to restart the IP device. It takes
some minutes for the IP device to start again.
Restore and backup
› Backup: To take a backup all of the settings. If
necessary, it make possible to return to a backuped
configuration. Click this button and follow the
instructions on the browser to specify the folder
and save the setting data of the IP device. This
configuration backup can be restored whenever
needed.
› Restore:
1. Click the [Browse] button.
2. Find and open the file in which the configura-
tion setting data is stored.
3. Click the [Upload] button.
4. Click the [Restore] button after successfully
uploading the backup configuration. The sys-
tem settings will be restored and reboot the
system.
NOTE
• Backup and Restore can happen on IP
device having the same version of firmware.
This feature is not intended for multi-
configurations or for firmware upgrades.
• [Backup] function is allowed in HTTP protocol
but not in HTTPS protocol.
Summary of Contents for LW9226 Series
Page 60: ...BZ03 ...


