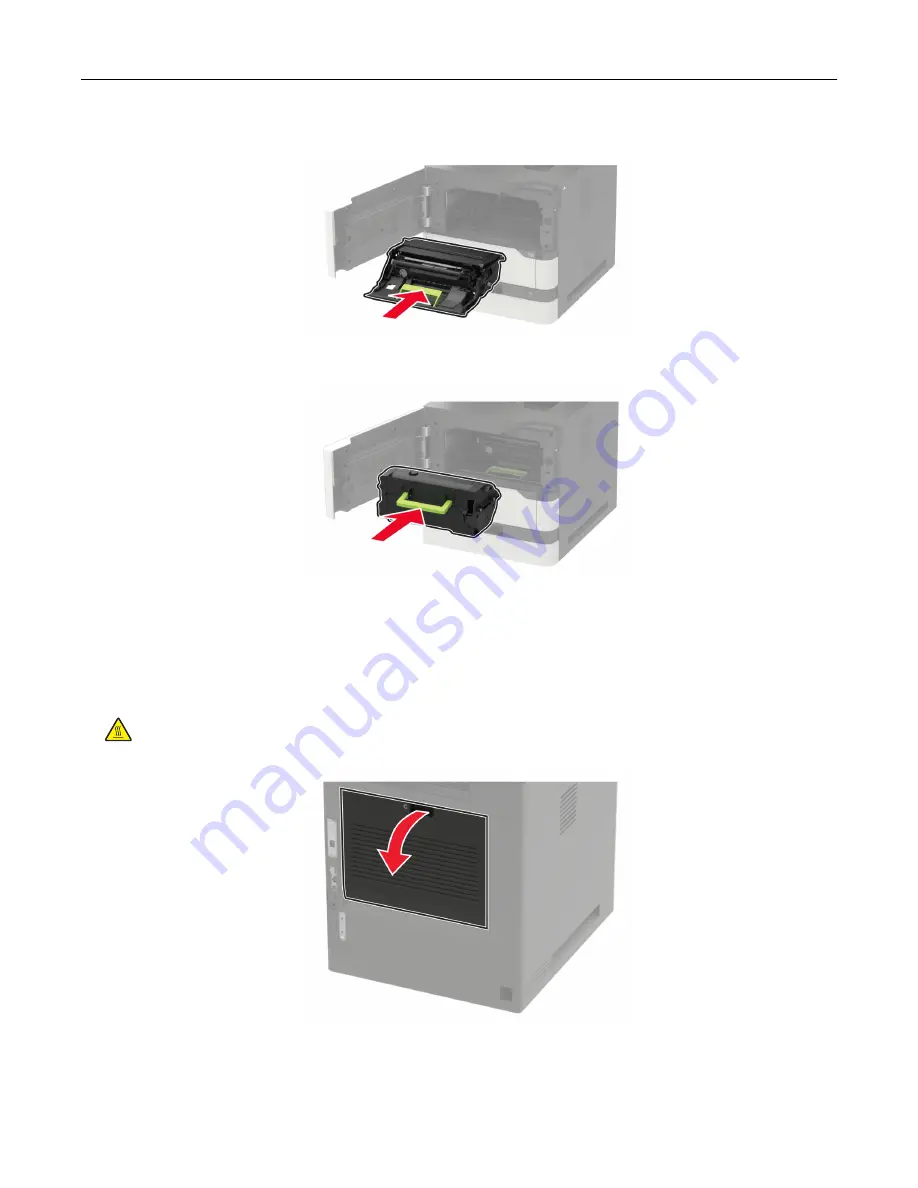
7
Insert the imaging unit.
8
Insert the toner cartridge.
9
Close the door.
Paper jam in door C
1
Open door C.
CAUTION—HOT SURFACE:
The inside of the printer might be hot. To reduce the risk of injury from a
hot component, allow the surface to cool before touching it.
2
Remove the jammed paper from any of the following areas:
Note:
Make sure that all paper fragments are removed.
Clearing jams
194
Summary of Contents for XM7355
Page 175: ...6 Insert the new ADF feed roller until it clicks into place Maintaining the printer 175...
Page 203: ...Staple jam in the staple nisher 1 Open door F Clearing jams 203...
Page 204: ...2 Remove the staple cartridge holder 3 Remove the loose staples Clearing jams 204...
Page 270: ...Upgrading and migrating 270...


