


7. Slide the system board to the front of the computer and then carefully lift the system board out of
the chassis.
8. Remove the microprocessor from the failing system board and install it on the new system board.
See “Microprocessor” on page 143.
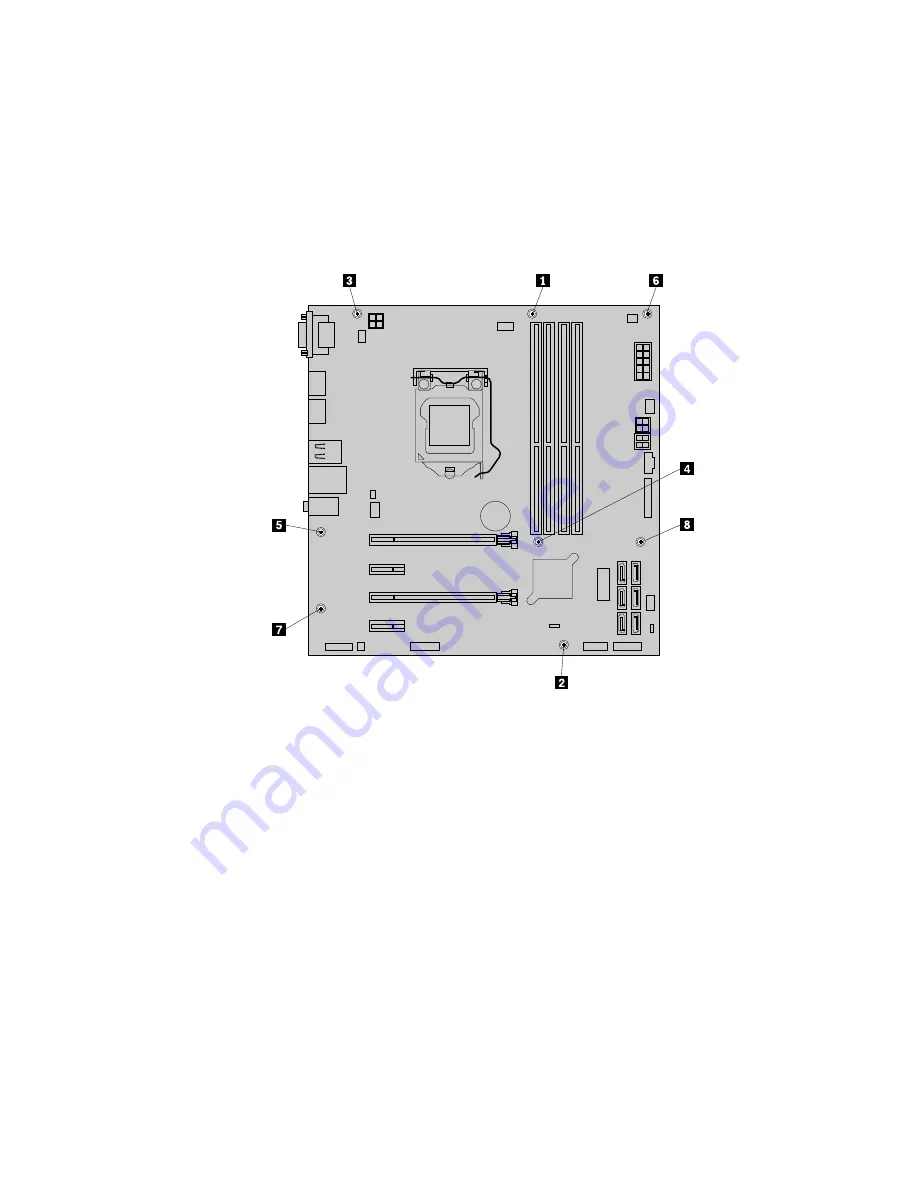
9. Install the new system board into the chassis by aligning the eight screw holes in the new system board
with the corresponding mounting studs on the chassis. Then, install the eight screws in the sequence as
shown to secure the new system board.
Figure 105. Installing the eight screws to secure the system board
10. Install the heat sink and fan assembly and connect its cable to the new system board. See “Heat
sink and fan assembly” on page 142.
11. Install all memory modules and PCIe cards removed from the failing system board onto the new system
board. See “Memory module” on page 101 and “PCIe card” on page 96.
12. Refer to your record to connect cables to the new system board. You also can refer to “Parts on the
system board” on page 34 to help you locate the connectors on the system board and connect cables.
13. To complete the installation or replacement, go to “Completing the parts replacement” on page 166.
The failing system board must be returned with a microprocessor socket cover to protect the pins during
shipping and handling.
To install the microprocessor socket cover, do the following:
1. After you have removed the microprocessor from the failing system board, close the microprocessor
retainer. Then put the small handle to the locked position to secure the retainer in place.
Hardware installation and replacement
147
Summary of Contents for ThinsStation P320
Page 1: ...P320 Hardware Maintenance Manual Machine Types 30BG 30BH and 30BR ...
Page 6: ...iv P320 Hardware Maintenance Manual ...
Page 8: ...vi P320 Hardware Maintenance Manual ...
Page 16: ...8 P320 Hardware Maintenance Manual ...
Page 20: ...12 P320 Hardware Maintenance Manual ...
Page 21: ...1 2 Chapter 1 Read this first Important safety information 13 ...
Page 22: ...1 2 14 P320 Hardware Maintenance Manual ...
Page 27: ...1 2 Chapter 1 Read this first Important safety information 19 ...
Page 28: ...1 2 20 P320 Hardware Maintenance Manual ...
Page 31: ...Chapter 1 Read this first Important safety information 23 ...
Page 62: ...54 P320 Hardware Maintenance Manual ...
Page 68: ...60 P320 Hardware Maintenance Manual ...
Page 78: ...70 P320 Hardware Maintenance Manual ...
Page 98: ...90 P320 Hardware Maintenance Manual ...
Page 176: ...168 P320 Hardware Maintenance Manual ...
Page 180: ...172 P320 Hardware Maintenance Manual ...
Page 182: ...174 P320 Hardware Maintenance Manual ...
Page 184: ...176 P320 Hardware Maintenance Manual ...
Page 192: ...184 P320 Hardware Maintenance Manual ...
Page 196: ...188 P320 Hardware Maintenance Manual ...
Page 198: ...190 P320 Hardware Maintenance Manual ...
Page 200: ...192 P320 Hardware Maintenance Manual ...
Page 201: ......
Page 202: ......