


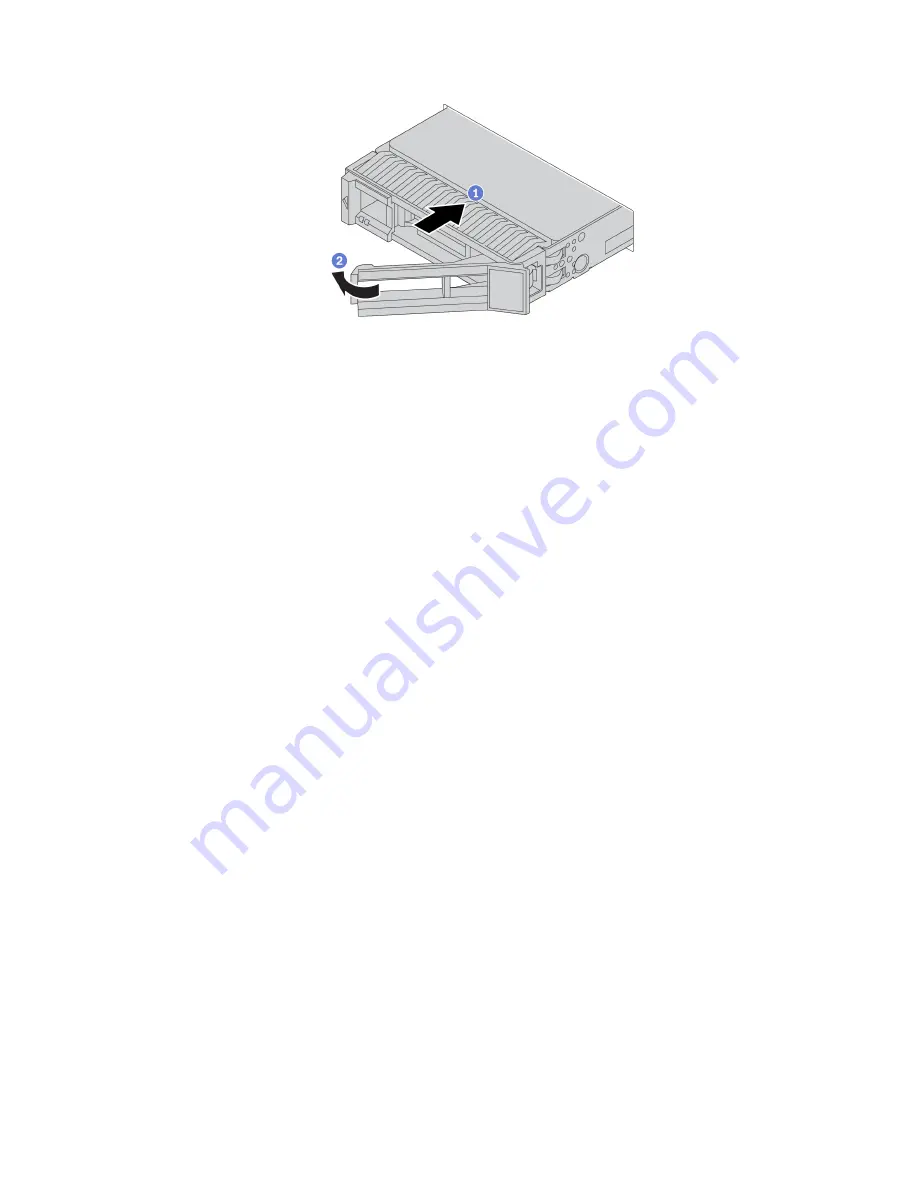
Figure 85. Hot-swap drive installation
a. Ensure that the drive tray handle is in the open position. Slide the drive into the drive bay until it
snaps into position.
b. Close the drive tray handle to lock the drive in place.
Step 4. Check the drive status LED to verify that the drive is operating correctly.
a. If the yellow drive status LED is lit continuously, that drive is faulty and must be replaced.
b. If the green drive activity LED is flashing, the drive is being accessed.
Step 5. Continue to install additional hot-swap drives if necessary.
198
ThinkSystem SR665 Setup Guide
Summary of Contents for ThinkSystem SR665
Page 1: ...ThinkSystem SR665 Setup Guide Machine Types 7D2V and 7D2W ...
Page 20: ...16 ThinkSystem SR665 Setup Guide ...
Page 64: ...60 ThinkSystem SR665 Setup Guide ...
Page 80: ...Figure 24 Cable routing for configuration 4 76 ThinkSystem SR665 Setup Guide ...
Page 121: ...Figure 39 Cable routing for configuration 1 Chapter 3 Internal cable routing 117 ...
Page 124: ...Figure 41 Cable routing for configuration 2 120 ThinkSystem SR665 Setup Guide ...
Page 129: ...Figure 44 Cable routing for configuration 6 Chapter 3 Internal cable routing 125 ...
Page 131: ...Chapter 3 Internal cable routing 127 ...
Page 146: ...142 ThinkSystem SR665 Setup Guide ...
Page 220: ...On GPU air baffle 216 ThinkSystem SR665 Setup Guide ...
Page 240: ...236 ThinkSystem SR665 Setup Guide ...
Page 248: ...244 ThinkSystem SR665 Setup Guide ...
Page 253: ... Copyright Lenovo 2020 249 ...
Page 256: ...252 ThinkSystem SR665 Setup Guide ...
Page 266: ...262 ThinkSystem SR665 Setup Guide ...
Page 267: ......
Page 268: ......


