


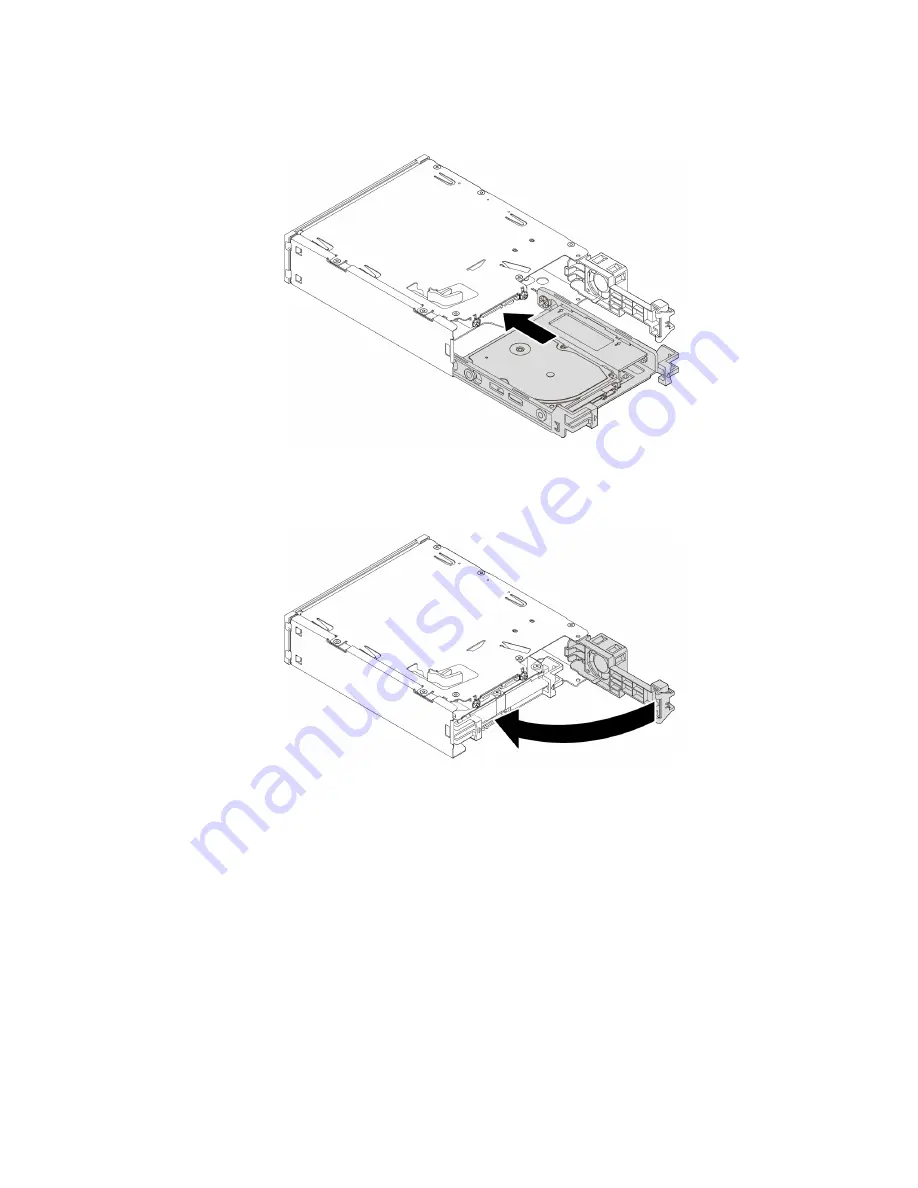
8. Slide the new 2.5-inch storage drive with bracket into the kit from the rear until the drive snaps into
position.
Figure 52. Installing the new 2.5-inch storage drive with bracket into the kit
9. Pivot the rear cover of the kit inward until you hear a click. Ensure that the rear cover is secured in place.
Figure 53. Pivoting the rear cover inward
10. Slide the kit into the flex bay and reconnect the cables.
What to do next:
• To work with another piece of hardware, go to the appropriate section.
• To complete the installation or replacement, go to “Completing the parts replacement” on page 134.
Cover presence switch
Attention:
Do not open your computer or attempt any repair before reading and understanding the “Read
this first: Important safety information” on page iii.
To remove or install the cover presence switch, do the following:
1. Prepare your computer. See “Preparing your computer and removing the computer cover” on page 59.
2. To remove the cover presence switch, do the following:
Hardware removal and installation
83
Summary of Contents for ThinkStation P520
Page 1: ...P520 User Guide Machine Types 30BE 30BF 30BQ and 30DC ...
Page 12: ...x P520 User Guide ...
Page 30: ...18 P520 User Guide ...
Page 46: ...34 P520 User Guide ...
Page 60: ...48 P520 User Guide ...
Page 142: ...Figure 128 Opening the PCIe card latch 130 P520 User Guide ...
Page 152: ...140 P520 User Guide ...
Page 154: ...142 P520 User Guide ...
Page 156: ...144 P520 User Guide ...
Page 164: ...152 P520 User Guide ...
Page 166: ...Mainland China RoHS Taiwan RoHS 154 P520 User Guide ...
Page 168: ...156 P520 User Guide ...
Page 170: ...158 P520 User Guide ...
Page 172: ...160 P520 User Guide ...
Page 173: ......
Page 174: ......