


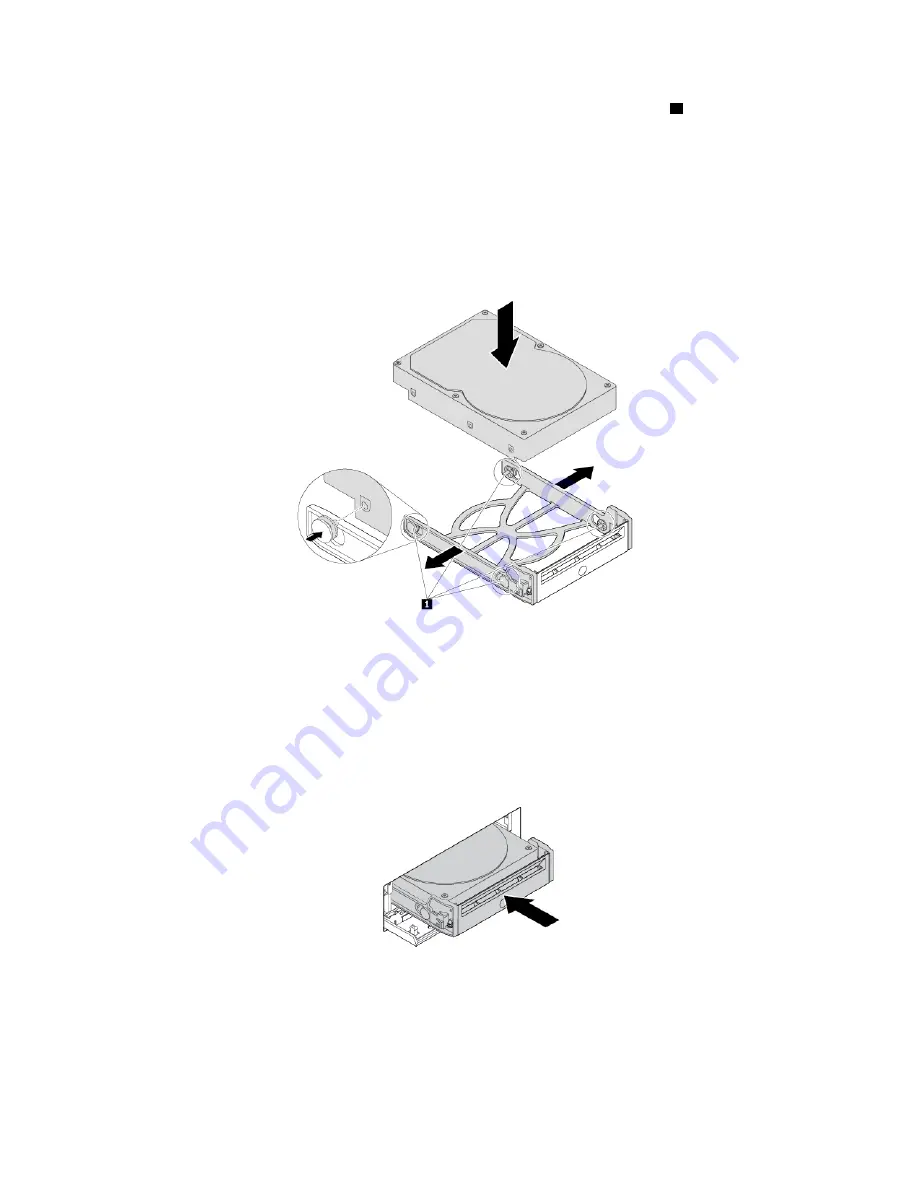
5. To install a new 3.5-inch storage drive, flex both sides of the bracket and align pins
1
on the bracket
with the corresponding holes in the new drive.
Notes:
• Ensure that the circuit board faces downward and the connectors face toward the rear of the bracket.
• Do not touch the circuit board on the storage drive during operation.
Figure 18. Installing the 3.5-inch storage drive into the bracket
6. Slide the bracket with the new 3.5-inch storage drive into the front-access storage enclosure until it
snaps into position. Press the notch to secure the enclosure cover and lock the enclosure cover with the
key.
Figure 19. Installing the 3.5-inch storage drive into the front-access storage enclosure
What to do next:
• To work with another piece of hardware, go to the appropriate section.
• To complete the installation or replacement, go to “Completing the parts replacement” on page 134.
68
P520 User Guide
Summary of Contents for ThinkStation P520
Page 1: ...P520 User Guide Machine Types 30BE 30BF 30BQ and 30DC ...
Page 12: ...x P520 User Guide ...
Page 30: ...18 P520 User Guide ...
Page 46: ...34 P520 User Guide ...
Page 60: ...48 P520 User Guide ...
Page 142: ...Figure 128 Opening the PCIe card latch 130 P520 User Guide ...
Page 152: ...140 P520 User Guide ...
Page 154: ...142 P520 User Guide ...
Page 156: ...144 P520 User Guide ...
Page 164: ...152 P520 User Guide ...
Page 166: ...Mainland China RoHS Taiwan RoHS 154 P520 User Guide ...
Page 168: ...156 P520 User Guide ...
Page 170: ...158 P520 User Guide ...
Page 172: ...160 P520 User Guide ...
Page 173: ......
Page 174: ......