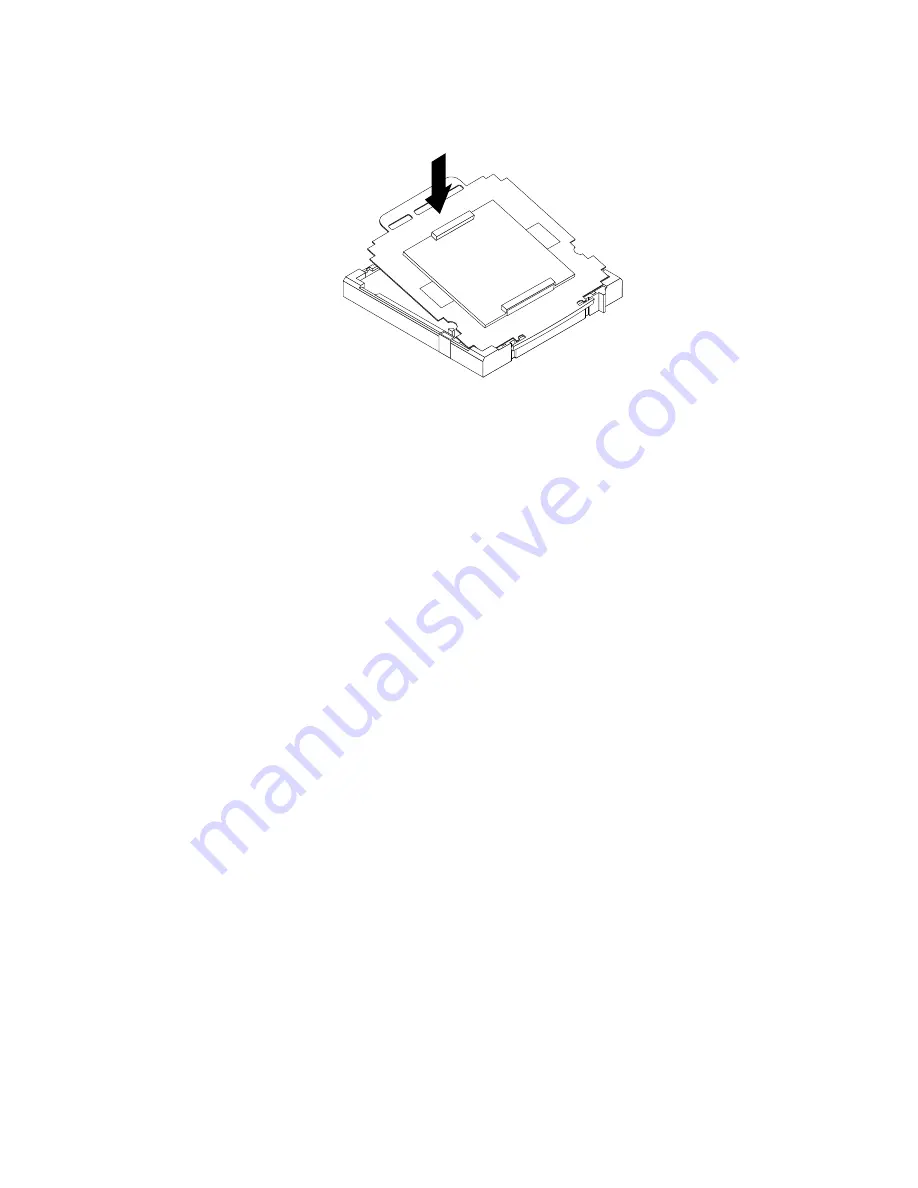
5. Carefully press the other side of the socket cover downwards until the socket cover snaps into place.
Figure 104. Securing the socket cover
6. Carefully check the four corners of the socket cover to make sure that the cover is secured in the
microprocessor socket.
7. Close the microprocessor retainer and then lower the lever to secure the retainer. Ensure the lever
is locked into position.
8. Follow any additional instructions included with the replacement part you received.
Completing the parts replacement
After completing the installation or replacement for all parts, you need to reinstall the computer cover and
reconnect cables. Depending on the parts you installed or replaced, you might need to confirm the updated
information in the Setup Utility program. Refer to Chapter 6 “Using the Setup Utility program” on page 55.
To reinstall the computer cover and reconnect cables to your computer, do the following:
1. Ensure that all components have been reassembled correctly and that no tools or loose screws are left
inside your computer. See “Locating major FRUs and CRUs” on page 81 for the locations of various
components in your computer.
2. If you have removed the front bezel, reinstall it. To reinstall the front bezel, align the three tabs on
the front bezel with the corresponding holes in the chassis and pivot the front bezel inwards until
it snaps into position.
3. Ensure that the cables are routed correctly before reinstalling the computer cover. Keep cables clear of
the hinges and sides of the computer chassis to avoid interference with closing the computer cover.
4. Lower the optical drive bay.
5. Close the computer cover.
6. If there is an integrated cable lock available, lock the computer.
7. Reconnect the external cables and power cords to the computer. See “Locating connectors on the
rear of your computer” on page 80.
8. To update your configuration, refer to Chapter 6 “Using the Setup Utility program” on page 55.
Note:
In most areas of the world, Lenovo requires the return of the defective Field Replaceable Units (FRUs).
Information about this will come with the new FRUs or will come a few days after you receive the new FRUs.
Chapter 11
.
Replacing FRUs (for machine types: 3688, 3690, 3691, 3693, and 3695)
167
Summary of Contents for ThinkStation 2551
Page 2: ......
Page 8: ...2 ThinkStation Hardware Maintenance Manual ...
Page 15: ...1 2 Chapter 2 Safety information 9 ...
Page 16: ... 18 kg 37 lbs 32 kg 70 5 lbs 55 kg 121 2 lbs 10 ThinkStation Hardware Maintenance Manual ...
Page 19: ...1 2 Chapter 2 Safety information 13 ...
Page 20: ...1 2 14 ThinkStation Hardware Maintenance Manual ...
Page 21: ...Chapter 2 Safety information 15 ...
Page 27: ...Chapter 2 Safety information 21 ...
Page 31: ...Chapter 2 Safety information 25 ...
Page 60: ...54 ThinkStation Hardware Maintenance Manual ...
Page 70: ...64 ThinkStation Hardware Maintenance Manual ...
Page 186: ...180 ThinkStation Hardware Maintenance Manual ...
Page 187: ......
Page 188: ......


