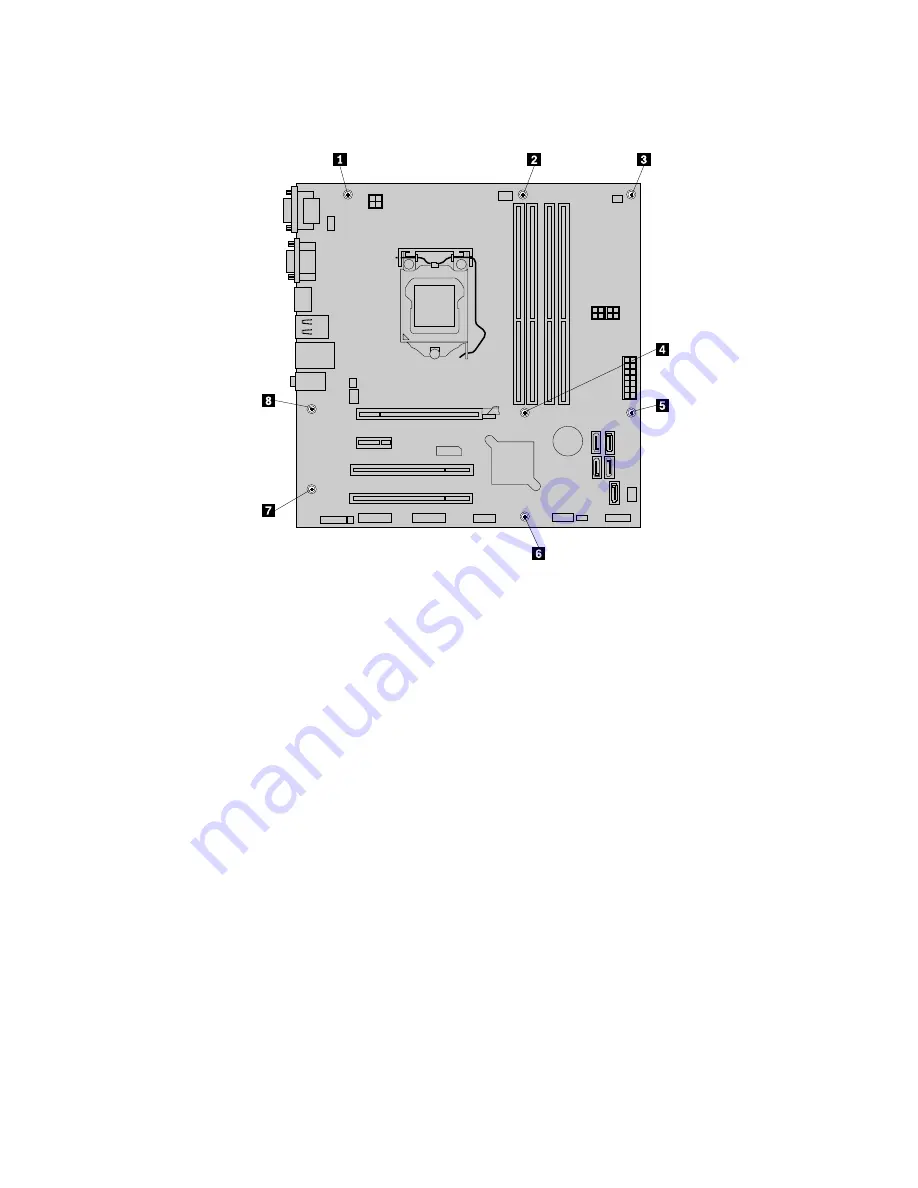
9. Remove the eight screws that secure the system board.
Figure 50. Removing the eight screws that secure the system board
10. Carefully slide the system board so that it can be released from the mounting studs that secure the
system board in place.
11. Lift the system board out of the chassis.
12. Remove the microprocessor from the failing system board and install it on the new system board. See
“Replacing the microprocessor” on page 114.
13. Install the new system board into the chassis by aligning the eight mounting studs in the chassis with the
corresponding holes in the new system board. Carefully slide the new system board into the chassis until
it is secured in place by the mounting studs. Then, install the eight screws to secure the system board.
14. Install the heat sink and fan assembly and connect the heat sink and fan assembly cable to the new
system board. See “Replacing the heat sink and fan assembly” on page 99.
15. Install the hard disk drive.
16. Install the power supply assembly. See “Replacing the power supply assembly” on page 113.
17. Install all memory modules and PCI cards removed from the failing system board on the new system
board. See “Installing or replacing a memory module” on page 93 and “Installing or replacing a PCI
card” on page 90.
18. Reconnect all remaining cables to the system board. See “Locating parts on the system board”
on page 76.
19. To complete the replacement, go to “Completing the parts replacement” on page 120.
The failing system board must be returned with a microprocessor socket cover to protect the pins during
shipping and handling.
To install the microprocessor socket cover, do the following:
118
ThinkStation Hardware Maintenance Manual
Summary of Contents for ThinkStation 2551
Page 2: ......
Page 8: ...2 ThinkStation Hardware Maintenance Manual ...
Page 15: ...1 2 Chapter 2 Safety information 9 ...
Page 16: ... 18 kg 37 lbs 32 kg 70 5 lbs 55 kg 121 2 lbs 10 ThinkStation Hardware Maintenance Manual ...
Page 19: ...1 2 Chapter 2 Safety information 13 ...
Page 20: ...1 2 14 ThinkStation Hardware Maintenance Manual ...
Page 21: ...Chapter 2 Safety information 15 ...
Page 27: ...Chapter 2 Safety information 21 ...
Page 31: ...Chapter 2 Safety information 25 ...
Page 60: ...54 ThinkStation Hardware Maintenance Manual ...
Page 70: ...64 ThinkStation Hardware Maintenance Manual ...
Page 186: ...180 ThinkStation Hardware Maintenance Manual ...
Page 187: ......
Page 188: ......


