Step
4.
Attaching
the
cables
to
the
drive
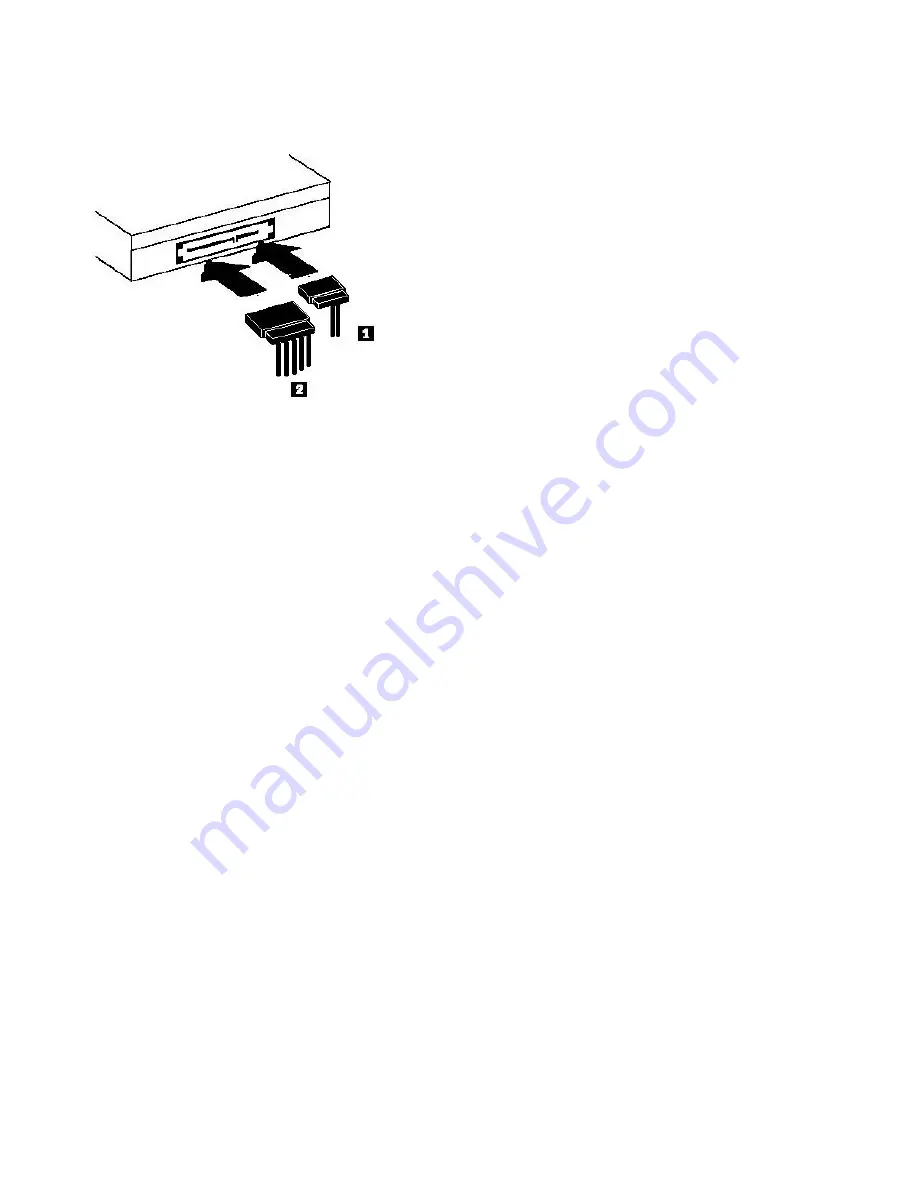
The
following
diagram
shows
where
to
connect
the
cables
to
the
drive.
1.
Attach
a
7-pin
Serial
ATA
data
cable
connector
1
to
the
Serial
connector
on
the
drive.
2.
Attach
a
15-pin
power
cable
2
to
the
power
connector
on
the
drive.
Step
5.
Completing
the
hardware
installation
1.
Ensure
that
the
drive
is
securely
mounted
and
that
the
connectors
are
firmly
attached.
2.
Ensure
that
the
cables
do
not
interfere
with
the
computer
cover,
and
that
they
do
not
block
the
power-supply
fan
blades
or
airflow
paths.
3.
Reinstall
the
computer
cover.
4.
Reconnect
all
external
devices.
5.
Reconnect
all
power
cords
into
the
electrical
outlets.
2-2
ThinkCentre
and
Lenovo
Super
Multi-Burner
Drive
(Serial
ATA)
User’s
Guide
Summary of Contents for ThinkCentre 41N5626
Page 1: ...ThinkCentre and Lenovo Super Multi Burner Drive Serial ATA User s Guide ...
Page 2: ......
Page 3: ...ThinkCentre and Lenovo Super Multi Burner Drive Serial ATA User s Guide ...
Page 10: ...viii ThinkCentre and Lenovo Super Multi Burner Drive Serial ATA User s Guide ...
Page 14: ...xii ThinkCentre and Lenovo Super Multi Burner Drive Serial ATA User s Guide ...
Page 18: ...1 4 ThinkCentre and Lenovo Super Multi Burner Drive Serial ATA User s Guide ...
Page 32: ...3 12 ThinkCentre and Lenovo Super Multi Burner Drive Serial ATA User s Guide ...
Page 38: ...B 4 ThinkCentre and Lenovo Super Multi Burner Drive Serial ATA User s Guide ...
Page 44: ...C 6 ThinkCentre and Lenovo Super Multi Burner Drive Serial ATA User s Guide ...
Page 46: ...D 2 ThinkCentre and Lenovo Super Multi Burner Drive Serial ATA User s Guide ...
Page 70: ...G 4 ThinkCentre and Lenovo Super Multi Burner Drive Serial ATA User s Guide ...
Page 71: ......
Page 72: ...Part Number 41N5626 Printed in USA 1P P N 41N5626 ...


