


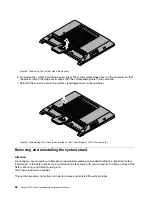


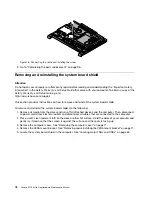
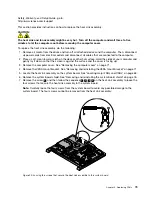

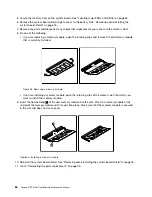


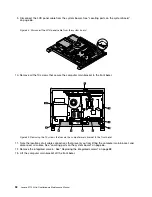
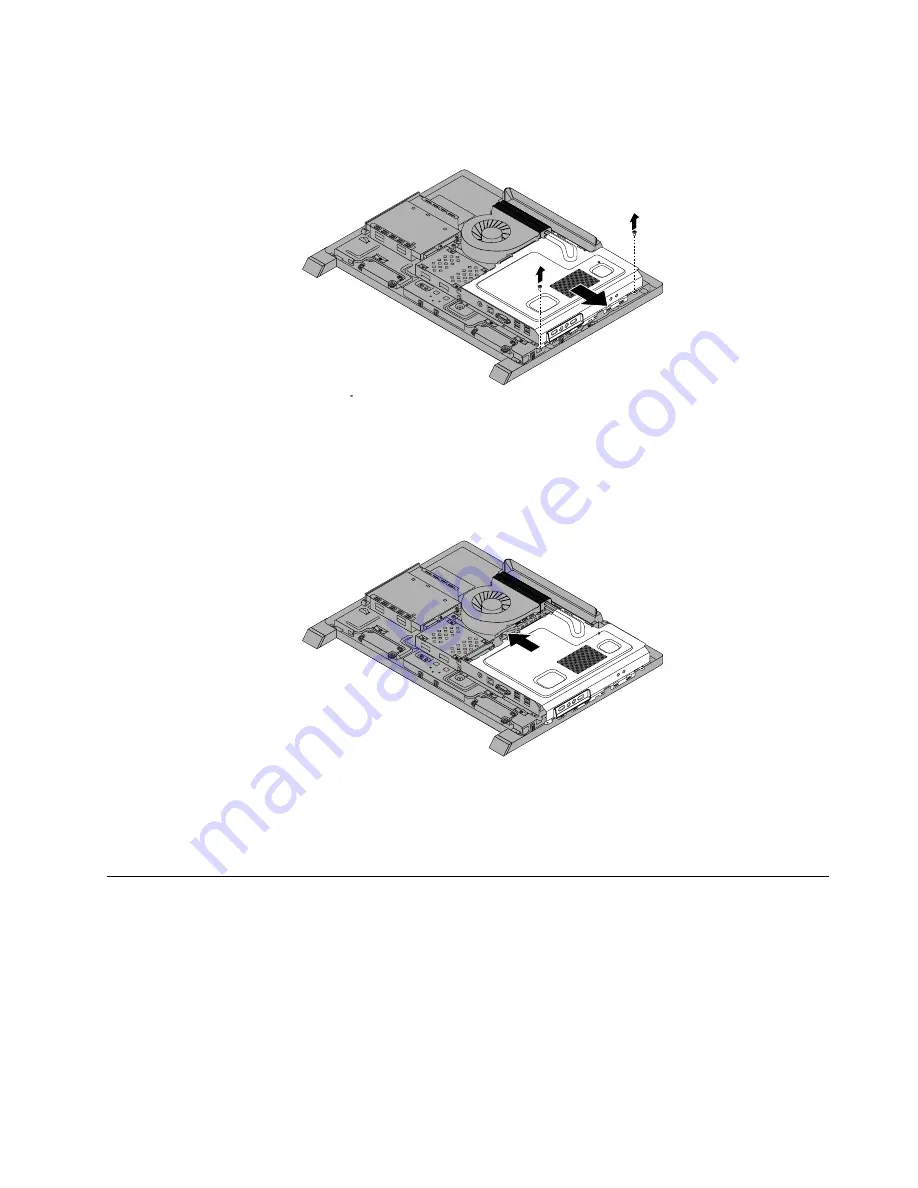
6. Remove the two screws that secure the system board shield, and then slide the system board shield
out of the computer.
Figure 17. Removing the system board shield
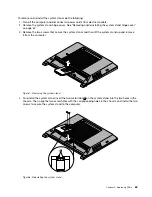
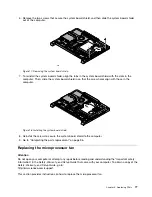
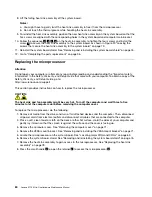
7. To reinstall the system board shield, align the tabs in the system board shield with the slots in the
computer. Then, slide the system board shield in so that the screw holes align with those in the
computer.
Figure 18. Installing the system board shield
8. Reinstall the screws to secure the system board shield to the computer.
9. Go to Completing the parts replacement on page 96.
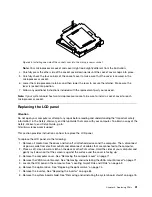
Replacing the microprocessor fan
Attention
Do not open your computer or attempt any repair before reading and understanding the Important safety
information in the
Safety, Warranty, and Setup Guide
that came with your computer. To obtain a copy of the
Safety, Warranty, and Setup Guide
, go to:
This section provides instructions on how to replace the microprocessor fan.
Chapter 9
.
Replacing FRUs
77
Summary of Contents for 10152/F0AG
Page 1: ...Lenovo S710 All In One Hardware Maintenance Manual Machine Types 10152 F0AG ...
Page 2: ......
Page 3: ...Lenovo S710 All In One Hardware Maintenance Manual Machine Types 10152 F0AG ...
Page 8: ...2 Lenovo S710 All In OneHardware Maintenance Manual ...
Page 15: ...Chapter 2 Safety information 9 ...
Page 19: ...Chapter 2 Safety information 13 ...
Page 20: ...1 2 14 Lenovo S710 All In OneHardware Maintenance Manual ...
Page 21: ...1 2 Chapter 2 Safety information 15 ...
Page 26: ...1 2 20 Lenovo S710 All In OneHardware Maintenance Manual ...
Page 27: ...1 2 Chapter 2 Safety information 21 ...
Page 30: ...24 Lenovo S710 All In OneHardware Maintenance Manual ...
Page 34: ...28 Lenovo S710 All In OneHardware Maintenance Manual ...
Page 66: ...60 Lenovo S710 All In OneHardware Maintenance Manual ...
Page 70: ...Figure 3 Locating major FRUs and CRUs 64 Lenovo S710 All In OneHardware Maintenance Manual ...
Page 104: ...98 Lenovo S710 All In OneHardware Maintenance Manual ...
Page 117: ......
Page 118: ......


