


8
REMOVAL
1. Loosen lug nuts with 11/16” shallow socket.
2. Lift trike with jack and support with jack stands
or center stand.
3. Remove lug nuts and remove wheels.
4. Remove operator and passenger seats.
5. Disconnect wiring harness located under op-
erator seat behind battery.
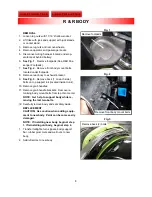
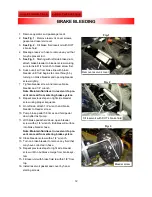
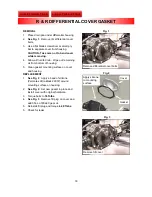
6.
See Fig. 1
. Remove footpads (See R&R Pas-
senger Footpads).
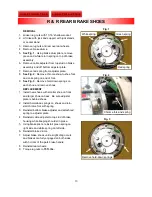
7.
See Fig. 2
. Remove front body mount bolts
located under footpads.
8. Remove rear body to exhaust bracket.
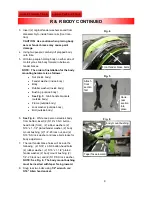
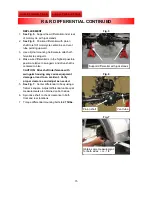
9.
See Fig. 3
. Remove back (1 on each side)
bolts on top support rail (located inside trunk).
10. Remove grab handles.
11. Remove grab handle brackets. Remove re-
maining body mount bolts from top chrome rail.
NOTE: Get help to support body while re-
moving the last two bolts.
12. Carefully remove body and set safely aside.
REPLACEMENT
CAUTION: Use caution when adding equip-
ment to new body. Paint can become easily
damaged.
NOTE: If installing new body, begin at step
1. If reinstalling old body, begin at step 4.
1. Transfer taillights, turn signals, body support
bar, rubber grommets and well nuts to new
body.
2. Add reflectors to new body.
Fig. 2
Fig. 1
Fig. 3
Remove footpads
Remove back (2) bolts
R & R BODY
Remove front body mount bolts