


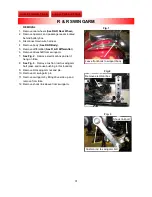


28
REMOVAL CONTINUED
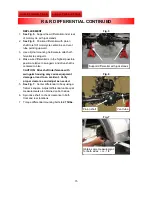
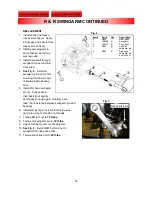
9. Tilt front of differential downward to access
front pinion nut.
10. Apply park brake and remove pinion nut with a
1 1/16” socket.
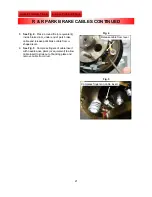
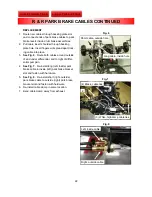
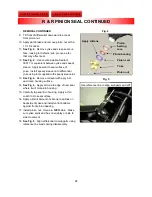
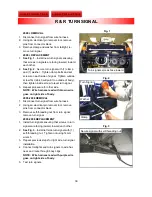
11.
See Fig. 4
. Remove yoke and clean seal sur-
face, looking for defects (pits, grooves, etc.)
that may affect seal.
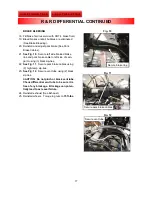
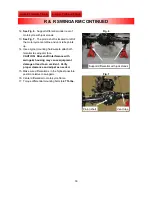
12.
See Fig. 4
. Use Loctite Aviation Sealant
30517 or equivalent between yoke and speedy
sleeve. Apply sealant to seal surface of
yoke. Install speedy sleeve onto differential
yoke using tool supplied with speedy sleeve kit.
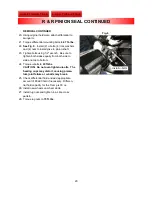
13.
See Fig. 4
. Remove old seal with a pry bar
and clean housing surface.
14.
See Fig. 4
. Apply silicone to edge of new seal
where it will mate into housing.
15. Carefully tap seal into housing. Apply a thin
coat of oil to seal surface.
16. Apply a small amount of silicone to splines on
backside of yoke and install until it bottoms
against front pinion bearing.
17. Install pinion nut; torque to
120 ft. lbs
.
Make
sure yoke spins and has no endplay or side to
side movement.
18.
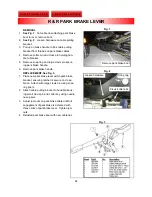
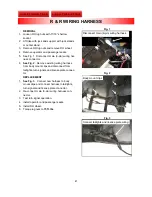
See Fig. 5
. Align differential to swingarm using
reference line made during disassembly.
R & R PINION SEAL CONTINUED
Fig. 4
Fig. 5
Pinion seal
Pinion nut
Pinion bearing
Apply silicone
Use reference line to align swingarm and diff.
Yoke
Pinion
bearing
race