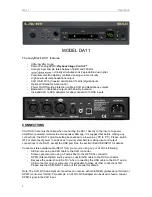
DA11
Quickstart Guide
2
Quickstart Guide- Settings and Operation
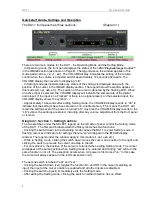
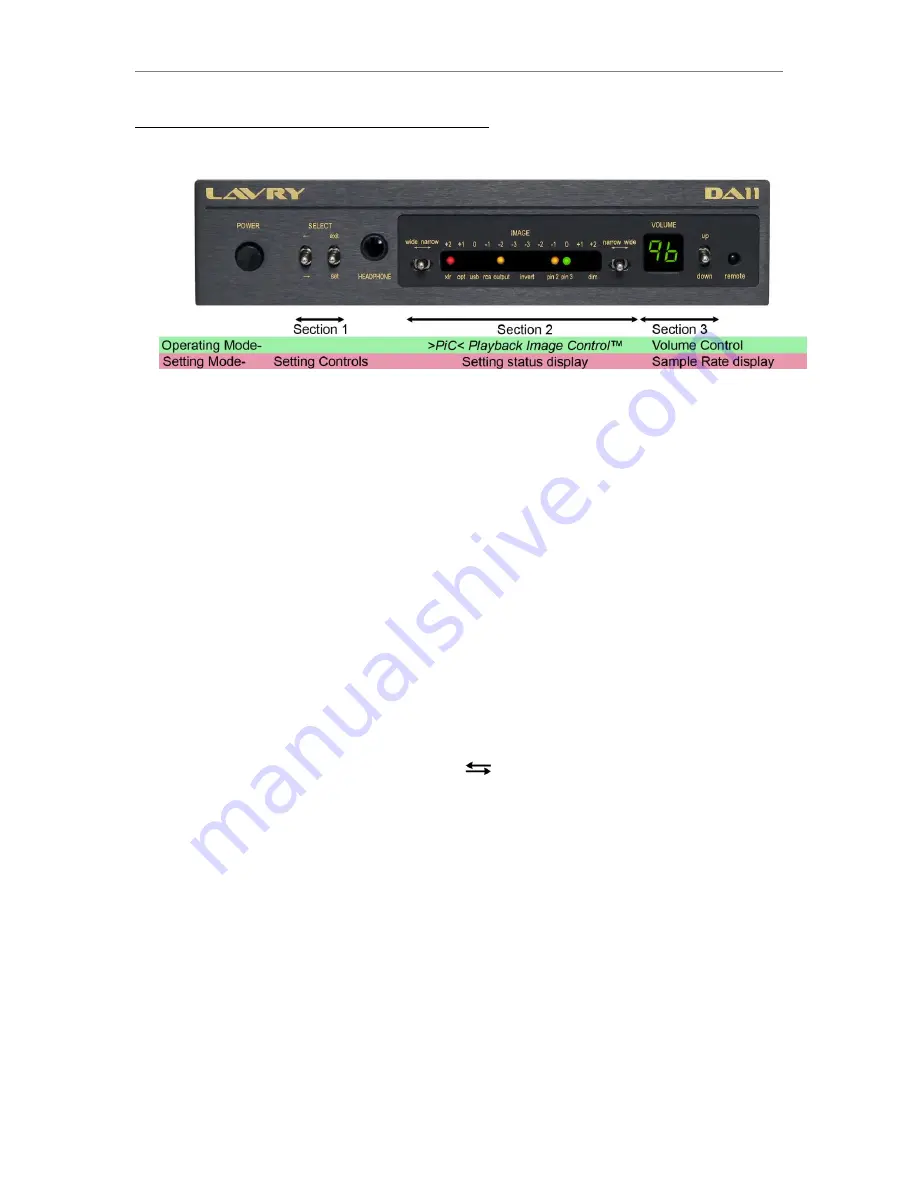
The DA11 front panel has three sections:
(Diagram 1)
There are two main modes for the DA11- the Operating Mode and the Setting Mode.
- In Operating mode, the front panel displays the status of the
>PiC< Playback Image Control
™
in the IMAGE section (as shown on Page 6). The legend
above
the window applies in this
mode (wide-narrow, +2, +1, etc). The VOLUME display indicates the setting of the volume
control when the volume is adjusted and for approximately 10 seconds afterwards. The
VOLUME display then reverts to displaying “LE.”
- In Setting mode (as illustrated above), status of the settings is displayed along with the
position of the cursor in the IMAGE display section. The legend
below
the window applies in
this mode (xlr, opt, usb, etc). The position of the cursor is denoted by the flashing LED. When
an active input is selected, the VOLUME display will indicate the sample rate of the digital
audio input. If the input is not “locked” or there is no signal present on the selected input, the
VOLUME display shows the symbol
“- -”
- Approximately 10 seconds after exiting Setting mode, the VOLUME display reverts to
“LE” to
indicate that the settings have been stored in non-volatile memory. This means the DA11 will
retain the setting
s even if the power is turned “off.” Any time the VOLUME display reverts to the
“LE” symbol, the settings are stored, including after any volume adjustment from the front panel
or remote.
Diagram 1, Section 1- Setting Controls
The two switches under the SELECT legend on the left side of panel control the Setting mode
of the DA11. The first switch labeled with the
symbols has two functions:
- Clicking the switch down in the Operating mode causes the DA11 to enter Setting mode. A
flashing cursor
and indicators for settings that are “on” will appear in the IMAGE display
window. The legend under the window apply in this mode (xlr, opt, usb, etc.).
- While in Setting mode, clicking the switch down moves the cursor one position to the right and
clicking the switch up moves the cursor one step to the left.
- For convenience, the position of the cursor is retained when exiting Setting mode. The cursor
will appear at the same position when Setting mode is re-entered and
clicking “set” will turn the
same function on or off. The exception occurs when
AC power is first turned “on;” in this case
the cursor will always appear in the left-most position (xlr).
The second switch is labeled “exit” and “set.”
- Clicking the switch down (set) toggles the function On and Off. In the case of selecting an
input, the input at the cursor position is enabled and all other inputs are disabled.
- Clicking the switch up (exit) immediately exits the Setting mode.
- After exiting the Setting mode, clicking the switch in either direction has no effect.
Summary of Contents for DA11
Page 4: ...DA11 Table of Contents ...


