2-12
F-459-R1
TIRES, BRAKES AND DRIVETRAIN
Bleeding Brakes
NOTE
Bleeding the brake system is necessary to remove any
air that is trapped when replacing brake lines, brake
calipers or the master cylinder. To avoid extensive
damage to the system, use only DOT 3 brake fluid.
WARNING
NOTE
Check the fluid level often during the bleeding operation
and add fluid as needed to prevent the level from falling
low enough to allow air bubbles into the master cylinder.
Use only new DOT 3 brake fluid from a sealed container.
NEVER use old or used brake fluid. It contains moisture
which will deteriorate the brake system components.
IMPORTANT
It is necessary to bleed both wheels if air has entered
the system. Air in the brake system can be caused by
low fluid level, a leaking brake line or a brake line that
has been disconnected. If the brake pedal feels
spongy when pressed and travels almost to the
mechanical stop but regains height when pumped,
air has entered the system. The system must be bled.
If no fittings were recently opened for service, check
for leaks that would have allowed air into the system
and repair leaks before attempting to bleed the
system.
DO NOT allow fluid to go inside of the brake drum
and onto the brake pad. It will contaminate the brake
shoes and cause failure.
NOTE
Have an assistant available, as well as a supply of brake
fluid, an empty container, a length of 3/16” (4.763 mm)
clear plastic or vinyl tubing to fit over the cylinder bleeder
fitting and a six point wrench to open and close the fitting.
1.
Set the key switch to OFF, remove the key from the
key switch and put in a secure place.
2.
Apply the parking brake, perform a Lock Out/Tag Out
procedure and disconnect the battery.
3.
Block the wheels so that the truck can’t move.
4.
Start with the right wheel (the wheel farthest from the
master cylinder).
IMPORTANT
Be careful when handling bleeder screws. Rust may
cause the fitting to break. Spray the fitting with
penetrating oil before attempting to loosen. Use a
6-sided wrench or socket instead of a 12-sided.
5.
Loosen the bleeder fitting slightly, then tighten it
where it is snug but can be loosened quickly and
easily.
6.
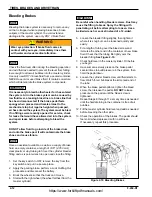
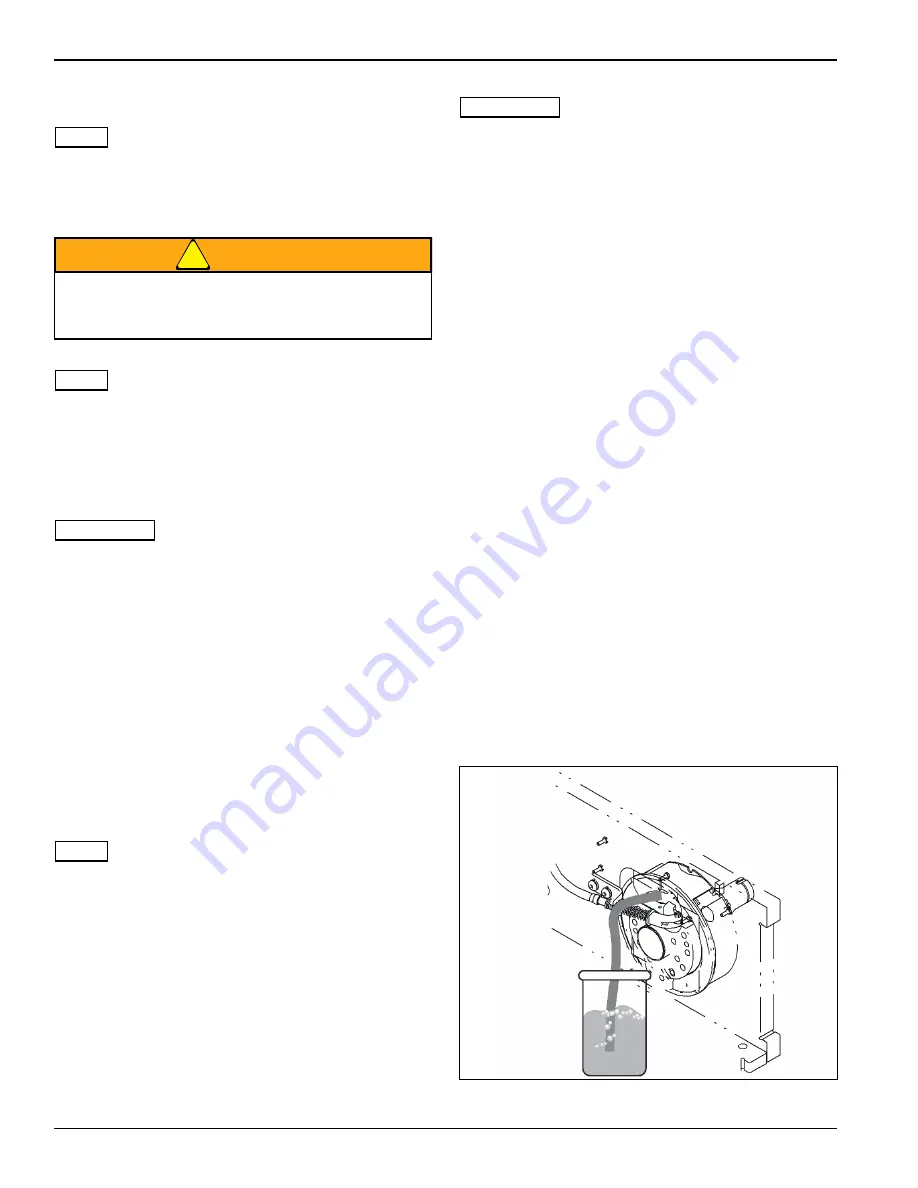
Fit a length of tubing over the bleed screw and
immerse the other end in the container of new brake
fluid. Check that the tubing fits tightly over the
bleeder fitting.See Figure 2-10.
7.
Check fluid level in the master cylinder. Fill before
you begin.
8.
Have someone slowly press on the brake pedal
several times to build pressure in the system, then
hold the pedal down.
9.
Loosen the cylinder bleed screw until fluid starts to
flow. Watch for air bubbles at the immersed end of
the tube.
10. When the brake pedal bottoms, tighten the bleed
screw, then release the pedal. DO NOT release
pressure on the pedal until the bleed screw is
tightened.
11. Repeat Steps 8 through 11 as many times as needed
until the fluid draining in the container is free of air
bubbles.
12. Fill the master cylinder fluid level and add as needed
before bleeding the other side.
13. Check the operation of the brakes. The pedal should
feel solid when depressed, with no softness.
If necessary, repeat this procedure.
Figure 2-10 Bleeding Brakes
Wear eye protection. If brake fluid comes in
contact with your eyes, immediately rinse them
with water and seek medical attention.
https://www.forkliftpdfmanuals.com/


