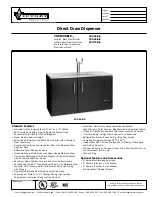
4
PRE-INSTALLATION
Unpack the Dispenser
1. Set shipping carton upright on the floor then cut package
banding straps and remove.
2. Open top of carton and remove interior packaging.
3. Lift carton up and off of the unit.
4. Remove plywood shipping base from the bottom of the unit.
(Support dispenser while removing shipping base.)
Inspection of Drain Spider
DO NOT LAY UNIT ON ITS SIDE OR BACK
!
ATTENTION
If unit is to be transported, it is advisable to leave the
unit secured to the plywood shipping base.
NOTE
The drain spider is located directly in the center of the
bin under the ice shroud. The coldplate has a cavity
designed to hold the drain spider. During shipment, the
drain spider may become dislodged from its original
position.
NOTE
Prior to installing the unit, ensure the drain spider is in
the correct position. This will prevent drain clog issues.
Inspect the lower bin area and reach under the shroud
to ensure the drain spider is secure in the coldplate
cutout. If the spider is not in place, proceed with the
following steps:
NOTE
5. Remove accessory kit and loose parts from ice compartment.
Inspect unit for concealed damage. If evident, notify
delivering carrier and file a claim against the same.
NOTE
6. If leg kit has been provided, assemble legs by tilting unit.
1. Remove agitator clip (2) and pin (4) from agitator bar (3).
2. Remove agitator bar from paddle wheel (5).
3. Remove paddle wheel.
4. Remove ice shroud (1) by lifting back then out of the bin.
5. Locate the drain spider and reinstall in the coldplate cavity
where the drain line exits.
6. Reinstall all components. Ensure agitator clip is locked.
Leveling the Dispenser
In order to facilitate proper dispenser drainage and carbonation,
ensure that the dispenser is level, front to back and side to side.
Place a level on the top of the rear edge of the dispenser. The
bubble must settle between the level lines. Repeat this procedure
for the remaining three sides. Level unit if necessary
Selecting/Preparing Counter Location
1. Select a level, well ventilated location that is in close
proximity to a properly grounded electrical outlet, within five
(5) feet (1.5 m) of a drain, a water supply that meets the
requirements shown in the Specifications section found on
pages 4-6, away from direct sunlight or overhead lighting,
and has sufficient clearance for service and air circulation.
2. Sufficient clearance must be provided, if an ice maker is not
installed, to allow filling ice compartment from a five gallon
bucket (a minimum of 16 inches is recommended).
The dispenser should only be installed in a location
where it can be overseen by trained personnel
NOTE
Lancer does
NOT
recommend the use of shaved or
flake ice in the dispenser.
NOTE
AIR
IN
AIR
IN
M
INIM
UM
of
6
" (1
52
m
m)
w
all
cle
aran
ce
MINIMUM
of 6" (152 mm)
clearance above ice maker
31" (775 mm)
AI
R
OU
T
AIR
OUT
AIR OU
T
AIR
O
UT
MINIMUM
of 6" (152 mm)
clearance above ice maker
6"
(1
52 mm
) cle
arance
6" (152
mm) clear
anc
e
30" (762 mm)
35.5” (901
.7 mm
)
3. The selected location should be able to support the weight of
the dispenser, ice and possibly an icemaker being installed
after counter cut out is made. Total weight (with icemaker) for
this unit could exceed 800 pounds (363.6kg).
4. Unit may be installed directly on countertop or on legs. If
installed directly on the counter, unit must be sealed to the
countertop with an FDA approved sealant. If an icemaker is
to be mounted on top of dispenser, do not install dispenser
on legs.
5. Select a location for the remote pump deck, syrup pumps,
CO
2
tank, syrup containers, and water filter (recommended).
6. Using Counter Cutout Template provided, cut out required
opening for the water, syrup, and CO
2
lines in the designated
dispenser location.
Summary of Contents for Bevariety ACIB Series
Page 14: ...14 WIRING DIAGRAMS ACIB 22 30...