1 OVERVIEW
16 Setting up NetWare Print Server
Setting up the NetWare in NDPS mode
This equipment supports printing over NetWare 6.0/6.5 networks running either the TCP/IP protocols or the IPX protocol.
For pure IP printing, this equipment takes advantage of features in NDPS (Novell Distributed Print Services).
An administrator can use either Novell Printer Gateway to set up the NetWare server in NDPS mode.
P.16 “Setting up NDPS using Novell Printer Gateway”
Setting up a NetWare environment correctly requires the presence and active cooperation of the Novell network
administrator. You must have administrator privileges on the network to create new NDPS objects.
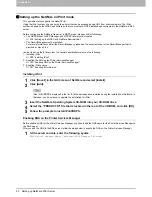
Setting up NDPS using Novell Printer Gateway
NDPS is not like the earlier queue-based versions of NetWare printing. Instead, you use an NDPS Manager and a Printer
Agent, which control the tasks previously handled by a print queue, print server, and spooler. You can also make the
printer driver available for clients to download from Windows client computers.
Before configuring the NetWare file server in NDPS mode, please confirm followings:
y
For NetWare 6.5, the Support Pack 5 and Novell Gateway version 3.00 or later with ndps3sp2c are installed.
y
Make sure you have a valid IP address for this equipment and for any computers that will print to it (when used in the
TCP/IP network).
y
In the equipment setup, enable TCP/IP and enter the IP address, Subnet mask, and Gateway address for this
equipment (when used in the TCP/IP network).
Setting up the NDPS with NetWare Administrator
1
In NetWare Administrator, select the container object to create the printer and click the
[Object] menu and select [Create].
The [New Object] dialog box appears.
2
Select [NDPS Broker] and click [OK].
The [Create NDPS Broker Object] dialog box appears.
If the NetWare file server has been installed as supporting the NDPS service, the NDPS Broker is created as
default. In this case, you can use the default NDPS Broker.
3
Specify the [NDPS Broker Name] and [RMS Volume] options, and click [Create].
The NDPS Broker is created.
4
Click the [Object] menu and select [Create].
The [New Object] dialog box appears.
5
Select [NDPS Manager] and click [OK].
The [Create NDPS Manager Object] dialog box appears.
6
Specify the [NDPS Manager Name], [Resident Server], and [Database Volume] option,
and click [Create].
The NDPS Manager is created.
7
After creating the NDPS Broker and NDPS Manager, please load the NDPS Broker and
NDPS Manager by entering the following commands in the Console screen of the
NetWare server.
load broker [Created NDPS Broker Name]
load NDPSM [Created NDPS Manager Name]
8
Double-click the NDPS Broker object that you created.
The NDPS Broker dialog box appears.
9
Click [Resource Management (RMS)].
Summary of Contents for TASKalfa 550c
Page 1: ...MULTIFUNCTIONAL DIGITAL SYSTEMS Software Installation Guide ...
Page 2: ... 2009 KYOCERA MITA CORPORATION All rights reserved ...
Page 4: ......
Page 24: ...1 OVERVIEW 22 Setting up NetWare Print Server ...
Page 25: ...1 OVERVIEW Setting up NetWare Print Server 23 1 OVERVIEW ...
Page 26: ...1 OVERVIEW 24 Setting up NetWare Print Server ...
Page 27: ...1 OVERVIEW Setting up NetWare Print Server 25 1 OVERVIEW ...
Page 28: ...1 OVERVIEW 26 Setting up NetWare Print Server ...
Page 115: ...4 INSTALLING PRINTER DRIVERS FOR MACINTOSH Uninstalling the Macintosh PPD File 113 ...
Page 116: ......
Page 142: ......
Page 150: ......
Page 168: ......
Page 180: ......
Page 182: ...180 INDEX ...
Page 183: ......
Page 184: ...First edition 2009 5 ...


