Creating songs (Sequencer mode)
34
MIDI recording
When
you
use
the
microSTATION’s
sequencer
to
record,
your
keyboard
performance
and
your
use
of
the
joystick
and
other
controllers
are
recorded
in
realtime.
In
most
cases,
you’ll
use
“single
track
recording”
where
you
record
one
track
at
a
time.
Note:
As
an
alternate
to
single
track
recording,
you
can
also
use
Let’s try recording
We’ll
use
a
Sequencer
mode
template
to
record
a
drum
track
and
a
bass
track.
When
you
enter
Sequencer
mode
on
the
microSTATION,
the
specified
template
will
be
loaded.
This
template
assigns
each
track’s
program,
volume
level,
and
pan
setting
etc.
Note:
Use
the
Global/Media
mode
GLOBAL/MEDIA:
Basic
setting
“Initial
Song”
to
specify
the
template
that
will
be
loaded
(
PG
p. 60).
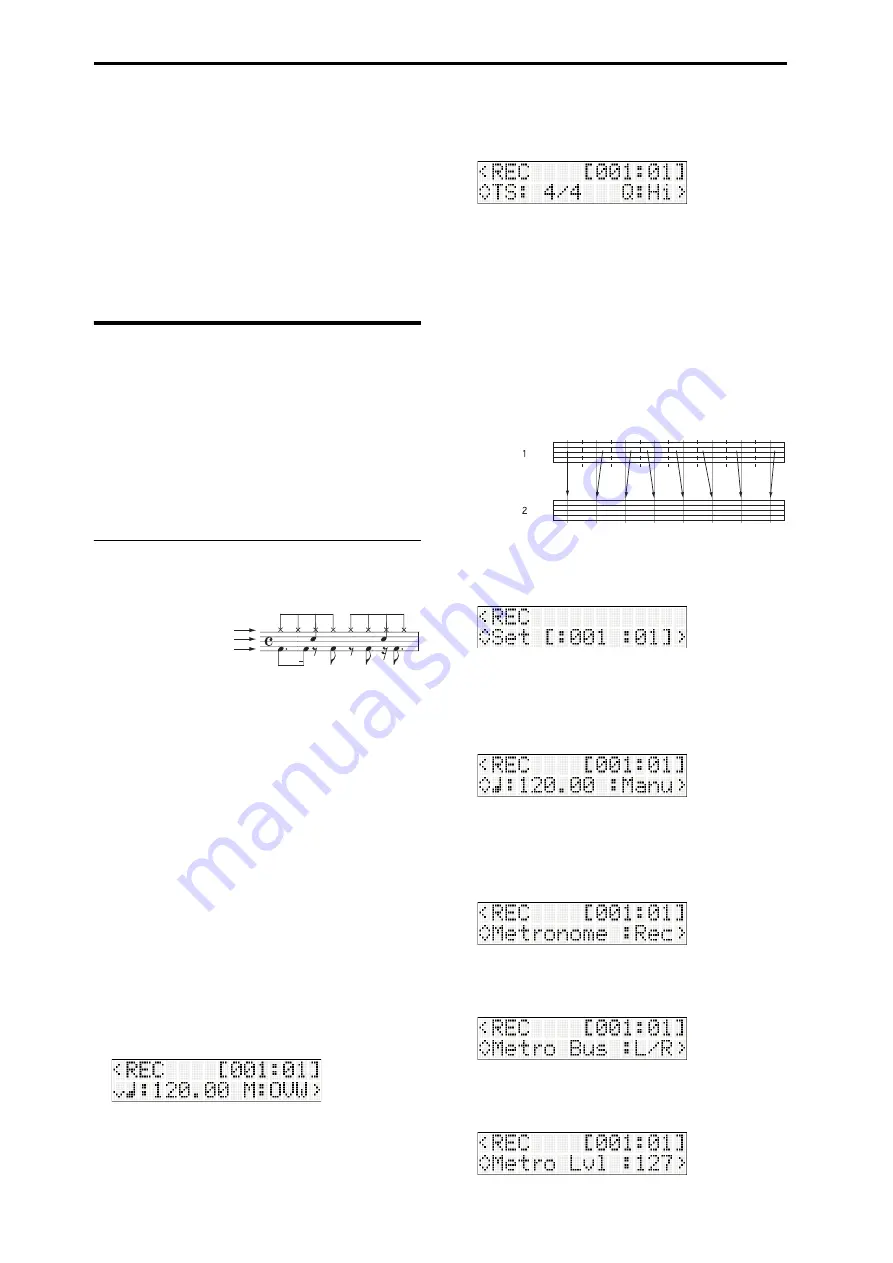
Recording the drum track
Let’s
use
the
drum
program
of
track
1
to
record
the
following
drum
pattern.
1. Press
the
MODE
SEQ
button
to
enter
Sequencer
mode.
2. Press
the
REC
button
to
enter
record
‐
standby
mode.
The
REC
button
will
light,
and
the
Start/Stop
button
will
blink.
The
function
01
LED
will
light,
indicating
that
track
1
is
selected
for
recording.
Note:
From
this
state,
you
can
press
one
of
the
function
02–16
buttons
to
change
the
track
that
will
be
recorded.
The
display
will
show
a
screen
where
you
can
specify
the
tempo
and
the
recording
mode.
When
in
recording
‐
standby
mode,
you
can
use
the
buttons
to
access
a
page
for
making
recording
‐
related
settings.
Use
the
buttons
to
select
a
parameter,
and
use
the
buttons
to
change
the
setting.
For
this
example,
use
the
following
settings.
Tempo and recording mode
“M”
(recording
mode):
OVW
(overwrite)
Select
a
tempo
where
you
can
record
comfortably.
Time signature and quantization
“TS”
(time
signature):
4/4,
“Q”
(quantization):
Hi
“Q”
specifies
how
the
timing
of
the
MIDI
data
you
perform
will
be
corrected
while
you
realtime
‐
record
to
a
MIDI
track.
(Previously
‐
recorded
data
will
not
be
corrected.)
For
example,
suppose
that
you
played
eighth
notes
while
realtime
‐
recording,
but
your
rhythm
was
slightly
incorrect
as
shown
in
figure
1.
If
you
realtime
‐
record
with
“Q”
set
to
in
this
case,
the
notes
would
automatically
be
adjusted
to
the
timing
shown
in
illustration
2,
below.
If
the
“Q”
setting
is
Hi,
your
performance
will
be
recorded
at
the
actual
timing;
no
correction
will
be
applied.
Location
Specify
the
location
where
recording
will
begin.
“Set”
(Set
Location):
[001:01]
Tempo and tempo mode
Adjust
tempo
‐
related
settings
for
the
song.
For
this
example,
choose
the
Manu
setting
so
that
the
song
will
follow
the
“
(Tempo)”
setting.
Tempo
mode:
Manu
(Manual)
Metronome sound
Specify
how
the
metronome
will
function.
For
this
example,
adjust
settings
so
that
the
metronome
will
be
on
only
during
recording.
Metronome
(Metronome
Sound):
REC
Metronome bus
Specify
the
output
bus
for
the
metronome.
Metro
Bus:
L/R
Metronome level
Specify
the
volume
level
of
the
metronome.
Metro
Lvl:
127
Bass drum: C3
Snare: D3
Hi hat: Ab3


