background image

Connecting the Fax Machine to Your Computer

7

Minoltafax 1600

7-77

7

Connecting the Fax Machine to Your
Computer

7.1

Use as PC-Fax, Scanner and PC-Printer

If you have installed these functions with you PC LaserFax 3.5, no further
settings except from activating the modem are necessary. The software is
available as an optional accessory. For further information please refer to
the manual for the software.

If you use the machine as a PC fax machine, only the machine's modem
is in use. With the LaserFax 3.5 the achieved compatibility allows a trans-
fer rate of up to 19200 bps between PC and the Minoltafax 1600.

Use a 9-pin RS-232C interface cable, wired 1:1 (optional).

Modem Specifications

Your Minoltafax 1600 has the following protocol specifications:

Standard: EIA-578 Class 1 Fax/Modem, no data modem included.

Speed with HDLC support 300 bps.

7.2

Setting PC Mode

Available settings: OFF, PC transmit and PC transmit/receive.

Description

Display

1

Press 8 times

SET

and 1.

2

Select the desired setting using the
arrow keys and press

YES.

3

Press

NO

to terminate the entry.

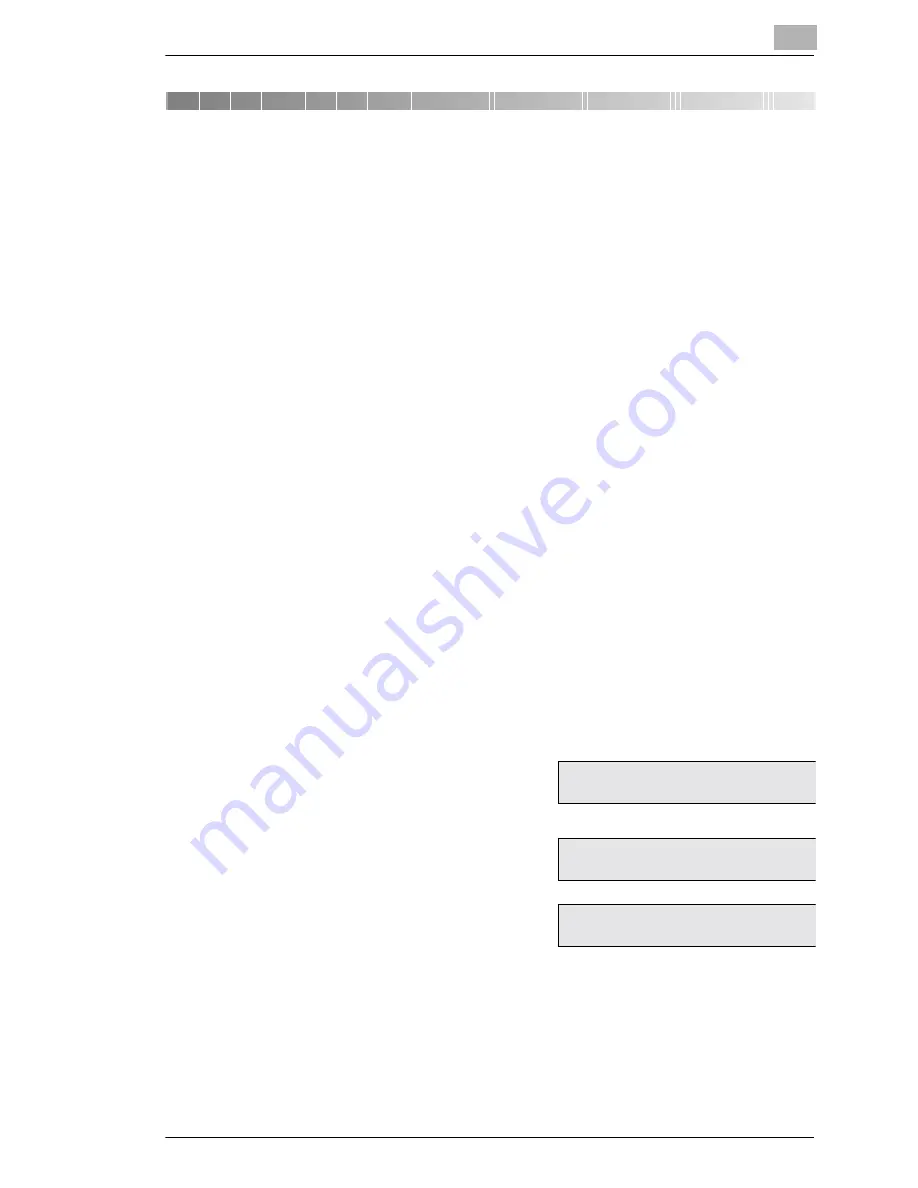
1 PC MODE

*OFF

TX.

TX/RX

- Select & press” YES”

NOV. 19 13:30

100%

SET DOC. FACE DOWN

Summary of Contents for Minoltafax 1600

Page 1: ...The essentials of imaging www minoltaeurope com User Manual Minoltafax 1600...

Page 2: ...Unpacking 13 2 2 Location 14 2 3 Machine Layout 16 2 4 Control Panel Displays and Keys 18 2 5 The Toner Cartridge and the Drum Cartridge 20 Installing the Toner Cartridge and the Drum Cartridge 21 2 6...

Page 3: ...ialling In Number Speed Dial 38 Changing One Touch or Speed Dial Numbers 39 Erasing One Touch or Speed Dial Numbers 40 Entering Call Groups 41 Changing Group Dials 42 Erasing Call Groups 43 Phone Book...

Page 4: ...asting 60 Polling Transmission 61 Mailbox Transmission 62 Password TX 63 Entering the Password 63 Setting Password TX 63 Delete Reservations 64 5 Reception 65 5 1 Manual Reception 65 5 2 Automatic Rec...

Page 5: ...ax Operation with Your Computer 79 7 5 Printing from Your Fax Machine 79 8 Reports 81 8 1 Transmission Report 81 Automatic Print 81 Manual Print 82 8 2 Reception Report 83 Manual Print 83 8 3 Activity...

Page 6: ...ms 99 Clearing Original Document Jams 99 Clearing Printout Paper Jams 100 Paper Jam in the Paper Cassette 100 Paper Jam inside the Fusing Unit 100 Paper Jam at the Drum Cartridge 101 9 3 Trouble Shoot...

Page 7: ...VI Minoltafax 1600...

Page 8: ...machine is authorised for use in the public telephone network and is compatible to other fax machines of the communication standard 3 The Minoltafax 1600 was manufactured to the same high quality sta...

Page 9: ...sounds are the so called hand shaking and function as an introduction sequence before the actual transmission just as interlocutors often in troduce themselves at the beginning of a telephone call In...

Page 10: ...r pan European single terminal connection to the public switched telephone network PSTN However due to differences be tween the individual PSTNs provided in different countries the approval does not o...

Page 11: ...rrect user data Make sure to enter the correct user names l Do not unscrew any parts if not specifically requested in this manual If necessary contact your technical service l Never open the machine w...

Page 12: ...ring printer operation a small quantity of ozone is released This amount is not large enough to harm anyone However be sure the room where the fax machine is being used has adequate ventilation especi...

Page 13: ...l on hook dialling group dialling l Phone book function Functions l Delayed transmission l Broadcasting up to 100 Destinations l Multi tasking operation interface l Polling RX TX l Confidential recept...

Page 14: ...drawing below shows what should be included in the packaging 1 Main unit 2 Toner cartridge 3 Drum cartridge 4 Power cord 5 Telephone line cord 6 Paper cassette cover 7 Paper tray 8 Document input tra...

Page 15: ...ocations close to ventilation openings air conditioners and heaters l The machines should be easily accessible from all sides l Make sure no liquids can enter the machine l Keep all covers closed when...

Page 16: ...15 The figure below shows the space required to ensure easy access to the machine and its proper functioning Make sure there is enough space around the machine approx 40 cm in every direction Bild 450...

Page 17: ...tallation 2 16 Minoltafax 1600 2 3 Machine Layout 1 Release buttons 2 Printer cover 3 Paper tray 4 Document input tray 5 Control panel 6 Scanner cover 7 Paper cassette Bild 4503u201 einf gen 2 1 3 4 5...

Page 18: ...Installation 2 Minoltafax 1600 2 17 1 RS 232C interface 2 Line terminal 3 Power terminal 4 Mains switch Bild 4503u201 einf gen 1 2 3 4...

Page 19: ...umeric keypad or the arrow keys 9 FUNCTION Press this key to select the various communication options 10 YES Press this key to confirm the current function 11 NO Press this key to cancel the current f...

Page 20: ...key to enter spaces and to delete wrong entries when entering data 19 SELECTION KEY Use this key to select the upper or the lower row of one touch keys 20 RESOLUTION Press this key to select the desir...

Page 21: ...old or humidity Detailed information on the care and handling of the toner cartridge is pro vided with the shipment of new cartridges Exchange the cartridge when toner low appears in the display The d...

Page 22: ...it 2 Insert the drum cartridge along the guides into the machine 3 Unpack the toner cartridge Then holding the cartridge with both hands shake it to distribute the toner evenly 4 Insert the toner car...

Page 23: ...ion of the arrows until the cover locks into position 2 6 Supply Paper Installing the Paper Input Tray 1 Insert the two protrusions of the tray into the appropriate holes Installing the Paper Tray 1 I...

Page 24: ...er cassette holds up to 250 sheets of A4 sized paper A4 Letter Legal A4 is the standard size 1 Fan the paper well and align the sheets 2 Place the paper in the paper tray If the machine runs out of pa...

Page 25: ...he end of the telephone cord into the terminal of the machine 3 Plug the wall end of the telephone cable into the wall socket Connecting the Interface Cables The RS 232C serial interface cable is avai...

Page 26: ...he machine Press I for On press O for Off When the machine is in stand by mode the display to the right will appear Now the machine is ready for operation Note Always leave the machine on for at least...

Page 27: ...2 Installation 2 26 Minoltafax 1600...

Page 28: ...turn to stand by mode 3 1 Typing Conventions in this Manual If nothing else is requested all keys are to be pressed one after the other This is also the case if they are connected by a to facilitate t...

Page 29: ...3 Group dial 4 Program dial empty empty empty empty 2 Scanning printing 1 Resolution 2 Scan contrast 3 I T recognition 4 Density 5 Paper size Standard Step 3 on Step 4 A4 3 Transmission 1 Page count 2...

Page 30: ...Numeric key 1 2 3 4 5 6 7 8 9 0 1 time 1 2 3 4 5 6 7 8 9 0 2 times A D G J M P T W 3 times B E H K N Q U X 4 times C F I L O R V Y 5 times S Z Numeric key Numeric key Numeric key 1 time 9 times 17 ti...

Page 31: ...y report and the other fax machine s printouts Description Display 1 Press 7 times SET 2 Press 1 3 Enter the date DDMMYY and time 24 hour format and press YES to store the entry Note If enter day appe...

Page 32: ...ur fax number in the header The information in the header help the receiving station to identify the sender Press SPEED DIAL to enter the You can enter spaces with one touch key 9 Description Display...

Page 33: ...me your name or both Up to 32 characters can be entered Refer to 3 2 for instructions on how to make the entries Description Display 1 Press 7 times SET 2 Press 3 to delete an existing number press NO...

Page 34: ...of numbers which are coded as beep ing noises e g when you use the mailbox function Pulse dialling dials by transmitting a number of pulses for each dialled number The factory setting is tone dial De...

Page 35: ...access or dial code access using the arrow keys 5 If you have selected code enter the dial code Press YES to store the entry The prefix is limited to 4 digits Note The line access is achieved automat...

Page 36: ...iption Display 1 Press SET and 1 2 Press the desired one touch key between 01 and 20 3 Enter the fax number and press YES 4 Use the numeric keypad to enter the name and press YES 5 Use the arrow keys...

Page 37: ...ween 01 and 20 3 Enter the first part of the number and press the arrow up key 4 Enter the extension number and press YES 5 Use the numeric keypad to enter the name and press YES 6 Use the arrow keys...

Page 38: ...isplay 1 Press SET and 2 2 Enter the 2 digit speed dial number s identifier code 3 Enter the fax number and press and press YES 4 Use the numeric keypad to enter the name and press YES 5 Use the arrow...

Page 39: ...entifier code 3 Enter the first part of the number and press the arrow up key 4 Enter the extension number and press YES 5 Use the numeric keypad to enter the name and press YES 6 Use the arrow keys t...

Page 40: ...lect Edit using the arrow keys and press YES 5 Enter the new number and press YES 6 Enter the new name using the nu meric key pad and press YES 7 Use the arrow keys to set the mo dem speed and press Y...

Page 41: ...cription Display 1 Press SET and 1 or 2 2 Press the desired one touch key or enter the desired speed dial number 3 Press NO 4 Select delete using the arrow keys and press YES 5 Press YES 6 Press 2 tim...

Page 42: ...mbers as call groups these must be stored as one touch or speed dial numbers Description Display 1 Press SET and 3 2 Press the desired one touch key between 17 and 20 3 Enter the desired group name an...

Page 43: ...5 Use the numeric keypad to enter the name and press YES 6 All members of the group are being listed Press YES to confirm the en tries or press NO to delete them 7 You can add new members when the li...

Page 44: ...lect delete all using the arrow keys and press YES 5 Press 2 times NO to terminate the process Phone Book You do not need to enter any data into the phone book All one touch num bers speed dial number...

Page 45: ...save mode is ON If you want to change the setting follow the procedure below Description Display 1 Press 5 times SET 2 Press 1 3 Use the arrow keys to select the de sired setting and press YES 4 If y...

Page 46: ...inate the entry Buzzer Volume Use this function to set the volume of buzzer tones for example when pressing a button Follow the procedure below to make your fax machine print the key setting list Desc...

Page 47: ...quality is sent repeatedly This procedure reduces the number of er rors considerably Although the time for the transmission is longer it is still quicker than re sending a whole page Description Disp...

Page 48: ...achine For this the set uses data is used Use this function to print a header on the transmitted pages Follow the procedure below to make your fax machine print the key setting list Description Displa...

Page 49: ...footer on the received pages Follow the pro cedure below to make your fax machine print the key setting list Description Display 1 Press 4 times SET 2 Press 7 3 Use the arrow keys to select the desir...

Page 50: ...nger than 500 mm the machine recognises document jam and stops scanning the document Use yellow green yellow or light blue colours for information you do not want to be transmitted Make sure ink glue...

Page 51: ...centre of the ADF and adjust the paper guides so that they lightly touch the edges of the document You can insert up to 10 pages into the feeder Make sure the pages are well placed and aligned before...

Page 52: ...F If you send documents with normal print or typed documents adjustments are not necessary To change the resolution press RESOLUTION RESOLUTION allows three adjustments Note GREYSCALE increases the ti...

Page 53: ...turn to stand by mode Contrast If you raise the contrast fine differences in tone on the document are en hanced and transmitted more clearly However information may be lost during this process Descrip...

Page 54: ...age Text Recognition Use this function to set greyscale mode for the image part of a document only This allows a high quality for documents that consist of text and im ages Description Display 1 Press...

Page 55: ...ssary For this press STOP to delete and enter the number again You can also correct single digits using the arrow keys Max 32 digits can be entered One Touch Dialling 1 Press one of the programmed one...

Page 56: ...d Program Dialling Use the last 4 one touch keys 17 20 to program the following functions Broadcasting 1 Delayed transmission Timer 3 Mailbox transmission 4 Polling 7 Description Display 1 Press SET a...

Page 57: ...al numbers Note It is necessary that the pre dial number and a character are stored as one touch number or speed dial number The telephone number is limited to 32 digits Phone Book The phone book list...

Page 58: ...will be sent Memory transmission offers several advantages Make sure the memory LED is lit If this is not the case press MEMORY Description Display 1 Insert the document face down into the ADF 2 Dial...

Page 59: ...ant to transmit Make sure you have switched off MEMORY before Description Display 1 Insert the document face down into the ADF Adjust the contrast and resolution if necessary 2 Dial the telephone numb...

Page 60: ...1 Press FUNCTION and 3 2 Enter the time of the transmission using the numeric keypad 24 hour format and press YES 3 Enter the fax number and or the de sired function broadcasting poll ing relay broadc...

Page 61: ...a list of the destinations is printed be fore the transmission Insert the document face down In the document feeder Adjust contrast and resolution if necessary Description Display 1 Press FUNCTION and...

Page 62: ...ngle mode and a multiple mode In single mode the document can only be polled once Afterwards the document is automatically deleted In multiple mode the document is scanned and polled from memory After...

Page 63: ...box ID codes are identical This prevents the document from being transmitted to a wrong mailbox The document is scanned into the remote fax machine s memory and can only be printed if the recipient en...

Page 64: ...Description Display 1 Press 7 times SET and 4 2 Enter the 4 digit password using the numeric keypad 0000 9999 and press YES 3 Press NO to terminate the entry Setting Password TX Description Display 1...

Page 65: ...timer transmission for this example Timer transmission Description Display 1 Press FUNCTION and 0 2 Press YES 3 Press NO to terminate the entry If you have programmed more than one function you can sc...

Page 66: ...the reception mode Because the machine has no telephone receiver a separate phone must be attached to the same telephone wall outlet An swer the call and press START Description Display 1 Press 4 time...

Page 67: ...e at which the message is to be printed Description Display 1 Press 4 times SET 2 Press 1 3 Use the arrow keys to select the de sired setting and press YES 4 Enter the time at which the docu ments are...

Page 68: ...ox ID is entered Your Minoltafax 1600 has 2 Mailboxes The document is scanned into the fax machine s memory and can only be printed if the correct 4 digit mailbox ID is entered Programming Mailbox ID...

Page 69: ...SET and 5 2 Enter the number of the desired mailbox 3 Press NO 4 Enter the 4 digit Mailbox ID using the numeric keypad 0000 9999 and press YES 5 Press STOP to terminate the entry 5 MAILBOX MAILBOX NO...

Page 70: ...hine You can poll from up to 100 destinations per set ting Description Display 1 Press FUNCTION and 7 2 Enter the desired fax number using the numeric keypad the speed dial numbers the one touch keys...

Page 71: ...scription Display 1 Press 7 times SET and 4 2 Enter the 4 digit password using the numeric keypad 0000 9999 and press YES 3 Press NO to terminate the entry Setting Password Reception Description Displ...

Page 72: ...to set the number of rings the fax machine waits before it answers an incoming call Description Display 1 Press 4 times SET 2 Press 2 3 Set the number of rings 1 10 and press YES 4 Press NO to termina...

Page 73: ...the desired setting using the arrow keys and press YES 4 Set the number of copies and press YES 5 Press NO to terminate the entry If you choose ON SORT your Minoltafax will sort the copies when you a...

Page 74: ...1 Press 4 times SET 2 Press 4 3 Select the desired setting using the arrow keys and press YES 4 Press NO to terminate the entry For further information please contact your dealer Print Density Use th...

Page 75: ...the paper Select from A4 and Letter Description Display 1 Press 2 times SET 2 Press 5 3 Select the desired setting using the arrow keys and press YES 4 Press NO to return to stand by mode SCAN PRINT Y...

Page 76: ...fax 1600 is capable of making up to 99 copies of a document 6 1 Single Copies Insert the document into the ADF Adjust contrast and resolution if necessary Description Display 1 Press START COPY The ma...

Page 77: ...lect from copying the same size enlarge or reduce If you select en large or reduce you can further select the ratio Description Display 1 Press FUNCTION and 2 2 Select the desired setting using the ar...

Page 78: ...dem is in use With the LaserFax 3 5 the achieved compatibility allows a trans fer rate of up to 19200 bps between PC and the Minoltafax 1600 Use a 9 pin RS 232C interface cable wired 1 1 optional Mode...

Page 79: ...and press YES 3 Press NO to terminate the entry PC Baudrate Use this function to set the rate for data transfer between PC and your Mi noltafax Available settings are 300 2400 9600 19200 bps and autom...

Page 80: ...documents and transfers them to the PC 7 4 Fax Operation with Your Computer This function allows you to send documents that you have created on your computer without printing them first Also faxes ca...

Page 81: ...7 Connecting the Fax Machine to Your Computer 7 80 Minoltax 1600...

Page 82: ...Report You can print the transmission report either manually or automatically Automatic Print Follow the procedure below to make your fax machine print the transmission report automatically Descripti...

Page 83: ...NO to terminate the entry The report is printed TX Result Report FUNCTION NUM DESTINATION DATE TIME P DUR NUM RESULT P 01 M LLER KG SEP 03 12 00 01 00H02 00 G3 OK NOV 19 13 30 100 SET DOC FACE DOWN D...

Page 84: ...RM and YES 4 Press NO to terminate the entry The report is printed TX Report FUNCTION NUM DESTINATION DATE TIME P DURATION NUM RESULT P 01 M LLER KG SEP 03 12 00 01 00H02 00 G3 OK NOV 19 13 30 100 SET...

Page 85: ...ES 4 Press NO to return to standby mode Manual Print Description Display 1 Press CONFIRM 2 Select REPORT using the arrow keys and press YES 3 Press 3 times CONFIRM and press YES 4 Press NO to terminat...

Page 86: ...ECM 8 T OOOO08 9 DEC 9 45 P 7404154 1 OHO1 29 FINE OK ECM 51 T OOOO09 9 DEC 13 50 P 7404154 1 OHO1 21 STD OK ECM 52 T OOOO10 9 DEC 15 00 P 7404154 1 OHO1 10 STD OK ECM 53 T OOOO11 9 DEC 16 45 TX 7404...

Page 87: ...all speed dial numbers and one touch keys programmed Follow the procedure below to make your fax machine print the fax number list Description Display 1 Press CONFIRM 2 Select REPORT using the arrow...

Page 88: ...DATE OT 03 SCHMIDT 665533 NDR 2 12 1998 OT 05 I 798 High 3 12 1998 OT 6 G 06 532 High 3 12 1998 SUB 5637768 OT 18 Group 8 12 1998 OT 19 PROGRAM 9 12 1998 OT 20 Program 9 12 1998 SD NO DESTINATION ID...

Page 89: ...RM 2 Select REPORT using the arrow keys and press YES 3 Press 6 times CONFIRM and press YES 4 Press NO to terminate the entry Your fax machine prints the group dial list MAILBOX LIST BOX NO BOX ID DES...

Page 90: ...ress YES 3 Press 7 times CONFIRM and press YES 4 Press NO to terminate the entry Your fax machine prints the group dial list Key List KEY TIMER FUNCTION NUM DESTINATION DATE OT 17 None OT 18 GROUP SAL...

Page 91: ...prints the group dial list Status List Initial Uses Data Store fax number Scanning printing DATE 2 12 1998 ID 49 511 968668 HEADER MINOLTA PASSWORD 0001 ONE TOUCH 2 20 RESERVED SPEED DIAL 1 100 RESER...

Page 92: ...9 RX REDUCE ON SECURE MAILBOX 1 ID NONE 2 ID NONE RX PASSWORD OFF FOOTER ON MANUAL RX MODE OFF POWER SAVE TIMER ON 12 00 OFF 00 00 LCD CONTRAST DARK LIGHT TONE PULSE TONE VOLUME BUZZER OFF G3 ECM ON...

Page 93: ...NFIRM 2 Select REPORT using the arrow keys and press YES 3 Press 4 times CONFIRM and press YES 4 Press NO to terminate the entry Your fax machine prints the group dial list Memory data JOB TIMER FUNCT...

Page 94: ...CONFIRM 2 Select REPORT using the arrow keys and press YES 3 Press 5 times CONFIRM and press 2 times YES 4 Press NO to terminate the entry Your fax machine prints the data Memory Data Print FUNCTION N...

Page 95: ...ntains a list of all documents which could not be transmitted during the power failure 8 12 Memory Overflow Report This report will be automatically printed if not enough memory is available for the p...

Page 96: ...Shooting Cleaning the Machine Clean your Mainoltafax if neccessary Before cleaning the machine switch it off and unplug the power cable Use a soft dam cloth to achieve good results Cleaning the Casin...

Page 97: ...Minolta cleaning kit No 8918 561 is highly recommended for cleaning the rollers and the scanner 1 Open the control panel and hold it with one Hand 2 Wipe the surface of the scanner and the transport...

Page 98: ...rtridge from the machine shake it well and reinstall it If the Toner Empty message appears again follow the procedure de scribed below 1 Open the top cover pressing the two release buttons and pull th...

Page 99: ...x 20 000 pages Remove the toner cartridge from the machine as described above 1 Remove the old drum cartridge from the machine 2 Unpack the drum cartridge and slide it along the guides into the machin...

Page 100: ...nside the machine either the message ORIGINAL DOC JAM or RECORDING PAPER JAM appears on the display You can remove paper jams by following the procedures described below Clearing Original Document Jam...

Page 101: ...as shown Paper Jam inside the Fusing Unit Note Take care not to dirty your hands when removing the paper The inside of the fusing unit can be very hot If the error message still appears on the displa...

Page 102: ...om light 4 If the paper is jammed in the fusing unit carefully remove it as shown 5 Reinstall the drum cartridge and the toner cartridge Close the cover firmly Paper Jam at the Drum Cartridge 1 If the...

Page 103: ...our machine If the copy shows no lines the problem is at the other location If no stripes appear on the copy the remote side s machine is probably defective The display shows Docu ment jam or recordin...

Page 104: ...idge The reception copy is dis torted Probably the paper was not properly fed on the remote side Ask for a new transmission The other fax machine s printouts are blurred Make a photocopy with your fax...

Page 105: ...ctions on the LCD BLINKING Malfunction Call the technical service Alarm Problem Solution Three short beeps Wrong key was pressed Press the correct key Short beeps last 2 Secs Communication error Follo...

Page 106: ...JAM The printout paper is jammed inside the ma chine Follow the instructions given earlier in this chap ter CAUTION SCANNER COVER OPEN The control panel is not closed properly Close the control panel...

Page 107: ...Minoltafax 1600 TOO MANY RESERV The maximum number of reservations was exceeded Send manually or delete a reservation WRONG PAPER SIZE The wrong paper size was entered in the menu EN TER Enter the cor...

Page 108: ...ble cause Solution Poor development Shake the Toner Cartridge Replace the Toner Cartridge Replace the Drum Cartridge Set Print Density Paper Check paper for quality and humidity Change paper Possible...

Page 109: ...Stains Missing Areas Possible cause Solution Poor development Scanner dirty Check toner Clean scanner Replace the drum cartridge Possible cause Solution Poor transmission Check toner shake toner cart...

Page 110: ...correction yes Original document Min original size W x L 148 mm x 100 mm oversize Max original size B x L 216mm x 500 mm Oversize no Max scan width 208 mm Resolution standard fine Paper weight 50 120...

Page 111: ...s Enlarge reduce in copy mode auto vertical reduction Document exit capacity 200 page Document exit face down Printout paper Paper supply paper supply 250 page Paper size A4 Paper weight 60 90 g m Pri...

Page 112: ...e book yes Transmission Header yes Reservation yes Resolution for transmission standard fine Delayed transmissions yes Number of delayed transmissions 10 20 with extended memory installed Number of jo...

Page 113: ...Polling Delayed pollingD yes Max polling locations 148 Selective polling yes Secure polling yes Multi mode yes Reverse Mode no Memory polling Bulletin Board yes max 30 Broadcasting Manual broadcastin...

Page 114: ...ny rights to patents copyrights trade names trademarks whether registered or unregistered or any other rights franchises or licenses in respect of the Software Title to the Software and any copy made...

Page 115: ...arranty which was supplied with the hardware With the exception of the foregoing express warranties applicable to hardware and media only the Software is not warranted and is provided AS IS SUCH WARRA...

Page 116: ...er Software clause at FAR 252 227 7013 subdivision b 3 ii or subparagraph c 1 ii as appropriate Further use duplication or disclosure is subject to restrictions applicable to restricted rights softwar...

Page 117: ...e der Software und jedweder von ihr angefertigten Kopie Die Verantwortung f r die Wahl zur Erzielung der gew nschten Ergebnisse Installation Benutzung und die mit der Software erzielten Ergebnisse lie...

Page 118: ...ine Garantie auf Material und Verarbeitung der Hardware die die Software beinhaltet Die Haftungsbedingungen und beschr nkungen bez glich der Hardware die die Software beinhaltet sind in den Gew hrleis...

Page 119: ...mungen im Abschnitt unter der berschrift Lizenz gilt eine Frist von 4 Jahren F r diesen Vertrag gilt im brigen das Recht des Landes indem dieses Produkt erworben worden ist LIZENZNEHMER REGIERUNG Hand...

Page 120: ...ENDVERBRAUCHER LIZENZVERTRAG...

Page 121: ...on dans le domaine des logiciels A l exception de ce qui est indiqu dans cet accord vous n avez aucun droit sur les brevets les droits de reproduction les noms de marque enregistr s ou pas ni aucun au...

Page 122: ...lequel le logiciel est enregistr contre tout d faut mat riel ou de fabrication dans les conditions normales d utilisa tion Les d tails de garantie et les limites du logiciel sont d crits sur la d clar...

Page 123: ...itions suivantes s appliquent Utilisation duplication ou divulgation sont sujettes aux restrictions men tionn es dans Rights in Technical Data and Computer Software FAR 252 227 7013 section b 3 ii ou...

Page 124: ...ero ha avuto la licenza da parte degli altri proprietari i diritti di autore per il Software Ad eccezione di quanto dichiarato nel pre sente Contratto non avrete alcun diritto di brevetto copyright no...

Page 125: ...la violazione delle restrizioni di esportazione dettate dal Governo locale 5 GARANZIA LIMITATA MINOLTA garantisce che i mezzi su cui il Software registrato sono privi di difetti nei materiali e nella...

Page 126: ...edimenti L uso la duplicazione o la divulgazione da parte del Governo sono soggetti alle re strizioni stabilite nella clausola Rights in Technical Data e in Computer Software in FAR 252 227 7013 sotto...

Reviews: