Konica Minolta Bizhub 4000i User Manual Download Page 52

4

Scan the document.

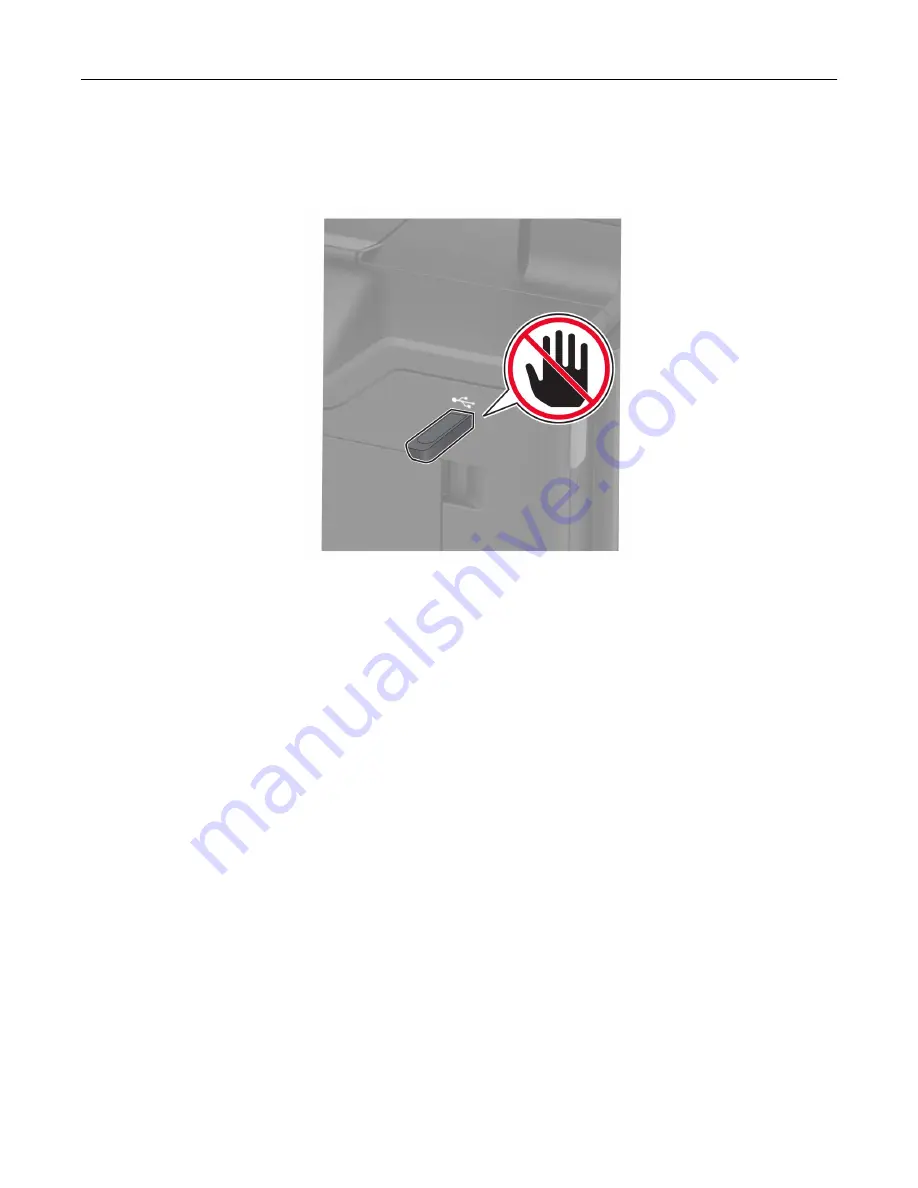
Warning—Potential Damage: 

To avoid loss of data or printer malfunction, do not touch the flash drive or

the printer in the area shown while actively printing, reading, or writing from the memory device.

Sending scanned documents to a computer

1

Load an original document into the ADF tray or on the scanner glass.

2

From the home screen, touch 

Scan Profiles

 > 

Scan To Computer

.

3

Select the scan profile where you want to save the document.

Scanning

52

Summary of Contents for Bizhub 4000i

Page 1: ...User s Guide 2018 3 AAFM 9565 11A...

Page 2: ...k Setup Page 14 Using the keyboard on the display 14 Setting up and using the home screen applications 15 Using the home screen 15 Customizing the home screen 16 Using Display Customization 16 Managin...

Page 3: ...ing copies 32 Collating copies 32 Placing separator sheets between copies 32 Copying multiple pages onto a single sheet 32 Creating a copy shortcut 32 E mailing 33 Setting up the e mail function 33 Co...

Page 4: ...k Ports 107 Security 119 Reports 127 Help 128 Troubleshooting 129 Securing the printer 130 Locating the security slot 130 Erasing printer memory 130 Erasing printer hard disk memory 130 Con guring pri...

Page 5: ...t 160 Paper jam in trays 161 Paper jam in the multipurpose feeder 161 Paper jam in the automatic document feeder 162 Troubleshooting 164 Network connection problems 164 Internal option problems 166 Pa...

Page 6: ...power strips multioutlet extenders or UPS devices The power capacity of these types of accessories can be easily overloaded by a laser printer and may result in a risk of re property damage or poor p...

Page 7: ...nter If the printer has separate oor standing optional trays or output options attached to it then disconnect them before moving the printer If the printer has a caster base then carefully roll it to...

Page 8: ...not always be obvious The manufacturer is not responsible for the use of other replacement parts Refer service or repairs other than those described in the user documentation to a service representat...

Page 9: ...this product near water or wet locations Make sure that air ow in the room meets the latest revision of the ASHRAE 62 standard or the CEN Technical Committee 156 standard Provide a at sturdy and stabl...

Page 10: ...ability causing possible injury For more information on supported con gurations contact the place where you purchased the printer CAUTION TIPPING HAZARD To reduce the risk of equipment instability loa...

Page 11: ...t or the manufacturer s authorized replacement CAUTION POTENTIAL INJURY To avoid the risk of electrical shock do not set up this product or make any electrical or cabling connections such as the power...

Page 12: ...ine to send and receive faxes 4 EXT port Connect additional devices telephone or answering machine to the printer and the telephone line Use this port if you do not have a dedicated fax line for the p...

Page 13: ...k depending on which mode is selected 8 Pause button Place a dial pause in a fax number 9 Backspace button Move the cursor backward and delete a character in an input eld 10 Indicator light Check the...

Page 14: ...s four sets of numbers separated by periods such as 123 123 123 123 If you are using a proxy server then temporarily disable it to load the web page correctly 2 Open a web browser and then type the pr...

Page 15: ...Touch To 1 Copy Make copies 2 E mail Send e mails 3 Fax Send fax 4 Status Supplies Show a printer warning or error message whenever the printer requires intervention to continue processing View more...

Page 16: ...er IP address on the printer home screen The IP address appears as four sets of numbers separated by periods such as 123 123 123 123 If you are using a proxy server then temporarily disable it to load...

Page 17: ...Apply the changes Adding groups 1 Open a web browser and then type the printer IP address in the address eld Notes View the printer IP address on the printer home screen The IP address appears as fou...

Page 18: ...ddress eld Notes View the printer IP address on the printer home screen The IP address appears as four sets of numbers separated by periods such as 123 123 123 123 If you are using a proxy server then...

Page 19: ...e Type select a paper source 2 Set the size and type of the specialty media Con guring Universal paper settings 1 From the home screen touch Settings Paper Media Con guration Universal Setup 2 Con gur...

Page 20: ...acedown with the top edge of the sheet toward the front of the tray for one sided printing Load letterhead faceup with the bottom edge of the sheet toward the front of the tray for two sided printing...

Page 21: ...before loading 4 Load paper with the printable side faceup Notes Load letterhead faceup with the top edge of the sheet toward the front of the tray for one sided printing Load letterhead facedown with...

Page 22: ...ers separated by periods such as 123 123 123 123 If you are using a proxy server then temporarily disable it to load the web page correctly 2 Click Settings Paper Tray Con guration 3 Set the same pape...

Page 23: ...5 8 x 8 3 in X A6 105 x 148 mm 4 1 x 5 8 in X JIS B5 182 x 257 mm 7 2 x 10 1 in X O cio Mexico 216 x 340 mm 8 5 x 13 4 in Hagaki 100 x 148 mm 3 9 x 5 8 in X X X Business card 50 8 x 88 9 mm 2 x 3 5 i...

Page 24: ...velope Monarch 98 x 191 mm 3 9 x 7 5 in X X X 9 Envelope 98 x 225 mm 3 9 x 8 9 in X X X 10 Envelope 105 x 241 mm 4 1 x 9 5 in X X X DL Envelope 110 x 220 mm 4 3 x 8 7 in X X X C5 Envelope 162 x 229 mm...

Page 25: ...ne sided paper labels designed for laser printers are supported for occasional use It is recommended to print 20 or fewer pages of paper labels per month Vinyl pharmacy and two sided labels are not su...

Page 26: ...cation 2 Tap Print and then select a printer 3 Print the document Printing from a mobile device using Mopria Print Service Mopria Print Service is a mobile printing solution for mobile devices running...

Page 27: ...e printer is processing other print jobs then Busy appears on the display 2 From the display touch the document that you want to print If necessary con gure other print settings 3 Send the print job T...

Page 28: ...B ash drives must support the File Allocation Table FAT system Many ash drives are tested and approved for use with the printer For more information contact the place where you purchased the printer F...

Page 29: ...re deleted from the printer memory Note Verify jobs print one copy to check if it is satisfactory before printing the remaining copies Reserve Job Expiration Set the amount of time before reserved job...

Page 30: ...2 Select the job to cancel Printing 30...

Page 31: ...nu select the setting that best matches the original photo 4 Copy the photo Copying on letterhead 1 Load an original document into the ADF tray or on the scanner glass 2 From the home screen touch Cop...

Page 32: ...h Copy and then set Collate to On 3 Copy the document Placing separator sheets between copies 1 Load an original document into the ADF tray or on the scanner glass 2 From the home screen touch Copy Se...

Page 33: ...The IP address appears as four sets of numbers separated by periods such as 123 123 123 123 If you are using a proxy server then temporarily disable it to load the Web page correctly 2 Click Settings...

Page 34: ...Creating an e mail shortcut 1 From the home screen touch E mail 2 Con gure the settings and then touch 3 Enter a shortcut name 4 Apply the changes E mailing 34...

Page 35: ...ea shown while actively sending or receiving a fax Setting up the fax function 1 From the home screen touch Settings Device Preferences Run Initial Setup 2 Turn off the printer wait for about 10 secon...

Page 36: ...1 Connect one end of the telephone cable to the line port of the printer 2 Connect the other end of the cable to an active analog wall jack Notes You can set the printer to receive faxes automaticall...

Page 37: ...e wall jack 1 Connect one end of the telephone cable to the line port of the printer 2 Connect the other end of the cable to an active analog wall jack 3 Connect the answering machine to the telephone...

Page 38: ...e to an active analog wall jack Notes If you have only one telephone number on your line then set the printer to receive faxes automatically Set the printer to pick up calls two rings after the answer...

Page 39: ...the telephone to the telephone port of the printer Notes This setup works best if you are using voice mail more often than fax and if you subscribe to a distinctive ring service When you answer the te...

Page 40: ...ture during a lightning storm CAUTION POTENTIAL INJURY To reduce the risk of re use only a 26 AWG or larger telecommunications RJ 11 cord when connecting this product to the public switched telephone...

Page 41: ...ting up fax using VoIP telephone service CAUTION SHOCK HAZARD To avoid the risk of electrical shock do not set up this product or make any electrical or cabling connections such as the power cord fax...

Page 42: ...t the telephone to the telephone port of the printer Notes To check if the telephone port on the VoIP adapter is active plug an analog telephone into the port and then listen for a dial tone If you ne...

Page 43: ...TION SHOCK HAZARD To avoid the risk of electrical shock do not use the fax feature during a lightning storm CAUTION POTENTIAL INJURY To reduce the risk of re use only a 26 AWG or larger telecommunicat...

Page 44: ...te To check if the telephone port on the cable modem is active connect an analog telephone and then listen for a dial tone Setup 2 Printer is connected to a wall jack cable modem is installed elsewher...

Page 45: ...11 cord when connecting this product to the public switched telephone network For users in Australia the cord must be approved by the Australian Communications and Media Authority The standard wall ja...

Page 46: ...le to the line port of the printer 2 Connect the other end of the cable to the RJ11 adapter and then connect the adapter to the wall jack 3 If you want to connect another device with a non RJ11 connec...

Page 47: ...able to the RJ11 adapter and then connect the adapter to an N port 3 If you want to connect a telephone and answering machine to the same wall jack then connect the devices as shown Connecting to a di...

Page 48: ...canner glass 2 From the home screen touch Fax and then enter the needed information 3 If necessary con gure other fax settings 4 Send the fax job Using the computer For Windows users 1 With a document...

Page 49: ...enter another fax number 3 Touch 4 Enter a shortcut name 5 Apply the changes Changing the fax resolution 1 Load an original document into the ADF tray or on the scanner glass 2 From the home screen to...

Page 50: ...all Log Blocking junk faxes 1 From the home screen touch Settings Fax Analog Fax Setup Fax Receive Settings Admin Controls Block No Name Fax 2 Apply the changes Holding faxes 1 From the home screen to...

Page 51: ...e FTP job Creating an FTP shortcut 1 From the home screen touch FTP 2 Enter the FTP server address and then touch 3 Enter a shortcut name 4 Apply the changes Scanning to a ash drive 1 Load an original...

Page 52: ...er in the area shown while actively printing reading or writing from the memory device Sending scanned documents to a computer 1 Load an original document into the ADF tray or on the scanner glass 2 F...

Page 53: ...guration Copy Copy Defaults Fax Fax Mode Analog Fax Setup Fax Server Setup E mail E mail Setup E mail Defaults Web Link Setup FTP FTP Defaults Network Ports Network Overview Wireless Ethernet TCP IP S...

Page 54: ...wizard Keyboard Keyboard Type List of languages Select a language as a keyboard type Notes All the Keyboard Type values may not appear or may require special hardware to appear This menu item appears...

Page 55: ...nd Removal On Off Specify whether background removal is allowed Allow Custom Job scans On Off Scan multiple jobs to one le One Page Flatbed Scanning On Off Set copies from the scanner glass to only on...

Page 56: ...item appears only in some printer models ADF Loaded Beep Off On Enable a sound when loading paper into the ADF Alarm Control Off Single Continuous Set the number of times that the alarm sounds when th...

Page 57: ...ore the printer performs an automatic reboot Error Prevention Auto Reboot Auto Reboot Counter Show a read only information of the reboot counter Error Prevention Auto Reboot Reset Auto Reboot Counter...

Page 58: ...out Disabled 1 hour 2 hours 3 hours 6 hours 1 day 2 days 3 days 1 week 2 weeks 1 month Set the time before the printer enters Hibernate mode Timeouts Hibernate Timeout on Connection Hibernate Do Not H...

Page 59: ...er settings Restore network settings Restore fax settings Restore app settings Restore the printer factory default settings Note The default value is the value selected during the initial setup Mainte...

Page 60: ...user Continue Use current Set the printer to resolve paper or envelope related change prompts Reports Menu Settings Page Event Log Event Log Summary Print reports about printer menu settings status an...

Page 61: ...unctional the printer performs one sided printing for a two sided print job Device Operations Minimum Copy Memory 20MB 30MB 50MB 80MB 100MB Set the memory allocation for storing copy jobs Note The val...

Page 62: ...dian Big Endian Determine the byte order of a TIFF formatted scan output Scanner Con guration Exact Tiff Rows Per Strip On Off Set the RowsPerStrip tag value of a TIFF formatted scan output Note An as...

Page 63: ...t con guration les to a ash drive Export Compressed Logs to USB Export compressed log les to a ash drive Print Layout Menu item Description Sides 1 sided 2 sided Specify whether to print on one side o...

Page 64: ...de Print multiple page images on one side of a sheet of paper Pages per Side Ordering Horizontal Reverse Horizontal Vertical Reverse Vertical Specify the positioning of multiple page images when using...

Page 65: ...rmine what the printer does with downloaded resources such as fonts and macros when it receives a job that requires more than the available memory Notes When set to Off the printer retains downloaded...

Page 66: ...indicates the factory default setting Job Accounting Menu item Description Job Accounting Off On Set the printer to create a log of the print jobs that it receives Accounting Log Frequency Daily Week...

Page 67: ...ll But Current Specify how the printer responds when disk usage reaches the maximum limit URL to Post Log Specify where the printer posts job accounting logs E mail Address to Send Logs Specify the e...

Page 68: ...ted in 1200 dpi Lock PS Startup Mode On Off Disable the SysStart le Font Priority Resident Flash Disk Establish the font search order Notes Resident sets the printer to search its memory for the reque...

Page 69: ...graphics on the page Lines per Page 1 255 Specify the number of lines of text for each page printed through the PCL datastream Notes This menu item activates vertical escapement that causes the select...

Page 70: ...w the factory default setting assigned for each paper source Tray Renumber Restore Defaults Return all tray assignments to factory default values Print Timeout Disabled 1 255 90 Set the printer to end...

Page 71: ...ge Note When set to On this menu item overrides the scaling and orientation settings for the image Invert Off On Invert bitonal monochrome images Note This menu item does not apply to GIF or JPEG imag...

Page 72: ...ltipurpose feeder like a manual feeder When set to First the printer picks paper from the multipurpose feeder until it is empty regardless of the required paper source or paper size Substitute Size Of...

Page 73: ...trait height of the universal paper Feed Direction Short Edge Long Edge Set the printer to pick paper from the short edge or long edge direction Note Long Edge appears only when the longest edge is sh...

Page 74: ...Light Normal Heavy Note An asterisk next to a value indicates the factory default setting Copy Copy Defaults Menu item Description Content Type Text Text Photo Photo Graphics Improve the output result...

Page 75: ...eet of paper Print Page Borders Off On Place a border around each image when printing multiple pages on a single page Collate Off 1 1 1 2 2 2 On 1 2 1 2 1 2 Print multiple copies in sequence Copy from...

Page 76: ...e An asterisk next to a value indicates the factory default setting Advanced Imaging Menu item Description Color Dropout None Red Green Blue Default Red Threshold 0 255 128 Default Green Threshold 0 2...

Page 77: ...w edge to edge scanning of the original document Sharpness 1 5 3 Adjust the sharpness of a scanned image Note An asterisk next to a value indicates the factory default setting Admin Controls Menu item...

Page 78: ...rt is set to T 38 or G711 This menu item requires a line splitter and a telephone handset Use a regular telephone line to answer an incoming fax job and to dial a fax number To go directly to the Manu...

Page 79: ...ort is set to T 38 Enable Extension in Use Support Off On Determine whether a telephone line is used by another device such as another phone on the same line Notes This menu item is monitored continuo...

Page 80: ...oto Film Magazine Newspaper Press Other Improve the output result based on the source of the original document Darkness 1 9 5 Adjust the darkness of the scanned image Behind a PABX On Off Set the prin...

Page 81: ...If you want to remove the background color from the original document then set Background Detection to Content based If you want to remove image noise from a photo then set Background Detection to Fi...

Page 82: ...rors in the fax transmission process that are caused by telephone line noise and poor signal strength Enable Fax Scans On Off Fax documents that are scanned at the printer Driver to Fax On Off Allow t...

Page 83: ...per source for printing incoming fax Sides On Off Print on both sides of the paper Separator Sheets Off Before Job After Job Specify whether to insert blank separator sheets when printing Separator Sh...

Page 84: ...Add Banned Fax Specify the phone numbers that you want to block Answer On All Rings Single Ring Only Double Ring Only Triple Ring Only Single or Double Rings Only Single or Triple Rings Only Double o...

Page 85: ...forward received fax Con rmation E mail Send a con rmation e mail when fax forwarding is successful Note The e mail is sent only when forwarding to FTP or Network Share destinations Max Speed 33600 14...

Page 86: ...oter x Note An asterisk next to a value indicates the factory default setting Fax Log Settings Menu item Description Transmission Log Print log Do Not Print Log Print Only For Error Print a log for su...

Page 87: ...to a value indicates the factory default setting Speaker Settings Menu item Description Speaker Mode Always Off Always On On until Connected Set the fax speaker mode Speaker Volume Low High Adjust the...

Page 88: ...r backup SMTP server Secondary SMTP Gateway Port 1 65535 25 Enter the server port number of your secondary or backup SMTP server SMTP Timeout 5 30 30 Set the time before the printer times out if the S...

Page 89: ...o connect to the SMTP server Device Password Kerberos 5 REALM Specify the realm for the Kerberos 5 authentication protocol NTLM Domain Specify the domain name for the NTLM security protocol Disable SM...

Page 90: ...he original document Notes Mixed Sizes is the U S factory default setting A4 is the international factory default setting This setting may vary depending on your printer model Use Multi Page TIFF Off...

Page 91: ...rusted Certi cate Off On Require a trusted certi cate when accessing the SMTP server SMTP Server Authentication No authentication required Login Plain NTLM CRAM MD5 Digest MD5 Kerberos 5 Set the authe...

Page 92: ...efault setting E mail Defaults Menu item Description Subject Specify the e mail subject and message Message File Name Specify the le name for the scanned image Format PDF pdf TIFF tif JPEG jpg XPS xps...

Page 93: ...t Photo Photo Graphics Improve the output result based on the content of the original document Content Source Black and White Laser Color Laser Inkjet Photo Film Magazine Newspaper Press Other Improve...

Page 94: ...anning a two sided document Note An asterisk next to a value indicates the factory default setting Advanced Imaging Menu item Description Color Dropout Color Dropout None Red Green Blue Default Red Th...

Page 95: ...n to Content based If you want to remove image noise from a photo then set Background Detection to Fixed Mirror Image Off On Create a mirror image of the original document Negative Image Off On Create...

Page 96: ...le carbon copy and blind carbon copy in e mail Use Multi Page TIFF On Off Choose between single and multiple page TIFF les TIFF Compression LZW JPEG Set a compression option for TIFF les Text Default...

Page 97: ...as shortcuts Note When set to Off the Save As Shortcut button does not appear on the e mail Destination screen E mail Images Sent As Attachment Web Link Specify how to send the images in e mail Note...

Page 98: ...original document Content Source Black and White Laser Color Laser Inkjet Photo Film Magazine Newspaper Press Other Improve the output result based on the source of the original document Color Black a...

Page 99: ...scanned image Note An asterisk next to a value indicates the factory default setting Advanced Imaging Menu item Description Color Balance 4 to 4 0 Adjust the amount of toner used for each color in sca...

Page 100: ...Content based If you want to remove image noise from a photo then set Background Detection to Fixed Mirror Image Off On Create a mirror image of the original document Negative Image Off On Create a n...

Page 101: ...n transmission Log Paper Source Tray x 1 Multipurpose Feeder Specify the paper source for printing FTP logs FTP Bit Depth 1 bit 8 bit Enable the Text Photo mode to have smaller le sizes by using 1 bit...

Page 102: ...f On Set the PDF format for the scanned image Content Type Text Text Photo Graphics Photo Improve the output result based on the content of the original document Content Source Black and White Laser C...

Page 103: ...raphics on the page Original Size List of paper sizes Set the paper size of the original document Notes Letter is the U S factory default setting A4 is the international factory default setting These...

Page 104: ...Quality Best for content 5 95 Set the quality of a JPEG format image Notes 5 reduces the le size but lessens the image quality 90 provides the best image quality but produces a large le size Contrast...

Page 105: ...nned image Photo Default 5 95 75 Set the quality of a photo on a scanned image Use Multi Page TIFF On Off Choose between single and multiple page TIFF les TIFF Compression LZW JPEG Set the compression...

Page 106: ...atically offsets each printed information of the page to bind the job correctly Pages per Side Off 2 Up 3 Up 4 Up 6 Up 9 Up 12 Up 16 Up Print multiple page images on a sheet of paper Pages per Side Or...

Page 107: ...pter Auto Standard Network Wireless Choose the network connection that the printer connects to Network Status Show the connection status of the printer network Display Network Status on Printer Off On...

Page 108: ...d of time Start PIN Method connects the printer to a wireless network when a PIN on the printer is entered into the wireless settings of the access point Network Mode BSS Type Infrastructure Ad hoc Pr...

Page 109: ...hrough WPA2 Note This menu item appears only if the Wireless Security Mode is set to WPA2 WPA Personal or WPA2 Personal 802 1x Encryption Mode WPA WPA2 Enable wireless security through 802 1x standard...

Page 110: ...appears only when a hard disk is installed Mac Binary PS Auto On Set the printer to process Macintosh binary PostScript print jobs Note On processes raw binary PostScript print jobs Ethernet Menu item...

Page 111: ...ically to PS emulation when a print job requires it regardless of the default printer language Note If PS SmartSwitch is off then the printer does not examine incoming data and uses the default printe...

Page 112: ...gs WINS Address Specify a server address for Windows Internet Name Service WINS Enable BOOTP Off On Allow the BOOTP to assign a printer IP address Restricted Server List Specify an IP address for the...

Page 113: ...tting SNMP Note This menu appears only in network printers or printers that are attached to print servers Menu item Description SNMP Versions 1 and 2c Enabled Off On Allow SNMP Set Off On Enable PPM M...

Page 114: ...tting IPSec Note This menu appears only in network printers or printers that are attached to print servers Menu item Description Enable IPSec Off On Enable Internet Protocol Security IPSec Base Con gu...

Page 115: ...Base Con guration is set to Compatibility Pre Shared Key Authenticated Connections Host x Address Key Con gure the authenticated connections of the printer Note These menu items appear only when Enab...

Page 116: ...eturn Conversion Off On Enable carriage return conversion Note Carriage return is a mechanism that commands the printer to move the position of the cursor to the rst position on the same line Note An...

Page 117: ...On Print using ThinPrint Port Number 4000 4999 4000 Set the port number for the ThinPrint server Bandwidth bits sec 0 100 1000000 Set the speed to transmit data in a ThinPrint environment Packet Size...

Page 118: ...he standard USB port Note An asterisk next to a value indicates the factory default setting Google Cloud Print Menu item Description Registration Register Register the printer to the Google Cloud serv...

Page 119: ...pting clients automatically is not secured Note An asterisk next to a value indicates the factory default setting Security Login Methods Manage Permissions Menu item Description Function Access Access...

Page 120: ...erator Panel Lock Import Export All Settings Out of Service Erase Control access to the printer management options Apps New Apps Slideshow Change Wallpaper Screen Saver Card Copy Scan Center Scan Cent...

Page 121: ...ontrol group or user access to the printer functions applications and security settings Add User User Name Password User Name Password PIN Create local accounts to manage access to the printer functio...

Page 122: ...tem 3 System Daemons 4 Security Authorization Messages 5 Messages Generated Internally by Syslogs 6 Line Printer Subsystem 7 Network News Subsystem 8 UUCP Subsystem 9 Clock Daemon 10 Security Authoriz...

Page 123: ...hen a log entry is deleted E maiL Log Wrapped Alert Off On Send e mail noti cation to the administrator when the log becomes full and begins to overwrite the oldest entries Log Full Behavior Wrap Over...

Page 124: ...login attempts before the user gets locked out Lockout time 1 60 minutes 5 Specify the lockout duration Web Login Timeout 1 120 minutes 10 Specify the delay for a remote login before the user is logg...

Page 125: ...Hours 24 Hours 1 Week Set the expiration time that the printer prints a copy for the user to examine its quality before printing the remaining copies Reserve Job Expiration Off 1 Hour 4 Hours 24 Hour...

Page 126: ...nter hard disk Note An asterisk next to a value indicates the factory default setting Solutions LDAP Settings Use To Follow LDAP Referrals Off On Search the different servers in the domain for the log...

Page 127: ...uration Minimum Password Length 0 32 0 Specify the minimum characters allowed for a password Show Log Out Con rmation Off On Show or hide the logout con rmation prompt Note An asterisk next to a value...

Page 128: ...100 attempted received and blocked calls Note This menu item appears only when Enable Job Log is set to On Network Menu item Description Network Setup Page Print a page that shows the con gured netwo...

Page 129: ...Quality Guide Provides information about mono print quality settings Moving Guide Provides information about moving locating or shipping the printer Print Quality Guide Provides information about solv...

Page 130: ...mbedded solutions do the following 1 From the home screen touch Settings Device Maintenance Out of Service Erase 2 Select the Sanitize all information on nonvolatile memory check box and then touch ER...

Page 131: ...etwork settings and user data Type of memory Description Volatile memory Your printer uses standard random access memory RAM to temporarily buffer user data during simple print jobs Non volatile memor...

Page 132: ...or its hard disk is removed from your premises Degaussing Flushes the hard disk with a magnetic eld that erases stored data Crushing Physically compresses the hard disk to break component parts and re...

Page 133: ...ur printer and working properly For more information see the instruction sheet that came with the adapter The wireless network adapter is standard in some printer models Make sure that your access poi...

Page 134: ...the printer to a wireless network using Wi Fi Protected Setup WPS Before you begin make sure that The access point wireless router is WPS certi ed or WPS compatible For more information see the docum...

Page 135: ...the printer and then unplug the power cord from the electrical outlet 2 Remove paper from the standard bin and multipurpose feeder 3 Remove any dust lint and pieces of paper around the printer using...

Page 136: ...Cleaning the scanner 1 Open the scanner cover 2 Using a damp soft lint free cloth wipe the following areas ADF glass ADF glass pad Maintaining the printer 136...

Page 137: ...Scanner glass Scanner glass pad 3 Close the scanner cover 4 Open the ADF cover 5 Using a damp soft lint free cloth wipe the following areas ADF glass pad in the ADF cover Maintaining the printer 137...

Page 138: ...t covered by the warranty All life indicators are designed to function with KONICA MINOLTA supplies and parts and may deliver unpredictable results if third party supplies and parts are used Imaging c...

Page 139: ...n The IP address appears as four sets of numbers separated by periods such as 123 123 123 123 If you are using a proxy server then temporarily disable it to load the web page correctly 2 Click Setting...

Page 140: ...d toner cartridge 3 Unpack the new toner cartridge and then shake it three times to redistribute the toner 4 Insert the new toner cartridge Note Use the arrows inside the printer as guides Maintaining...

Page 141: ...idge according to your local regulations Do not burn the cartridge CAUTION POTENTIAL INJURY If you get toner in your eyes wash it out immediately with cool water and consult a doctor Replacing the ima...

Page 142: ...ack the new imaging unit and then shake it three times to redistribute the toner Warning Potential Damage Do not expose the imaging unit to direct light for more than 10 minutes Extended exposure to l...

Page 143: ...ductor drum Doing so may affect the quality of future print jobs 5 Insert the new imaging unit Note Use the arrows inside the printer as guides 6 Insert the toner cartridge Note Use the arrows inside...

Page 144: ...imaging unit according to your local regulations Do not burn the imaging unit Replacing the pick tires 1 Turn off the printer 2 Unplug the power cord from the electrical outlet and then from the print...

Page 145: ...4 Remove the used pick tires one after the other 5 Unpack the new pick tires Maintaining the printer 145...

Page 146: ...and properly grounded electrical outlet that is near the product and easily accessible 9 Turn on the printer Replacing the pick roller assembly 1 Turn off the printer 2 Unplug the power cord from the...

Page 147: ...Maintaining the printer 147...

Page 148: ...4 Remove the tray insert and then ip the tray base 5 Remove the used pick roller assembly 6 Unpack the new pick roller assembly Maintaining the printer 148...

Page 149: ...7 Insert the new pick roller assembly 8 Flip the tray base and then insert the tray insert Maintaining the printer 149...

Page 150: ...provided with this product or the manufacturer s authorized replacement CAUTION POTENTIAL INJURY When moving the printer follow these guidelines to avoid personal injury or printer damage Make sure th...

Page 151: ...the printer Saving energy and paper Con guring the power save mode settings Eco Mode 1 From the home screen touch Settings Device Power Management Eco Mode 2 Select a setting Sleep mode 1 From the ho...

Page 152: ...g is the default setting in the print driver Print multiple pages on a single sheet of paper Use the preview feature to see how the document looks like before printing it Print one copy of the documen...

Page 153: ...stack height is below the maximum paper ll indicator Do not slide paper into the tray Load paper as shown in the illustration Make sure that the paper guides are positioned correctly and are not pres...

Page 154: ...er according to manufacturer recommendations Identifying jam locations Notes When Jam Assist is set to On the printer automatically ushes blank pages or partially printed pages with after a jammed pag...

Page 155: ...Paper jam in the front door 1 Remove the tray 2 Open the front door Clearing jams 155...

Page 156: ...Damage Do not expose the imaging unit to direct light for more than 10 minutes Extended exposure to light may cause print quality problems Warning Potential Damage Do not touch the photoconductor dru...

Page 157: ...5 Remove the jammed paper Note Make sure that all paper fragments are removed 6 Insert the imaging unit Note Use the arrows inside the printer as guides Clearing jams 157...

Page 158: ...s guides 8 Close the front door 9 Insert the tray Paper jam in the rear door 1 Open the rear door CAUTION HOT SURFACE The inside of the printer might be hot To reduce the risk of injury from a hot com...

Page 159: ...jammed paper Note Make sure that all paper fragments are removed 3 Close the rear door Paper jam in the standard bin Remove the jammed paper Note Make sure that all paper fragments are removed Cleari...

Page 160: ...Paper jam in the duplex unit 1 Remove the tray 2 Remove the jammed paper Note Make sure that all paper fragments are removed 3 Insert the tray Clearing jams 160...

Page 161: ...d paper Note Make sure that all paper fragments are removed 3 Insert the tray Paper jam in the multipurpose feeder 1 Remove paper from the multipurpose feeder 2 Remove the jammed paper Note Make sure...

Page 162: ...Reload paper and then adjust the paper guide Paper jam in the automatic document feeder 1 Remove all original documents from the ADF tray 2 Open the ADF cover 3 Remove the jammed paper Note Make sure...

Page 163: ...4 Close the ADF cover Clearing jams 163...

Page 164: ...ngs page and then nding the TCP IP section Note An IP address appears as four sets of numbers separated by periods such as 123 123 123 123 Is the printer IP address correct Go to step 3 Type the corre...

Page 165: ...see Supported ash drives and le types on page 28 Is the ash drive supported Go to step 3 Insert a supported ash drive Step 3 a Check if the USB port is enabled For more information see Enabling the U...

Page 166: ...s installed in the appropriate connector in the controller board c Connect the power cord to the electrical outlet and then turn on the printer CAUTION POTENTIAL INJURY To avoid the risk of re or elec...

Page 167: ...e pages collated correctly The problem is solved Go to step 2 Step 2 a From the document that you are trying to print open the Print dialog and then select Collate b Print the document Are the pages c...

Page 168: ...tioned correctly Make sure that the stack height is below the maximum paper ll indicator Make sure to print on recommended paper size and type c Insert the tray d Print the document Do paper jams stil...

Page 169: ...s No Step 1 a From the control panel check if the documents appear in the Held Jobs list Note If the documents are not listed then print the documents using the Print and Hold options b Print the docu...

Page 170: ...he job individually Are the documents printed The problem is solved Go to step 4 Step 4 a Delete some held jobs to free up printer memory b Resend the print job Are the documents printed The problem i...

Page 171: ...ption or other network device b Print the document Is the printer still printing slow Go to step 5 The problem is solved Step 5 a From the Quality menu on the control panel set Print Resolution to 600...

Page 172: ...o to step 3 Step 3 a Check if the ports are working and if the cables are securely connected to the computer and the printer For more information see the setup documentation that came with the printer...

Page 173: ...s left on the imaging unit 1 Remove the toner cartridge and then remove the imaging unit Warning Potential Damage Do not expose the imaging unit to direct light for more than 10 minutes Extended expos...

Page 174: ...g Print Quality Test Pages For non touch screen printer models press to navigate through the settings Action Yes No Step 1 a Check if the printer is using a genuine and supported toner cartridge Note...

Page 175: ...oad paper from a fresh package Note Paper absorbs moisture due to high humidity Store paper in its original wrapper until you are ready to use it b Print the document Is the print dark Go to step 7 Th...

Page 176: ...rted toner cartridge Note If the cartridge is not supported then install a supported one b Print the document Are ne lines not printed correctly Go to step 2 The problem is solved Step 2 a Adjust the...

Page 177: ...umidity Store paper in its original wrapper until you are ready to use it b Print the document Is the paper folded or wrinkled Go to step 3 The problem is solved Step 3 a Depending on your operating s...

Page 178: ...es gray background appear on prints Go to step 3 The problem is solved Step 3 a Depending on your operating system specify the paper type from the Printing Preferences or Print dialog Notes Make sure...

Page 179: ...ke sure to remove any obstruction between the charge roller and photoconductor drum c Insert the imaging unit d Print the document Does gray background appear on prints Go to step 6 The problem is sol...

Page 180: ...p 1 a Adjust the paper guides to the correct position for the paper loaded b Print the document Are the margins correct The problem is solved Go to step 2 Step 2 a Depending on your operating system s...

Page 181: ...the print light Go to step 2 The problem is solved Step 2 a Turn off the printer wait for about 10 seconds and then turn on the printer b Increase toner darkness From the control panel navigate to Se...

Page 182: ...back into place c If the transfer roller does not depress and bounce back into place then insert it by pulling up the blue gear and pulling it out from the right side to the left d Firmly shake the i...

Page 183: ...s using a genuine and supported toner cartridge Note If the toner cartridge is not supported then install a supported one b Print the document Is the print mottled Go to step 2 The problem is solved S...

Page 184: ...ges For non touch screen printer models press to navigate through the settings Action Yes No Step 1 a Check if the printer is using a genuine and supported toner cartridge Note If the cartridge is not...

Page 185: ...Load paper from a fresh package Note Paper absorbs moisture due to high humidity Store paper in its original wrapper until you are ready to use it b Print the document Is the paper curled Go to step 6...

Page 186: ...the document Is the print crooked or skewed Contact customer support The problem is solved Repeating defects Note Before solving the problem print the Print Quality Test Pages From the control panel...

Page 187: ...supported toner cartridge Note If the toner cartridge is not supported then install a supported one b Print the document Is the printer printing solid black pages Go to step 2 The problem is solved St...

Page 188: ...toconductor drum c Insert the imaging unit d Print the document Is the printer printing solid black pages Go to step 4 The problem is solved Step 4 Check the imaging unit for signs of damage Is the im...

Page 189: ...ument Are text or images cut off Go to step 3 The problem is solved Step 3 a Remove the imaging unit Warning Potential Damage Do not expose the imaging unit to direct light for more than 10 minutes Ex...

Page 190: ...ridge Note If the toner cartridge is not supported then install a supported one b Print the document Does the toner easily rub off Go to step 2 The problem is solved Step 2 a Depending on your operati...

Page 191: ...Warning Potential Damage Do not touch the photoconductor drum under the imaging unit Doing so may affect the quality of future print jobs b Insert the imaging unit and then insert the cartridge c Pri...

Page 192: ...ark lines or streaks appear on prints Go to step 3 Go to step 2 Step 2 a Using a damp soft lint free cloth clean the scanner For more information see Cleaning the scanner on page 136 b Copy the docume...

Page 193: ...jobs b Print the document Do vertical dark lines or streaks appear on prints Go to step 5 The problem is solved Step 5 a Replace the imaging unit b Print the document Do vertical dark lines or streaks...

Page 194: ...c Insert the imaging unit d Print the document Do vertical dark streaks with missing images appear on prints Go to step 2 The problem is solved Step 2 a Check if the printer is using a genuine and su...

Page 195: ...models press to navigate through the settings Action Yes No Step 1 a Check if the printer is using a genuine and supported toner cartridge Note If the cartridge is not supported then install a support...

Page 196: ...ep 4 Turn on the printer Step 4 Check if the printer is in sleep or hibernate mode Is the printer in sleep or hibernate mode Press the power button to wake the printer Go to step 5 Step 5 Check if the...

Page 197: ...paper Go to step 2 Load the correct paper size and paper type Step 2 a Depending on your operating system specify the paper size and paper type from the Printing Preferences or Print dialog Notes Make...

Page 198: ...heck if it is working properly If you are using the On Hook Dial feature then turn up the volume to check if you hear a dial tone Can you hear a dial tone Go to step 5 Go to step 4 Step 4 Check the te...

Page 199: ...an analog connection on the PBX If none exists then consider installing an analog telephone line for the fax machine Can you send or receive a fax The problem is solved Go to step 6 Step 6 Temporarily...

Page 200: ...ion Yes No Step 1 Make sure that the paper source is not empty Can you receive faxes The problem is solved Go to step 2 Step 2 Check the ring count delay settings From the control panel navigate to Se...

Page 201: ...Is the fax print quality satisfactory The problem is solved Contact customer support Scanning problems Cannot scan from a computer Action Yes No Step 1 a Turn off the printer wait for about 10 second...

Page 202: ...port Poor copy quality Action Yes No Step 1 a Using a damp soft lint free cloth wipe the scanner glass and the ADF glass b Make sure that the document or photo is loaded facedown on the upper left cor...

Page 203: ...eck the cable connections a Make sure that the Ethernet or USB cable is securely connected to the computer and the printer b Resend the scan job Is the scan job successful The problem is solved Go to...

Page 204: ...t appear on the display c Copy or scan the document Is the scanner responding The problem is solved Go to step 2 Step 2 a Check if the power cord is connected properly to the printer and the electrica...

Page 205: ...ion Scanner Manual Registration 2 In the Print Quick Test menu touch Start 3 Place the Print Quick Test page on the ADF tray 4 Touch Front ADF Registration or Rear ADF Registration Notes To align Fron...

Page 206: ...the power cord from the electrical outlet before continuing If you have any other devices attached to the printer then turn them off as well and unplug any cables going into the printer 1 Turn off the...

Page 207: ...r off and unplug the power cord from the electrical outlet before continuing If you have any other devices attached to the printer then turn them off as well and unplug any cables going into the print...

Page 208: ...e card 5 Push the card rmly into place Note The entire length of the connector on the card must touch and be ush against the controller board Warning Potential Damage Improper installation of the card...

Page 209: ...the printer off and unplug the power cord from the electrical outlet before continuing If you have any other devices attached to the printer then turn them off as well and unplug any cables going into...

Page 210: ...the printer Installing optional trays CAUTION SHOCK HAZARD To avoid the risk of electrical shock if you are accessing the controller board or installing optional hardware or memory devices sometime af...

Page 211: ...r and then to the electrical outlet CAUTION POTENTIAL INJURY To avoid the risk of re or electrical shock connect the power cord to an appropriately rated and properly grounded electrical outlet that i...

Page 212: ...r Install and then follow the instructions on the computer screen Note Obtain the printer IP address from the TCP IP section in the Network Ports menu For Macintosh users 1 Insert the Drivers CD in th...

Page 213: ...12 From the Name list select the desired printer for a Bonjour connection The printer driver for the selected printer is displayed in Use When the printer driver is displayed go to Step 14 When the p...

Page 214: ...ew the printer IP address on the printer home screen The IP address appears as four sets of numbers separated by periods such as 123 123 123 123 If you are using a proxy server then temporarily disabl...

Page 215: ...Inc in the United States and other countries Unauthorized use is strictly prohibited PCL is a registered trademark of the Hewlett Packard Company PCL is Hewlett Packard Company s designation of a set...

Page 216: ...e Software 3 RESTRICTIONS 1 You shall not without the written consent of KONICA MINOLTA i use copy modify merge or transfer copies of the Software except as provided herein ii reverse engineer reverse...

Page 217: ...7202 4 June 1995 all U S Government End Users shall acquire the Software with only those rights set forth herein YOU ACKNOWLEDGE THAT YOU HAVE READ THIS AGREEMENT UNDERSTAND IT AND AGREE TO BE BOUND B...

Page 218: ...all be deemed third party bene ciaries of this License MICROSOFT CORPORATION NOTICES 1 This product may incorporate intellectual property owned by Microsoft Corporation The terms and conditions upon w...

Page 219: ...eding 0 1 by weight and 0 01 by weight for cadmium except for the exemption set in Schedule II of the Rules Product disposal Do not dispose of the printer or supplies in the same manner as normal hous...

Page 220: ...ode This product is designed with an energy saving mode called Sleep Mode The Sleep Mode saves energy by lowering power consumption during extended periods of inactivity The Sleep Mode is automaticall...

Page 221: ...iminatory terms in the Intellectual Property Rights IPR Disclosure of Certicom Corp at the IETF for TLS Suite B Pro le for Transport Layer Security TLS implemented in the product or service The use of...

Page 222: ...h Button method 134 conserving supplies 152 contacting customer support 205 contacts adding 17 deleting 18 editing 17 control panel using 13 controller board accessing 206 copy troubleshooting partial...

Page 223: ...using the control panel 51 G Google Cloud Print using 26 groups adding 17 deleting 18 editing 17 H hardware options trays 210 held jobs 29 Help menu 0 Hibernate mode con guring 151 holding faxes 50 ho...

Page 224: ...ving the printer 9 150 multipurpose feeder loading 21 N Network Setup Page printing 14 network setup page printing 165 noise emission levels 218 non volatile memory 131 erasing 130 notices 218 219 220...

Page 225: ...settings page 14 printing a network setup page 165 printing from a computer 26 printing from a ash drive 27 Push Button method 134 Q Quality menu 65 R reducing copies 32 repeat print jobs 29 replacing...

Page 226: ...kled paper 176 gray background on prints 177 horizontal light bands 179 light print 181 mottled print and dots 183 paper curl 184 repeating defects 186 solid black pages 187 text or images cut off 188...

Page 227: ...tatement of 131 W white lines 195 white pages 173 Wireless menu 108 wireless network con guration information 133 Wi Fi Protected Setup 134 Wi Fi Protected Setup wireless network 134 wrinkled paper 17...

Reviews: