

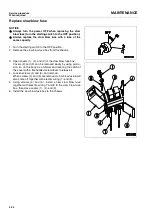

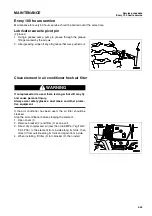


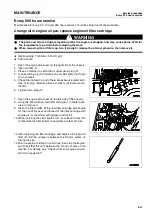

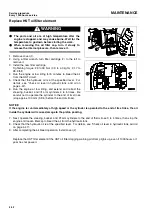


Service procedure
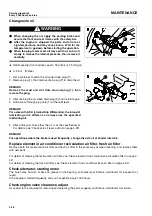
MAINTENANCE
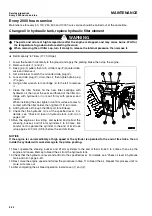
Every 250 hours service
4-42
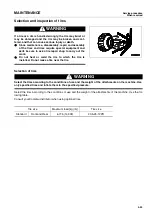
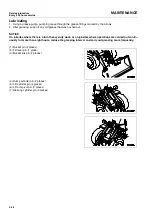
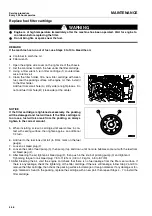
WHEN IT IS IMPOSSIBLE TO CHECK ELECTROLYTE LEVEL FROM SIDE OF BATTERY
0.
If it is impossible to check the electrolyte level from the side of the battery, or there is no display of the UPPER
LEVEL line on the side of the battery, check as follows.
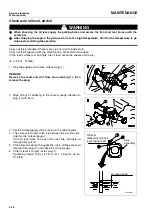
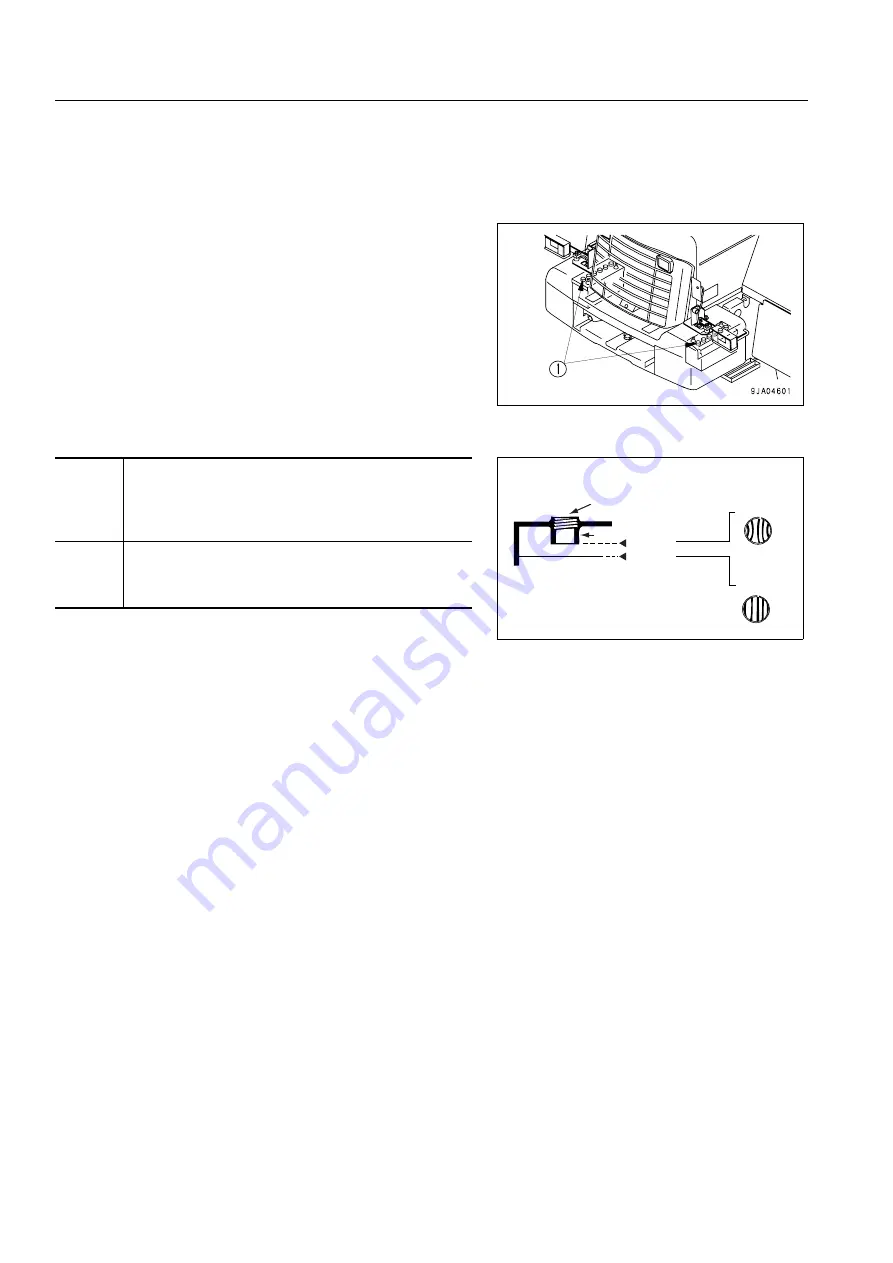
1. Open the cover of the battery box.
There are two battery boxes: One on each side at the rear of the machine.
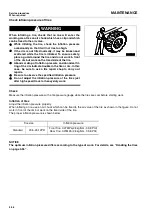
2. Remove cap (1) at the top of the battery, look through the
water filler port, and check the electrolyte surface. If the
electrolyte does not reach the sleeve, add distilled water so
that the level reaches the bottom of the sleeve (UPPER
LEVEL line) without fail.
3. If distilled water has been added to any cell of cap (1), add
distilled water also to the other cells.
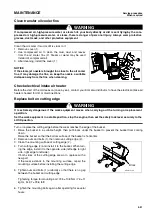
Use the diagram below for reference, and check if the electrolyte reaches the bottom of the sleeve.
4. After adding distilled water, tighten cap (1) securely.
REMARK
If distilled water is added to above the bottom of the sleeve, use a syringe to lower the level to the bottom
of the sleeve. Neutralize the removed fluid with baking soda (sodium bicarbonate), then flush it away with
a large amount of water or consult your Komatsu distributor or battery maker.
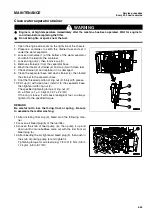
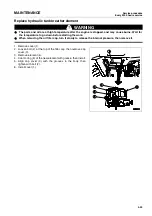
When it is possible to use indicator to check electrolyte level
0.
If it is possible to use and indicator to check the electrolyte level, follow the instructions given.
A
B
Filler port
Sleeve
Upper
Lower
A
Correct level
The electrolyte level is up to the bottom of the
sleeve, so the surface tension causes the surface
to rise and the plate appears to be warped.
B
Too low (level)
The electrolyte level is not up to the bottom of the
sleeve, so the plate appears to be normal.
Summary of Contents for WA250PT-5H
Page 2: ......
Page 3: ...FOREWORD 11...
Page 16: ...Contents FOREWORD 1 14...
Page 24: ...SAFETY 2 2...
Page 58: ...Precautions with tires SAFETY Precautions when storing tires 2 36...
Page 60: ...OPERATION 3 2...
Page 233: ...TECHNICAL DATA 45...
Page 235: ...TECHNICAL DATA Technical data 5 3...
Page 250: ...Central lubrication system ATTACHMENTS OPTIONS 6 14...
Page 251: ...INDEX 67...
Page 252: ...INDEX 7 2...
Page 255: ...Index 7 5...


