-17-
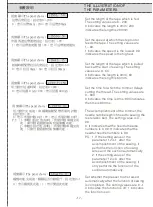
參數說明
THE ILLUSTRATION OF
THE PARAMETERS
1 INS L 50
2 INS Sp 50
3 Back L 15
4 CUT Ti 150
5 CUT St 10
視窗顯示/
The panel shows
:
送帶長度設定,設定值0~200。
0:表示送帶0mm;200:表示送帶200mm。
步進馬達送帶速度設定,設定值1~99。
1:表示送帶速度最慢;99: 表示送帶速度最快。
起縫時鬆緊帶拉回長度設定,設定值0~60。
0:表示拉回 0mm;60:表示拉回 60mm。
切刀動作延遲時間,設定值0~800。
0:表示延遲 0 mS;
80
0:表示延遲 800 mS。
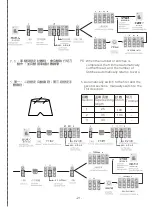
視窗顯示/
The panel shows
:
視窗顯示/
The panel shows
:
視窗顯示/
The panel shows
:
視窗顯示/
The panel shows
:
Set the length of the tape which is fed.
The setting values are 0~200.
0 indicates the length is 0mm; 200
indicates the length is 200mm.
Set the speed at which the step motor
feeds the tape. The setting values are
1~99.
1 indicates the speed is the lowest; 99
indicates the speed is the highest.
Set the length of the tape which is pulled
back at the start of sewing. The setting
values are 0~60.
0 indicates the length is 0mm; 60
indicates the length is 60mm.
Set the time for which the trimmer delays
cutting the thread. The setting values are
0~800.
0 indicates the time is 0 ms; 800 indicates
the time is 800 ms.
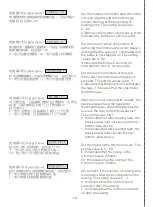
The accomplishment of the trimmer, the
needle numbers which need to sewing the
rest elastic belt. The setting value is 0 ~
99.
0: It indicates that the needful needle
numbers is 0. 99: It indicates that the
needful needle numbers is 99.
P.S.: 1. If the setting value of the
parameter 12 is 1, after the
accomplishment of the sewing, it
performs the function of loosing
wires and the suction automatically.
2. If the setting value of the
parameter 12 is 0, after the
accomplishment of the sewing, it
only performs the function of the
suction automatically.
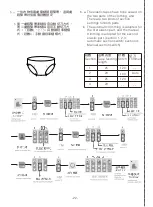
切刀動作完成後,車縫剩餘鬆緊帶所需的針數。
設定值0~99。
0:表示所需針數 0針;99:表示所需針數 99針。
P.S.:1. 參數12設定值為1時,所需針數車縫完成
後,會自動啟動鬆線與吸風集塵功能。
2. 參數12設定值為0時,所需針數車縫完成
後,只會自動啟動吸風集塵功能。
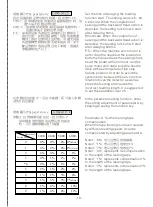
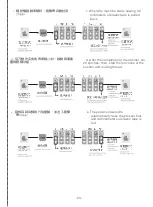
6 Foot Up 0
縫製功能完成後,壓腳是否自動提升。設定值0~1。
0:表示關閉此功能;1:表示開啟此功能。
視窗顯示/
The panel shows
:
Set whether the presser foot is raised
automatically after the function of sewing
is completed. The setting values are 0~1.
0 indicates the function is off; 1 indicates
the function is on.
Summary of Contents for Siruba LF-D6
Page 1: ...LF D6 使用說明書與零件圖 INSTRUCTION BOOK PARTS LIST ...
Page 2: ......
Page 14: ... 10 接管圖 WIRINGDIAGRAM ...
Page 33: ... 29 ...
Page 34: ... 30 ...
Page 35: ... 31 ...
Page 36: ... 32 ...
Page 37: ... 33 ...
Page 38: ... 34 ...
Page 39: ... 35 桌板圖 TABLE CUT OUT OF 747S T5 ...
Page 40: ......
Page 41: ......


