LX-D1010G
(PA012) 4-9
◎
About the Lamp-on Tool
Use the Lamp-on Tool when adjust or check the Optical Ass’y
without the Main PWB Ass’y.
This tool will be needed mainly when remove the dust on the
LCD Block.
Operation
(1) Perform (1), (3)-(5) and (7) of 4.4. Removing the (Main
PWB, Video PWB, Inlet Switch PWB and Terminal Board)
Ass'y.
(2) Disconnect all cables from the Main PWB Ass’y.
(3) Perform (4) of 4.5. Removing the Main PWB Ass'y, Video
PWB Ass'y, Inlet Switch PWB Ass'y and Terminal Board.
(4) Connect all cables to the Lamp-on Tool.
(5) Connect the AC Power Cord and then turn on the Power
Switch.
(6) Turn on the switches in the order of POWER-ON,
FAN-ON and LAMP-ON.
(7) The lamp turn on and then adjust or check.
(8) After finishing the work, turn off the switch of LAMP-ON.
(9) Wait for 2 minutes after lamp off and then turn off the
switches in the order of FAN-ON and POWER-ON.
(10) Turn off the Power Switch and then disconnect the AC
Power Cord.
(11) Remove the Lamp-on Tool and then put back the Main
PWB Ass’y and the Top Case Ass’y.
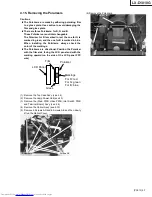
LAMP-ON
POWER-ON
FAN-ON
SF
SD
SA
SY
SW
SX
Summary of Contents for LX-D1010G - Lcd Projector
Page 32: ...LX D1010G 4 10 PA012 Memo ...
Page 36: ...LX D1010G 6 2 PA012 Memo ...
Page 67: ... PA012 15 1 LX D1010G 15 BLOCK DIAGRAMS ...
Page 68: ... PA012 15 2 LX D1010G ...
Page 69: ...LX D1010G PA012 15 3 ...
Page 70: ...LX D1010G PA012 16 1 ...
Page 77: ...LX D1010G PA012 Parts 7 Memo ...
Page 81: ...しろページ ...


