


10
5.
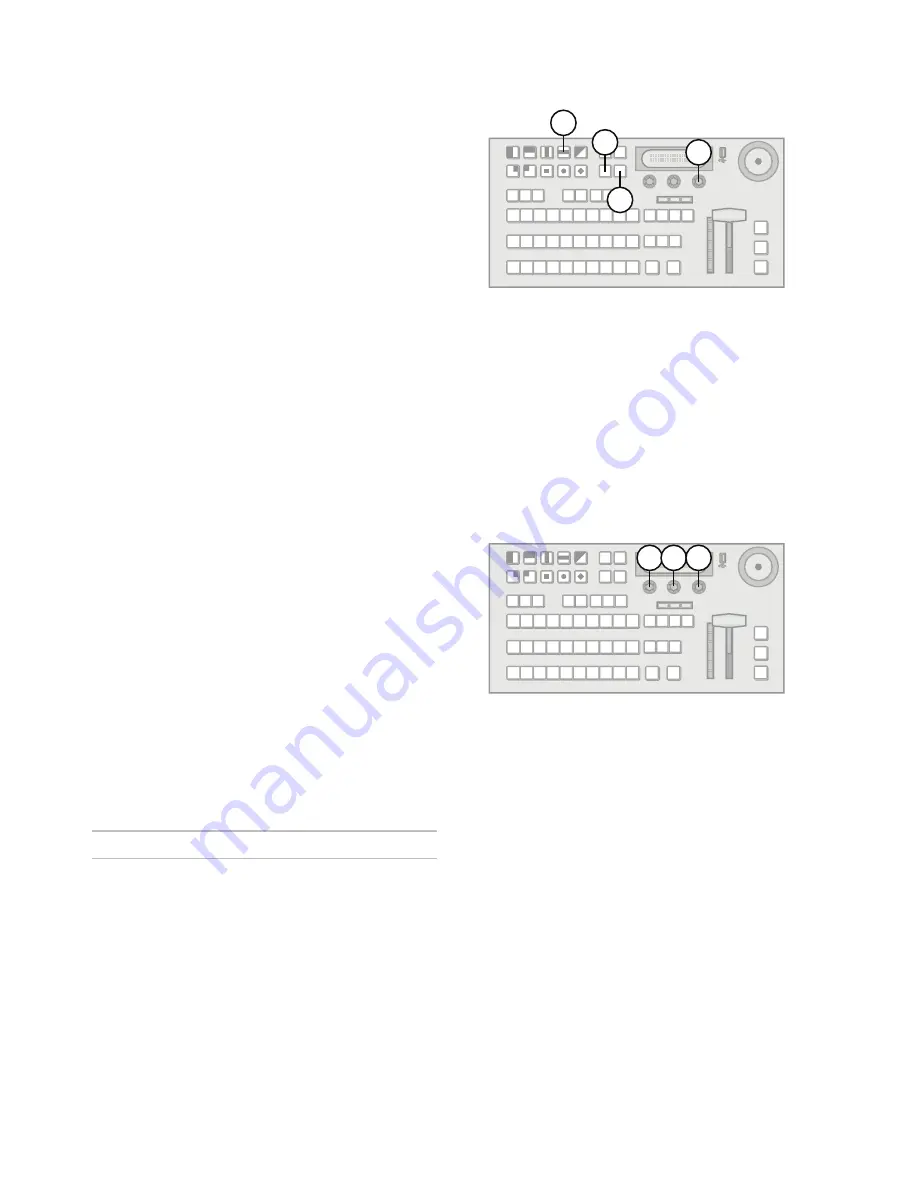
Use the
Frming
knob to set the aspect ratio
conversion mode. You can choose from the
following:
•
Full
— The video signal is scaled
disproportionately to fill the display of the new
aspect ratio. Aspect distortion occurs as the
image is stretched/compressed to fit in the
new aspect ratio.
•
Zoom
— The central portion of the video
signal is zoomed to fill the display of the new
video format. No aspect distortion is
introduced.
•
LttrBx
— Black bars are added to the top and
bottom of a 16:9 image to display correctly in a
4:3 video format.
•
PllrBx
— Black bars are added to the right
and left of a 4:3 image to display correctly in a
16:9 video format.
6.
Press
NEXT
.
7.
Press the
Fcfs1-4
knob to save your changes.
8.
Press the
Confrm
knob to commit the change
and exit the
FCFS
menu. Press the
Cancel
knob
to return to the
FCFS
menu for further editing.
Note:
• If one FCFS channel in a bus-pair is turned off, the
paired FCFS channel is also turned off.
• The switcher is set to switch on the first field when
using Bus mode.
• If a video format not compatible with the currently
defined conversion is used, the video image is
frozen with the last successfully processed image
frame.
For More Information on...
• switch on Field/Frame settings, refer to the section
“Field Switch Selection” on page 19.
• assigning an FCFS channel, refer to the procedure
“To assign an FCFS channel:” on page 8.
• switcher video formats, refer to the section
“Switcher Video Format” on page 7.
Output Reference Sync
The switcher has three reference outputs that can be
configured independently.
Setting the Output Reference Sync
If you are using one of the output references to time
external devices, ensure that they are connected to
the appropriate
REF OUT 1
,
REF OUT 2
, or
REF
OUT 3
outputs.
Different applications require different output
reference formats and delay settings. Consult a
facility engineer for assistance in configuring these
settings.
To set the output reference sync:
1.
Press
MENU
.
2.
Press the
REF
Wipe Pattern button.
3.
Press
NEXT
until
OSync
is displayed.
4.
Use the
OSync
knob to select the reference
output you wish to configure. You can choose
from the following:
•
OSync 1
— Configure reference output 1.
•
OSync 2
— Configure reference output 2.
•
OSync 3
— Configure reference output 3.
5.
Press the
OSync
knob to display the
Output
Sync
menu.
6.
Use the
OSync1-3
knob to set the output
reference format. You can choose from the
following:
•
NTSC/PAL
— Reference format is set to
standard definition.
•
720p
— Reference format is set to 720p.
•
1080i
— Reference format is set to 1080i.
•
Off
— No output reference signal is
generated.
7.
Use the
Mode
knob to configure the different
delay settings for the selected output reference
formats. You can choose from the following:
•
V
— Configure vertical delay (lines).
•
H
— Configure horizontal delay (pixels).
•
F
— Configure frame delay (frames)
(NTSC/PAL output reference format only).
8.
Use the
Value
knob to set the selected delay
value.
9.
Press the left knob to save your changes.
4
2
3
1
6
7
8


