o
Setting Input Channel to “INT” for Both [CH1] and
[CH2]
1
Set the [CH1 AUTO/MANUAL] selection
switch to “MANUAL”.
2
Turn the [CH1] recording level adjustment
knob to adjust the level.
When the built-in microphone and the [AUX]
input terminal are used, the recording levels of
[CH1] and [CH2] are interlocked.
This is also effective when the [CH1 AUTO/
MANUAL] selection switch is set to [CH2].
Memo :
0
Select [Limiter], [AGC Response], [AGC Mode],
or [Int. Mic Separation] in the menu to set the
recording audio.
0
If [Limiter] is set to other than “Off”, the limiter
operates according to the value set.
0
For the reference level to be recorded to an SD
card, set [Main Menu]
B
[A/V Set]
B
[Audio
Set]
B
[Ref. Level] to “-20dB”, “-18dB”, or
“-12dB”. (common for CH1/CH2)
0
The operations of the [CH2] recording level
adjustment knob and [CH2 AUTO/MANUAL]
selection switch are disabled.
Automatic Adjustment Mode
0
Set the [CH1/CH2 AUTO/MANUAL] selection
switch to “AUTO” or the [FULL AUTO] switch to
“ON” to enter Automatic Adjustment mode. The
audio recording level is set automatically
according to the input level.
0
When the [FULL AUTO] switch is set to “ON”,
mode switching with the [CH1/CH2 AUTO/
MANUAL] selection switch is disabled.
Memo :
0
When [Main Menu]
B
[A/V Set]
B
[Audio Set]
B
[Limiter] is set to “Off” while in the automatic
adjustment mode, the limiter operates at -5
dBFS.
0
If [Limiter] is set to other than “Off”, the limiter
operates according to the value set.
0
When [A/V Set]
B
[Audio Set]
B
[Audio On FULL
AUTO] is set to “SW Set”, you can switch the
audio recording mode with the [CH1/CH2
AUTO/MANUAL] selection switch on the
camera recorder even if the [FULL AUTO]
switch is set to “ON”.
Monitoring Audio Sound
During Recording Using a
Headphone
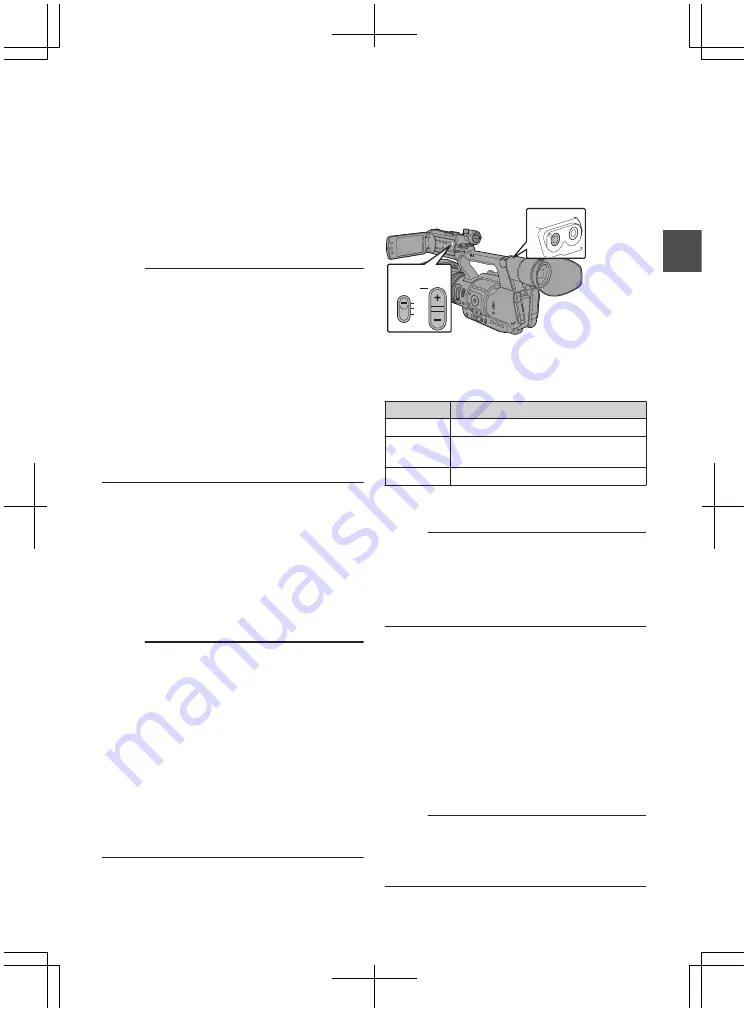
You can check the recorded audio using
headphone.
.
AUX
MONITOR
CH1
BOTH
CH2
3
1
2
1
Connect the headphone.
2
Select the channel to monitor with the
[MONITOR] selection switch.
Setting
Description
[CH1]
Outputs the audio recorded in [CH1].
[BOTH]
Outputs the audio recorded in
[CH1/CH2].
[CH2]
Outputs the audio recorded in [CH2].
3
Use the [M/-] button to adjust the
monitor volume.
Memo :
0
Audio during recording is not output from the
monitor speaker.
0
Warning tone is output when there is an
abnormality in the camera recorder or when the
battery is low.
Selecting Audio Output Method When the
[MONITOR] Selection Switch Is Set to “BOTH”
When a stereo type earphone jack is connected,
perform the following setting to output stereo
sound.
1
Set the [MONITOR] selection switch to
“BOTH”.
2
Set [Main Menu]
B
[A/V Set]
B
[Audio Set]
B
[Monitor] to “Stereo”.
Memo :
0
You can set the volume of the warning tone in
[Main Menu]
B
[A/V Set]
B
[Audio Set]
B
[Alarm
Level]. (“Off”/“Low”/“Middle”/“High”)
63
Sh
ooting
Summary of Contents for GY-HM600E
Page 146: ...146 ...
Page 147: ...147 ...
Page 148: ... GY HM600U GY HM600E HD MEMORY CARD CAMERA RECORDER 2014 JVC KENWOOD Corporation LST1424 001E ...


