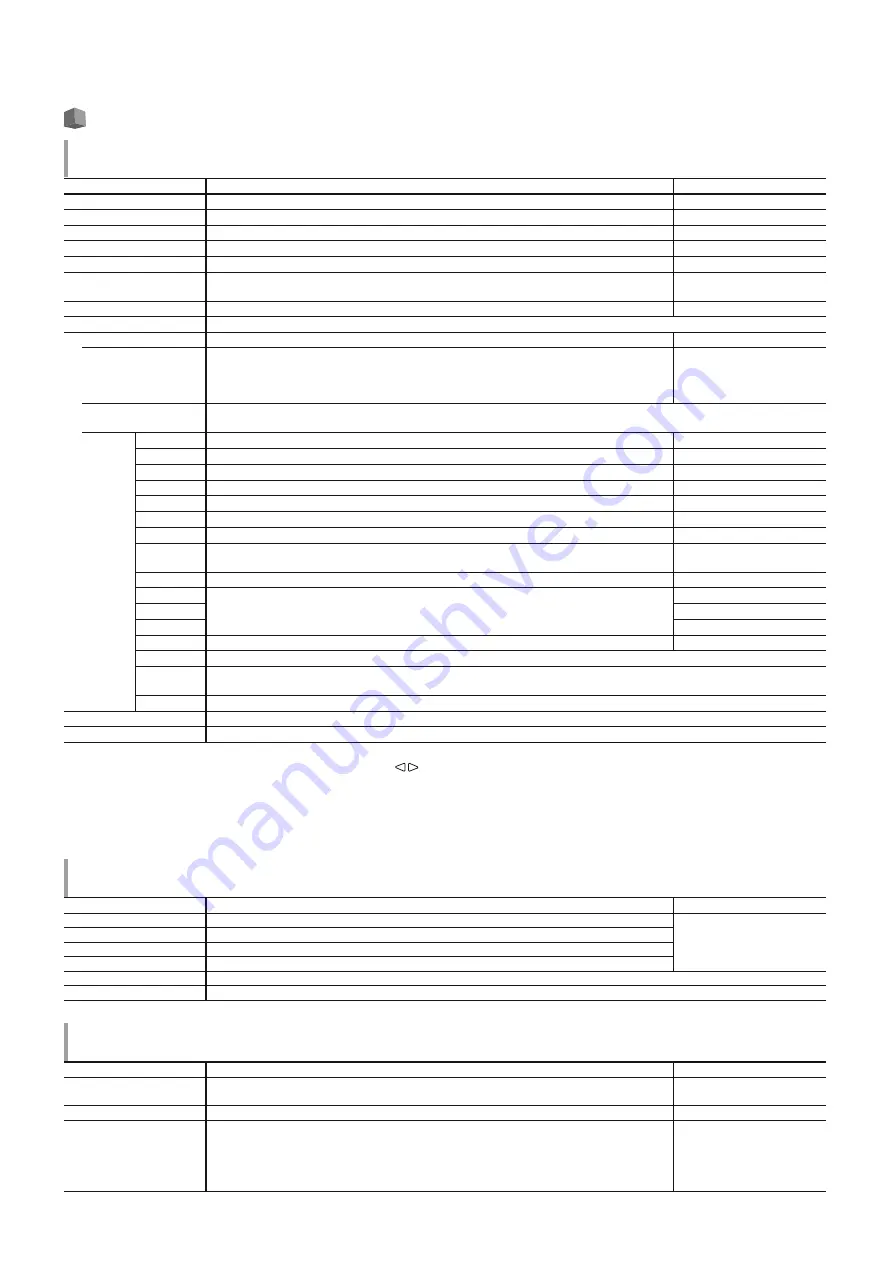
background image

11

11

 Main Menu

Picture Function

Setting for the picture quality.

Item 

To do 

Setting value

Backlight

Adjusts the brightness of the display.

 –20 to +20

Aperture*

1

Activates/deactivates the function at the level set in “Aperture Level”. 

Off, On

Aperture Level*

1

Compensate the frequency response of the luminance signal of the video signal. 

01 to 10

CTI

Adjust the clearness of the outlines of the chrominance signal. 

Off, Normal, Hard

LTI

Adjust the clearness of the outlines of the luminance signal. 

Off, Normal, Hard

Gamma

Select the Gamma correction value. 2.2 is equivalent to Υ 2.2, 2.35 is equivalent to Υ 2.35,
2.45 is equivalent to Υ 2.45, 2.6 is equivalent to Υ 2.6.

2.2, 2.35, 2.45, 2.6

Color Temperature

Select the color temperature.

9300K, 6500K, 5600K, User

Picture Memory

Storage and retrieval of values set in “Picture Memory Mode,” “Save,” and “Setting”.

Picture Memory Mode*

2

Retrieves a stored setting value.

Off, Mode-1, Mode-2, Mode-3

Save

Save destination for a set value.

t

  Values set using the picture adjustment knob and values set in the “Picture Function” 

menu are stored in “Picture Memory Mode”.

t

  Only selectable when “Picture Memory Mode” is set to “Off".

Mode-1, Mode-2, Mode-3

Setting

Adjusts/stores the brightness, contrast, etc. of the picture.

t

  Selectable when “Picture Memory Mode“ is set to “Mode-1”, “Mode-2” or “Mode-3”.

Contrast

Adjusts the level of the screen brightness.

-128 to +127

Bright

Adjusts black level.

-128 to +127

Chroma

Adjusts the color density.

-128 to +127

Phase

Adjusts the color phase.

-128 to +127

Backlight

Adjusts the back light brightness.

-20 to +20

Aperture

Activates/deactivates the function at the level set in “Aperture Level”.

Off, On

Aperture Level

Compensate the frequency response of the luminance signal of the video signal.

01 to 10

Gamma*

3

Select the Gamma correction value. 2.2 is equivalent to Υ 2.2, 2.35 is equivalent to Υ 2.35, 
2.45 is equivalent to Υ 2.45, 2.6 is equivalent to Υ 2.6.

2.2, 2.35, 2.45, 2.6

Color Temperature*

3

Select the color temperature.


9300K, 6500K, 5600K, User 

R Drive*

4

Adjust the drive level of each color (red, green, and blue).

t

  The maximum (Max) and minimum (Min) values vary depending on the input signal or 

other settings

Min to 000 to Max.

G Drive*

4

Min to 000 to Max.

B Drive*

4

Min to 000 to Max.

Color Gamut*

3

Select the color reproduction range.

ITU-709, User, Adobe RGB

sub menu

Display the sub menu which enables you to adjust the items in “Picture Memory Setting” while viewing the actual picture.

Save

Save destination for a set value.

t

  Stored in the currently selected “Mode-*”.

Restore

Restore the stored values.

sub menu

Display the sub menu which enables you to adjust the items in “Picture Function” while viewing the actual picture.

reset

Restore the default settings for all the items in “Picture Function”.

l

  If the picture adjustment knob is operated while “Picture Memory Mode” is set to “Mode-1”, “Mode-2” or “Mode-3”, “sub menu” of “Setting” is 

displayed and adjustment can only be performed using the     buttons.

*

1

  Memorized for each input.

*

2

  When retrieving a setting value, “Mode-1”, “Mode-2” or “Mode-3” will be displayed on the status display. 

When a value has been stored using “Save” after adjustment in “Setting”, or has not been restored to the stored value using “Restore”, “Mode-1*”, 
“Mode-2*” or “Mode-3*” will be displayed.

*

3

  “Gamma”, “Color Temperature” and “Color Gamut” can only be set when “Picture Memory Mode” is set to “Mode-3”. 

*

4

  “R Drive”, “G Drive” and “B Drive” can only be set when “Color Temperature” is set to “User”. 

Size/Position Adjust

Adjusts the size and position of the picture.

Item 

To do 

Setting value

H Size*

1

Adjust the horizontal picture size. 

Setting value varies 
depending on the signals.

H Position*

1

Adjust the horizontal picture position.

V Size*

1

Adjust the vertical picture size.

V Position*

1

Adjust the vertical picture position.

sub menu

Display the sub menu which enables you to adjust the items in “Size/Position Adjust” while viewing the actual picture.

reset

Restore the default settings for all the items in “Size/Position Adjust”.

*

1

  Memorized for each signal format.

Aspect

Sets the aspect ratio of the screen for displaying videos.

Item 

To do 

Setting value

Auto Aspect

Select whether to adjust the aspect ratio (horizontal to vertical ratio of the screen) of the SD 
signal automatically or manually (Manual Aspect).

Off, On

Manual Aspect*

1

Sets the aspect ratio of the SD signal.

16:9, 4:3 

SD4:3 Size*

1,

*

2

Selects the picture size when the input signal format is 4:3.

Normal, H Full, V Full

*

4

Normal 

:

Matches the vertical picture size to the number of pixels.

H Full

:

Matches the horizontal picture size to the horizontal size of the screen. At 
this time, the top and bottom of the picture are overscanned.

V Full*

4

:

Enlarges the picture vertically.

'79*B(1LQGE

Summary of Contents for DT-V17G2

Page 1: ...talian Spanish Russian are included on the supplied CD ROM as PDF files for Europe only For Customer Use Enter below the Model No and Serial No which is located on the body Retain this information for future reference Model No Serial No Please read the following before getting started Thank you for purchasing this product Before operating this unit please read the instructions carefully to ensure ...

Page 2: ...ook and screw M4 x 10 mm not provided EMC Supplement This equipment is in conformity with the provisions and protection requirements of the corresponding European Directives This equipment is designed for professional video appliances and can be used in the following environments t Controlled EMC environment for example purpose built broadcasting or recording studio and rural outdoors environment ...

Page 3: ...the cabinet using solvent such as alcohol thinner or benzine l Do not expose the cabinet to any volatile substance such as insecticides l Do not allow any rubber or plastic in contact for a long time l Do not wipe the cabinet forcefully Wipe stains off the cabinet with a soft cloth If the cabinet gets heavily stained wipe it with a soft cloth soaked in water diluted neutral detergent and wrung wel...

Page 4: ... LCD panel from being damaged Be careful not to pinch your fingers in the moving parts l Make sure to lift the stand up so that the monitor will be vertical otherwise the monitor may fall over l Place the monitor on a mat to avoid scratching the table surface l Do not rest your arm on the monitor or lean against the monitor l Do not touch the LCD panel when installing the monitor l Be sure to inst...

Page 5: ...ly Attach external battery for DC power supply by using 2 screw holes Choose the appropriate screw holes from 1 2 or 3 according to the type of external battery Depending on the battery type Use the Anton Bauer Dionic 90 mount QR DXC M3A external battery Caution DonotusetheexternalbatteryforDC24Vpowersupply Useonlythebatteryspecifiedabove Ifaheavybatteryisused itmayfalloffdependingonthewaythemonit...

Page 6: ...ls pin jack on page 5 2 VOLUME adjustment knob Adjusts the volume 3 Picture adjustment knob PHASE Adjusts the picture hue CHROMA Adjusts the picture color density BRIGHT Adjusts the picture brightness CONTRAST Adjusts the picture contrast l PHASE and CHROMA cannot be adjusted for certain signal formats l When Component Phase is set to Disable and an NTSC signal is input PHASE can be adjusted page ...

Page 7: ...ls l Each time you press this button the picture changes in the following order RGB Normal screen Red screen Blue screen Green screen t T C time code button lamp Activates deactivates the display of the time data time code contained in the SDI signal On the Information Display on page 8 l Select the time code type in Information of Set Up Menu page 17 y F1 F2 buttons lamps You can use the function...

Page 8: ...of MUTING are displayed for about 3 seconds l Make the setting to display hide the status in Status Display of the Information page 17 l When Status Display is set to Auto or On the status below is also displayed in the following cases When you change the input When the signal condition of the current input changes When you turn on the monitor l When Status Display is set to On the signal format a...

Page 9: ...he MENU button repeatedly until the menu screen disappears Main Menu Selected item Operation guide Set Up Menu Ex When Picture Function in the Main Menu is selected Menu Configuration The menu screen disappears automatically if no operations are made for about 30 seconds Inoperable menus will be grayed out Some items will not be displayed on the menu depending on the selected input and signal form...

Page 10: ...ervice Block Gain Size Position Transparent Auto Off Histogram Display Wave Display Wave Filter Wave Over Level Marking Wave Over Level Picture Function Audio Setting Sync Function No Operation Action Closed Caption 2 Signal Setting Marker Aspect Size Position Adjust Scope Setting Zebra Set Up Menu Contrast Bright Chroma Phase NTSC Setup Component Level sub menu reset Color Temperature 3 R Drive G...

Page 11: ...olorGamut 3 Select the color reproduction range ITU 709 User Adobe RGB sub menu Display the sub menu which enables you to adjust the items in Picture Memory Setting while viewing the actual picture Save Save destination for a set value t Stored in the currently selected Mode Restore Restore the stored values sub menu Display the sub menu which enables you to adjust the items in Picture Function wh...

Page 12: ...al of the currently selected SDI input SDI 1 or SDI 2 is reclocked and then output SDI 2 Signal input from SDI IN 2 terminal is output Switched Out SDI 2 sub menu Display the sub menu which enables you to adjust the items in Signal Setting while viewing the actual picture reset Restore the default settings for all the items in Signal Setting Marker 1 Settings for marker functions Item To do Settin...

Page 13: ...20dB 20dB 10dB Reference Level Over Level Green Red Yellow Over Level Reference Level 20dB 10dB t The number of audio channels displayed on the level meter varies depending on the setting value of Embedded Audio Group t The level meter with no audio signal input is displayed in white for 3Colors and in gray for White t Display position When Horizontal 1 or Horizontal 2 is selected for Level Meter ...

Page 14: ...to make the window translucent Off On Off On Normal Translucent Auto Off Set the function to turn off the window automatically 15 minutes after displayed Off On Histogram Display Select the signal component for the histogram display Y R G B RGB Wave Display Select a wave form to be displayed for the wave form monitor Y Pb Pr HD signal Y Cb Cr SD signal R G B RGB signal Wave Filter Turn on off the ...

Page 15: ...annel Selects the type of closed caption CC1 CC2 CC3 CC4 Text1 Text2 Text3 Text4 Service Block Selects the type of service block Service1 Service2 Service3 Service4 Service5 t Closed Caption does not work for all video formats t Closed Caption does not work for the COMPO HDMI input t Closed Caption does not work for the SDI input formats 1035 60i 1035 59 94i 1080 60p 1080 59 94p 1080 50p and 3G SD...

Page 16: ...d function when you press the F1 button Off Mode 1 Mode 2 Off Mode 1 Mode 2 No status display Perform the registration function Display the status Perform the registration function Display the status Do not perform the registration function Perform the registration function when the status is displayed and the button is pressed again l To display the Function Key Setting menu press the button when...

Page 17: ...r Item To do Setting value Source ID Select whether the name assigned in Character Setting below is displayed on the screen On the Information Display on page 8 t When Auto is selected the display color synchronizes with the color of the tally lamp while the tally lamp is lit Off On Auto Character Setting Assign a name to each video source as you like 10 characters at maximum You can also enter a ...

Page 18: ... Color Text color setting Command Same color as that set for communication Command Red Green Amber Blue Cyan Magenta White Color settings Command Red Green Amber Blue Cyan Magenta White Tally 1 Color Tally 1 color setting Command Same color as that set for communication Command Red Green Amber Blue Cyan Magenta White Color settings Command Red Green Amber Blue Cyan Magenta White Tally 2 Color Tall...

Page 19: ...ed Cancel reduced function is automatically performed every 24 hours n Example of setting up 1st Start and Work Time l IMD In monitor Display This unit supports TSL UMD Protocol V4 0 from Television Systems Ltd 16 character text display and one tally on each side can be controlled The color of both the text and the tally can be set Using the address setting up to 127 units can be controlled indivi...

Page 20: ...ntroller is not commercially available Consult your dealer if you need it Serial communication PC etc RS 485 IN RS 485 IN or RS 232C RS 485 OUT RS 485 IN RS 485 OUT RS 485 OUT l For the details see page 21 Using the MAKE TRIGGER system The MAKE TRIGGER terminal is configured as follows You can assign a function to each pin terminal in Remote Setting Pin1 Pin2 Pin3 Pin4 Pin5 in Parallel Type on pag...

Page 21: ...plays the information shown when INPUT SELECT button of the current input is pressed On the Status Display on page 8 While controlling with the MAKE system the information is displayed only at the moment of short circuiting 5 While controlling with the MAKE system the level meter is switched between displayed short circuiting and hidden opening When Audio Meter Display is set to Off or Lissajous t...

Page 22: ... D R E T Cr Initializes the control ID No data 5 1 B I D D S P x x 2 Cr Displays hides the control ID 00 Hide 01 Display 6 1 B M E N U Cr Displays the Main Menu Quits the menu operation No data 7 1 B U P Cr Moves the cursor upward No data 8 1 B D O W N Cr Moves the cursor downward No data 9 1 B A D J R Cr Makes setting adjustment No data 10 1 B A D J L Cr Makes setting adjustment No data 11 1 B S ...

Page 23: ...er the setting of COLOR OFF or SCREENS CHECK buttons are appropriate l Select the proper color system Color System in Signal Setting l Adjust the items of White Balance Setting in the Set Up Menu Or perform reset in White Balance Setting 6 16 7 12 17 The picture becomes blurred l Adjust the picture contrast or brightness by using the adjustment knobs on the front panel Or adjust Contrast or Bright...

Page 24: ...power cord 5 Contact your dealer with the information about which lamps were flashing l If you turn on the monitor soon after turning it off or after a short term power failure the INPUT SELECT lamps may flash and no image may be displayed When this happens turn off power and wait at least 10 seconds before turning on the monitor again If the INPUT SELECT lamps do not flash you can use the monitor...

Page 25: ...stand 8 2 kg 18 1 lbs with the stand 5 8 kg 12 8 lbs without the stand 8 3 kg 18 3 lbs with the stand 5 9 kg 13 lbs without the stand Accessories North America AC power cord x 1 Power cord holder x 1 Screw x 2 Instruction manual x 1 Core filter x 1 Europe AC power cord x 2 Power cord holder x 1 Screw x 2 Instruction manual x 1 CD ROM INSTRUCTIONS PDF x 1 LCD panel Type 24 wide active matrix TFT 21...

Page 26: ...any names and product names mentioned herein are used for identification purposes only and may be the trademarks or registered trademarks of their respective companies Dimensions Unit mm DT V24G2 Front view Side view Rear view 564 300 408 448 6 243 51 9 98 7 1 3 51 3 VESA mounting holes 4 M4 depth 10mm 100 100 115 DT V21G2 Front view Side view Rear view 515 240 347 387 6 212 9 53 99 8 1 3 20 2 VES...

Page 27: ...080 30PsF 1080 30PsF 6 3 3 40 1080 29 97PsF 1080 29 97PsF 7 4 4 41 1080 25PsF 1080 25PsF 42 1080 24PsF 1080 24PsF 43 1080 23 98PsF 1080 23 98PsF 8 5 5 l PC signals are compatible with major formats 1 For signal formats other than 3G HD SD SDI input 59 94 29 97 and 23 98 will be displayed as 60 30 and 24 respectively 2 Compatible with EMBEDDED AUDIO signals 3 If there is no payload ID the signal is...

Page 28: ...en weit von Eisenbahnen Sendern Starkstromleitungen usw entfernt Um die beste Leistung zu bewahren und elektromagnetische Verträglichkeit sicherzustellen empfehlen wir Kabel zu verwenden die die folgende Länge nicht überschreiten Kabel Länge Netzkabel befestigtes Kabel H05VV F 3 x 0 75 mm2 2 0 m Videosignalkabel Koaxialkabel 2 0 m Audiosignalkabel abgeschirmtes Kabel 1 5 m HDMI Kabel abgeschirmtes...

Page 29: ...es lignes de chemins de fer des émetteurs des lignes aériennes haute tension etc Pour maintenir la meilleure performance et pour assurer la compatibilité électromagnétique nous recommandons l utilisation de câbles n excédant pas les longueurs suivantes Câble Longueur Cordon d alimentation câble fourni H05VV F 3 x 0 75 mm2 2 0 m Câble de signal vidéo câble coaxial 2 0 m Câble de signal audio câble ...

Page 30: ...ici e in aree esterne isolate lontane dalle stazioni ferroviarie dai trasmettitori dalle linee elettriche sospese ecc Per garantire il mantenimento delle prestazioni ottimali e la necessaria compatibilità elettromagnetica raccomandiamo di usare cavi che non eccedano la seguente lunghezza Cavo Lunghezza Cavo di alimentazione cavo applicato H05VV F 3 x 0 75 mm2 2 0 m Cavo dei segnali video cavo coas...

Page 31: ...entornos rurales exteriores alejados de ferrocarriles transmisores líneas aéreas eléctricas etc Para optimizar el rendimiento y asegurar compatiblidad electromagnética se recomienda el uso de cables que no excedan la siguiente longitud Cable Longitud Cordón de alimentación cable adjunto H05VV F 3 x 0 75 mm2 2 0 m Cable de señal de vídeo cable coaxial 2 0 m Cable de señal de audio cable blindado 1 ...

Page 32: ...ɟɬ ɩɨɥɨɠɟɧɢɹɦ ɢ ɬɪɟɛɨɜɚɧɢɹɦ ɛɟɡɨɩɚɫɧɨɫɬɢ ɫɨɨɬɜɟɬɫɬɜɭɸɳɢɯ Ⱦɢɪɟɤɬɢɜ ȿɋ Ⱦɚɧɧɨɟ ɨɛɨɪɭɞɨɜɚɧɢɟ ɪɚɡɪɚɛɨɬɚɧɨ ɞɥɹ ɩɪɨɮɟɫɫɢɨɧɚɥɶɧɵɯ ɜɢɞɟɨɭɫɬɪɨɣɫɬɜ ɢ ɦɨɠɟɬ ɢɫɩɨɥɶɡɨɜɚɬɶɫɹ ɜ ɫɥɟɞɭɸɳɢɯ ɨɤɪɭɠɚɸɳɢɯ ɭɫɥɨɜɢɹɯ t В условиях контролируемой EMC например специально построенные вещательные или записывающие студии в условиях использования вне помещений в сельской местности вдали от железнодорожного полотна передатчиков в...

Page 33: ...льзуйте внешнюю батарею в качестве источника электропитания 24 В постоянного тока Используйте только указанную выше батарею Если используется тяжелая батарея то в зависимости от способа эксплуатации монитора она может отсоединиться и упасть p Выключатель DC только DT V21G2 DT V17G2 Включает и выключает питание постоянного тока l Чтобы включить монитор после включения выключателя DC необходимо нажа...

Page 34: ...ти 3 Ручка настройки изображения PHASE Настройка оттенков изображения CHROMA Настройка цветности изображения BRIGHT Настройка яркости изображения CONTRAST Настройка контрастности изображения l Параметры PHASE и CHROMA могут не настраиваться для определенных форматов сигнала l Когда для параметра Фаза Component задано значение Выключить и на вход поступает сигнал NTSC можно отрегулировать параметр ...

Page 35: ...RGB l При каждом нажатии этой кнопки изображение меняется в следующем порядке RGB нормальный экран Красный экран Синий экран Зеленый экран t Кнопка индикатор T C временной код Включает выключает отображение данных времени временной код содержащихся в сигнале SDI l Тип временного кода можно выбрать в разделе Информация Меню настроек y Кнопки индикаторы F1 F2 Можно использовать функции назначенные э...

Page 36: ... 2016 JVC KENWOOD Corporation B5A 1245 00 MULTI FORMAT LCD MONITOR DT V24G2 DT V21G2 DT V17G2 DT V17G25 ...

Reviews: