


H2 Stationary GrainGage User’s Guide
63
Field Maps
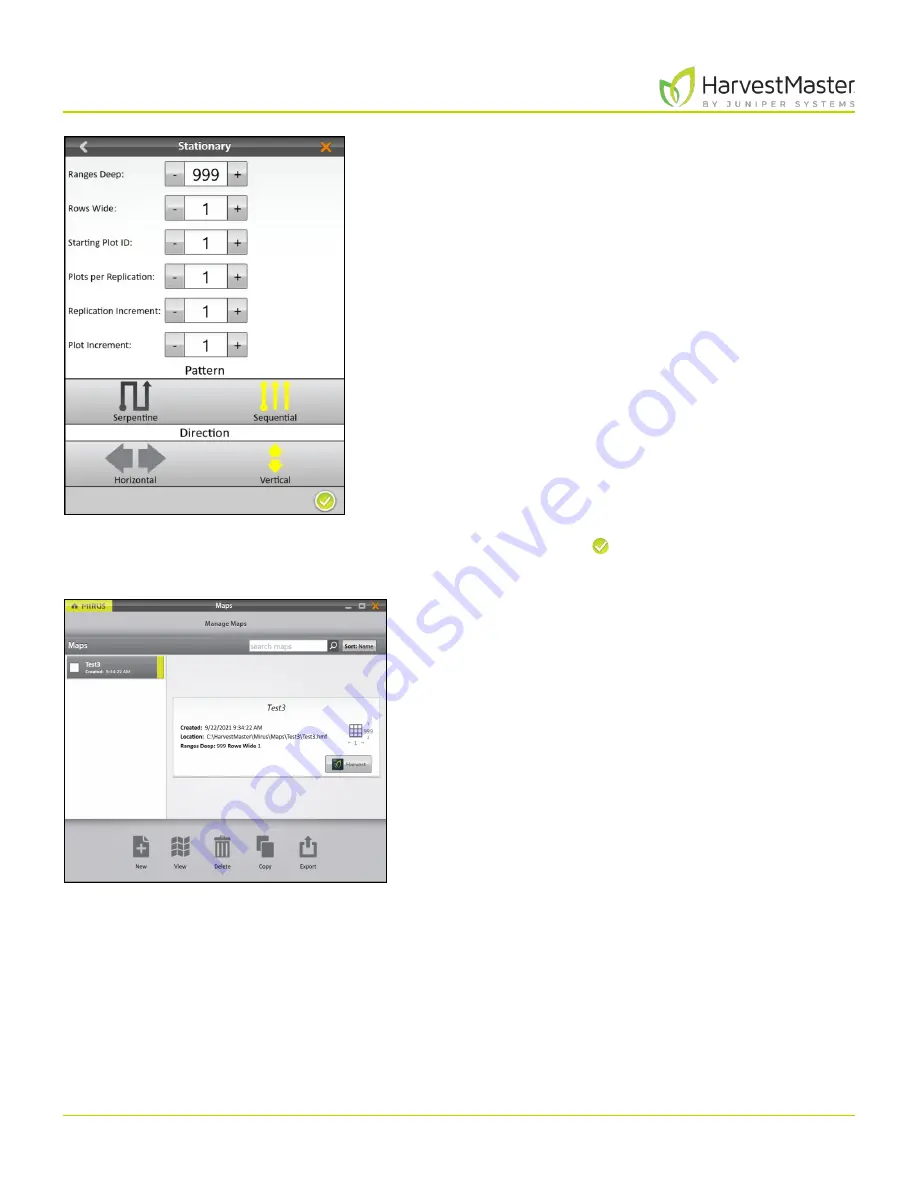
7. Set the following:
•
Ranges Deep
indicates the number of ranges within a
given field. Set to 999.
•
Rows Wide
indicates the number of rows within a
given field. Set to 1.
•
Starting Plot ID
: The number of the first plot. Set to 1.
•
Plots per Replication
: indicates the number of plots in
each replication. Set to 1.
•
Replication Increment
: the numeric interval between
the first plots in each replication (e.g., 100, 1000, or
10000). Set to 1.
•
Plot increment
is the numeric interval between plots.
This will usually be 1. Set to 1.
•
Pattern
: indicates the layout sequence for the plot
increments. Set to Sequential.
•
Direction
: indicates the direction in which plot
increments increase. This is not applicable for the H2
Stationary. Set to Vertical.
8. Tap the check icon to save the map.
Mirus displays a description of the map on the Manage
Maps screen. From this screen, Mirus allows you to do the
following with your maps:
•
Create new
•
View
•
Delete
•
Copy
•
Export
You also have the option to begin harvest.
Summary of Contents for HarvestMaster GRAINGAGE H2 STATIONARY
Page 1: ...USER S MANUAL...
Page 7: ...CHAPTER ONE Introduc tion...
Page 18: ...CHAPTER T WO Mirus and H2 Stationar y GrainGage Setup...
Page 36: ...CHAPTER THREE H2 Stationar y GrainGage Diagnos tic s and Aler t s...
Page 44: ...CHAPTER FOUR H2 Stationar y GrainGage Calibration...
Page 60: ...CHAPTER FIVE Field Maps...
Page 69: ...CHAPTER SIX Har ves t Mode...
Page 87: ...Standard Grain Information APPENDIX A...
Page 89: ...Troubleshooting Mirus APPENDIX B...
Page 94: ...Limited Warrant y APPENDIX C...


