M A I N T E N A NC E
Page 50
AT T E N T I O N !
The chain supplied together with this JDN
hoist is matched to the chain sprocket accor-
ding to strict tolerances. In order to ensure
optimum function of the chain and in order
to prevent hazards, only genuine JDN chains
must be installed.
Note:
When a chain is replaced, the buffers must also
be replaced. For changing buffers at the chain ends, see
section
"Removing and installing load sleeve, bottom
block, clamp and buffer"
.
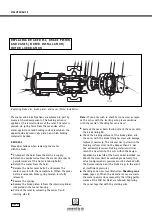
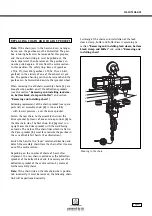
The buffers located within the chain are most easily
replaced when the open chain link between the old and
new chains passes the buffer to be replaced.
AT T E N T I O N !
Do not twist the chain ends.
In the case of operation with a chain box:
switch the hoist in the "lower" rotational direction
and run the old chain out of the chain box.
Then remove the chain box.
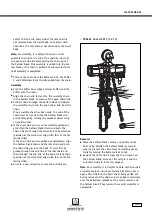
Move the bottom block as close as possible to the
hoist body and position it securely.
In the case of hoists without chain box, detach the
idle chain from the chain mount – for double fall
hoists, the bottom block chain is released simultane-
ously – (see also section
"Removing and installing
load sleeve, bottom block, clamp and buffer"
).
Detach the clamp, buffer and buffer discs from the
end of the idle chain.
For single fall hoists,
also detach the load sleeve,
buffer and buffer discs from the load chain.
For double fall hoists
with chain box, detach the
bottom block from the hoist body.
For treble fall hoists,
detach the bottom block chain
from the mount on the bottom block. (see also section
"Removing and installing load sleeve, bottom
block, clamp and buffer"
).
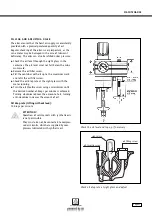
Attach the new chain to the end link of the load
section of the old chain after aligning the welds and
the first chain link by means of an open chain link.
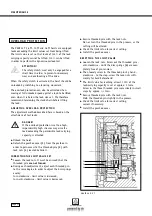
The welds on the upright chain links must face out-
wards when running over the chain sprockets. For
this reason, the welds of the chain links which lie
flat in the drive sprocket must face towards the gear-
box. If the first link of the new chain is not correctly
positioned, it must be removed.
Note:
It is possible that the first chain link of the other
chain end is correctly positioned.
Switch the hoist to the "lift" rotational direction.
The new chain will now run into the hoist while the
old chain is simultaneously run out on the idle
chain side.
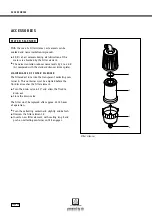
Run the chain until the join between the old and new
chain has run sufficiently (approx. 1m) out of the centre
section on the idle chain side.
Detach the connection between the old and new
chains.
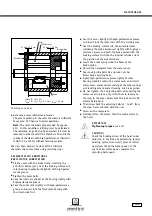
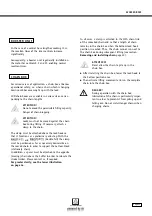
Install the clamp (at the 10th chain link), buffer and
buffer discs on the idle chain section of the new chain.
Only in the case of operation without chain box, align
the idle chain and attach to the fastening point on the
hoist – for double fall hoists, the bottom block chain is
also attached here later – (see also section
"Removing
and installing load sleeve, bottom block, clamp and
buffer"
.
Attach the chain box if necessary.
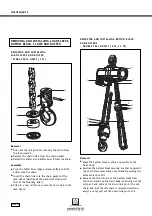
Switch the hoist in the "lift" rotational direction
until the as yet free end of the
aligned
load chain is
the correct length for attaching the chain link,
–
for single fall hoists
in the load sleeve after the
buffer and buffer discs have been pushed on,
–
for double fall hoists
at the fastening point on
the hoist body and
–
for treble fall hoists
at the fastening point of
the bottom block (see also section
"Removing and
installing load sleeve, bottom block, clamp and
buffer"
).
Note
: If the chain link of the load chain is positioned
incorrectly, it must be removed, the following chain link
will be positioned correctly.
R E M O V I N G A N D I N S TA L L I N G C H A I N

