M A I N T E N A NC E
Page 44
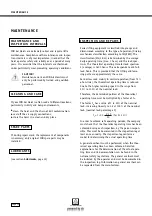
R E M O V I N G A N D I N S TA L L I N G
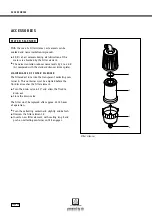
L OA D S L E E V E A N D B U F F E R
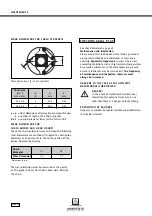
- S I N G L E FA L L H O I S T ( 3 T I )
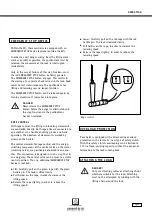
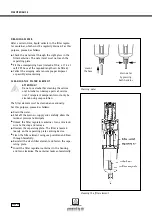
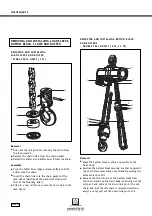
Removal
Drive out the roll pin
1
for securing the chain from
the load sleeve
3
.
Remove the chain link
2
from the chain pocket.
Detach the buffer
4
and buffer discs
5
from the chain.
Assembly
Push the buffer discs (edge encloses buffer) and the
buffer onto the chain.
Insert the chain link into the chain pocket of the
load sleeve (position of the weld must align with
that of the following links).
Drive in a new roll pin to secure the chain link in the
load sleeve.
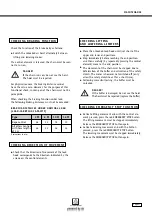
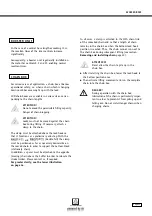
R E M OV I N G A N D I N S TA L L I N G B O T T O M B L O C K
A N D B U F F E R S
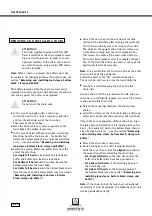
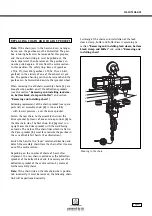
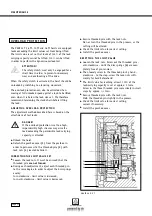
- D O U B L E FA L L H O I S T S ( 6 T I , 10 T I )
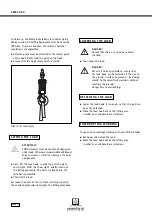
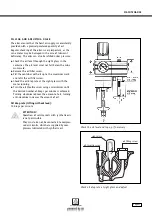
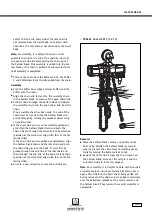
Removal
Move the bottom block as close as possible to the
hoist body.
Position the bottom block securely in order to prevent
the chain from unravelling uncontrollably causing the
bottom block to fall.
Remove the chain link
1
of the bottom block from
the chain mount on the hoist body by driving out the
roll pin
2
and pull out the chain link pin
3
(the end
chain link
4
of the idle chain is released simultane-
ously) or only pull out the chain link pin to the
2
1
6
13
12
10
9
11
7
8
8
5
4
3
2
3
1
5
4
5
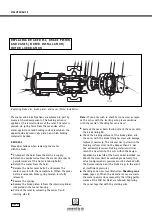
REMOVING AND INSTALLING LOAD SLEEVE,
BOTTOM BLOCK, CLAMP AND BUFFER

