Page 31 (52)
Ver 2_en_2022-06-27
Assembly Instructions
Envistar Flex
7.1
Assemble control cabinet
00196
Make sure that the cabinet is held up when the pins are removed. Once
the pins are pulled out, the cabinet is completely detached and may fall.
Always place the disassembled control cabinet with its back down on a
flat surface.
•
•
The disassembled control cabinet can be damaged if it falls. The main
switch, under the control cabinet, can be damaged if the control cabinet is
placed on a high edge.
Risk of damage to the product.
CAUTION!
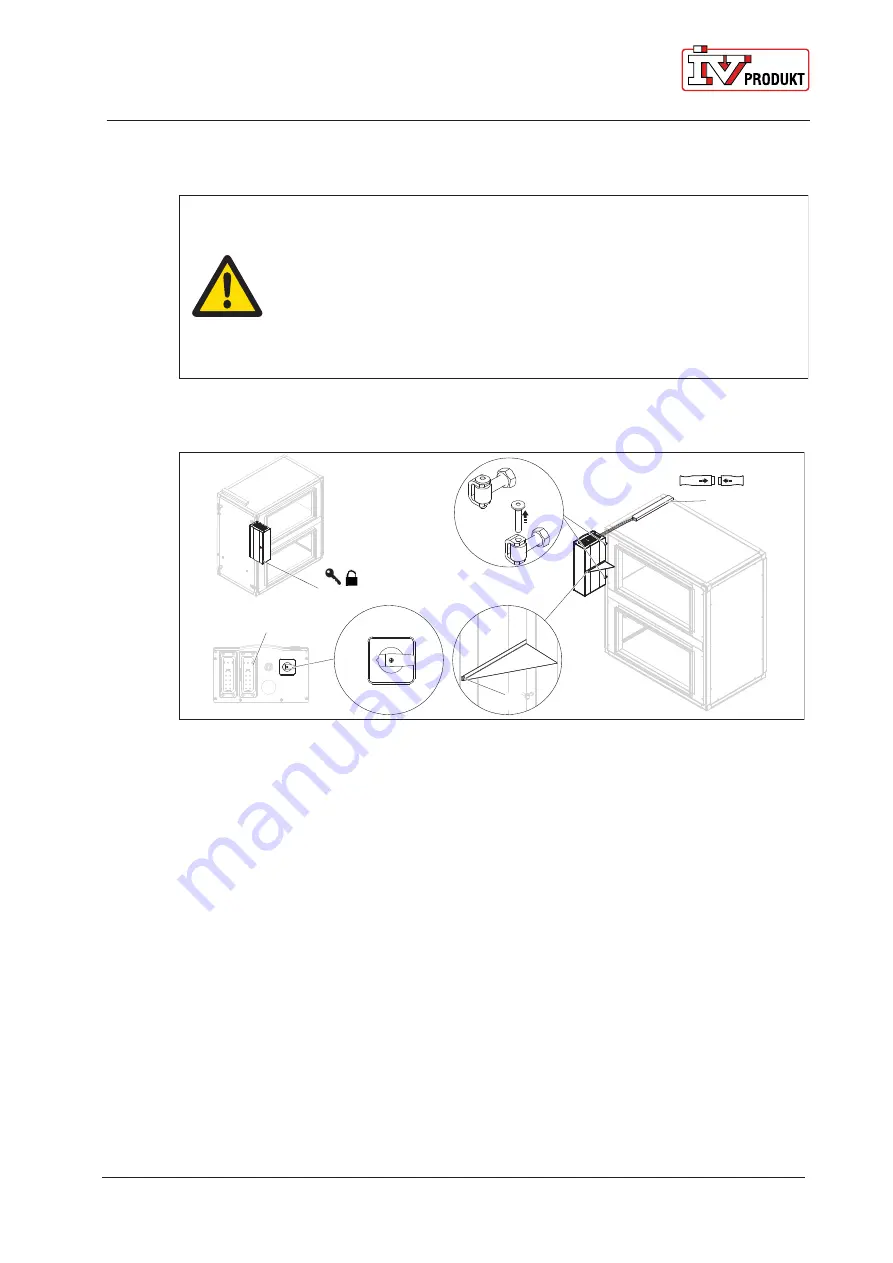
In sectioned configuration, the control cabinet is fixed to the unit on a hanging bracket. The
control cabinet can be disassembled from the unit.
00198
1
5
4
6
2
3
Figure: Control cabinet in sectioned configuration
1. The location of the control cabinet on delivery
2. Hinge
3. Cable strip
4. Control cabinet seen from below
5. Main switch
6. Hanging bracket with bolt in control cabinet
Remove the control cabinet from the unit
1. Lock the control cabinet with keys included.
2. Remove the cover of the cable strip on top of the unit and disconnect all the quick
connectors between the control cabinet and the unit part.
3. Unscrew and lift off the bolt on the hanging bracket.
4. From below, with a rubber mallet: knock the pins in the two hinges upwards and pick out
the pins. Make sure to support the control cabinet during the process.
5. Lift the control cabinet straight out from the hinges.
6. Place the control cabinet with its back down on a flat surface. Be careful with the loose
hoses and cables hanging out from the control cabinet.
Reassemble the control cabinet
Follow the instruction for removal in reverse order. Be sure not to squeeze any cables or
knock out hoses when handling.


