background image

10

Transom Transducer Installation

The transom transducers are  attached to the boat with
heavy-duty stainless steel kick-up brackets to provide
protection against impact at speeds up to

 35 knots (40

MPH).

  When the water force exceeds this setting, the

transducer automatically kicks up and becomes non-
operational.

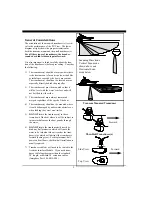
Selecting a Location

To achieve optimal performance, the transducers
should be mounted in a location which:

*

Minimizes acoustic noise reception.

*

Minimizes the chance that aerated water will
flow across the front of the transducer(s).

*

Optimizes the transducers view of the area ahead
and directly below the boat.

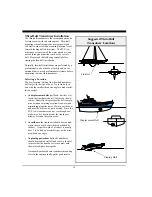
The transducers can be installed on either side of an
outboard or inboard/outboard engine, or between twin
outboards.  Choose a location where water flow is the
smoothest.  Refer to the diagram at right.

Because the transducers rotate back and upwards when
the brackets kick up, they must be mounted in a loca-
tion where there is sufficient clearance and headroom
to allow the full kick-up.

For 

single-engine

 installations, choose a location 18”

to 24” outboard of the propeller center line and, prefer-
ably, on the down-stroke side of the propeller.

For 

dual engine

 installation, choose a location just off

the center line of the vessel.

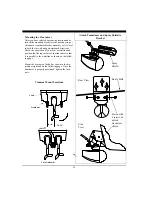
Attaching the Bracket

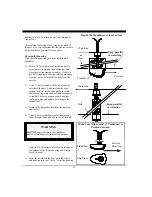
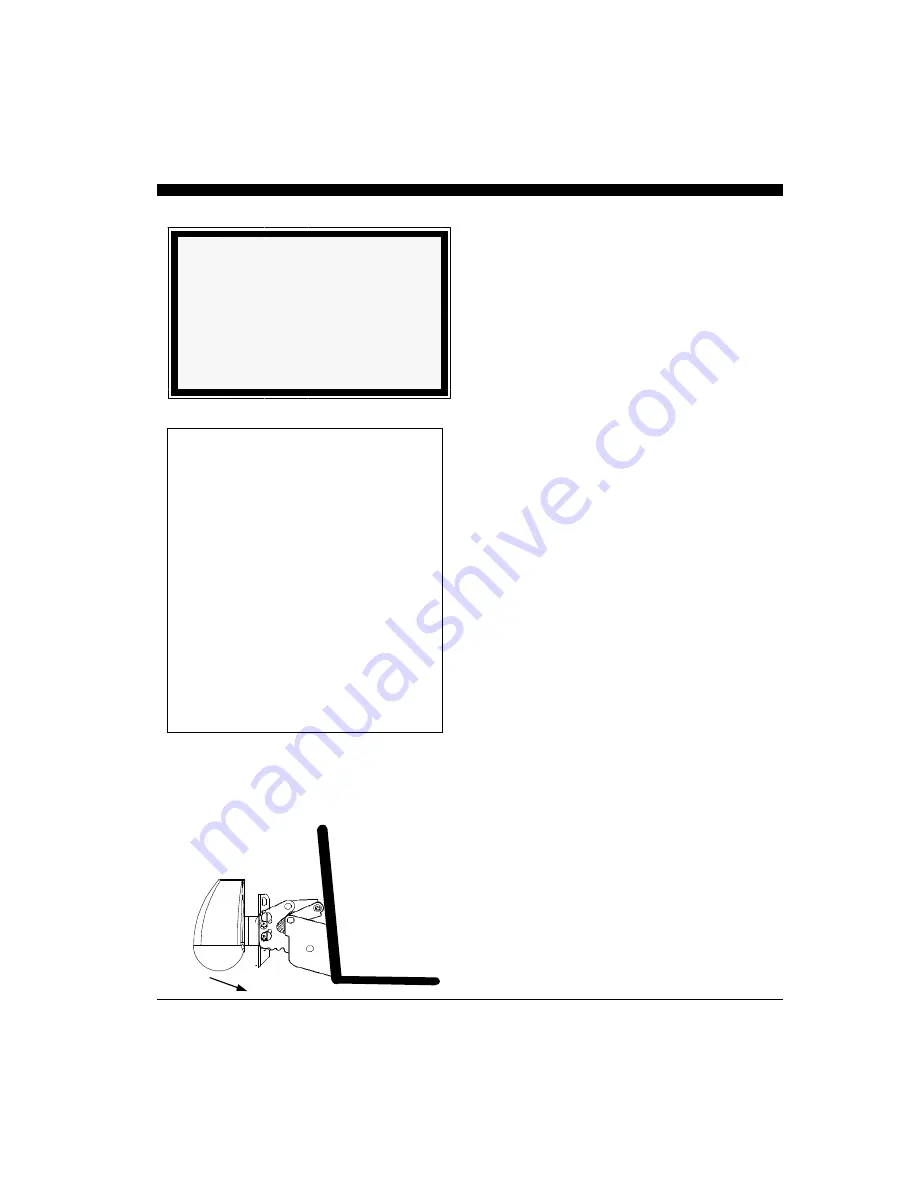
Position the spray shield inside the transducer’s
mounting ears.  Make sure the spray shield is orien-
tated as shown in the diagram at far right.

Attach the kick-up bracket to the transducer using the
4 screws, washers and lock nuts provided.  The bracket
arms must be mounted outside the mounting ears of the
transducer.  Do not fully tighten the lock nuts at this
time.

Tools Required for Transducer

Installation:

♦ 

Variable speed electric drill with a chuck
capacity of 10 mm (3/8”) or larger.

♦ 

Hole saw or spade bit 19 mm (7/8”) for
transom hole to route cable and connector

♦ 

Chamfer bit or 6 mm (1/4”) drill bit

♦ 

Drill bit No. 28 or 4 mm (9/64”)

♦ 

Drill bit 3 mm (7/64”)

♦ 

Marine bedding/sealing compound

Note:  Make sure your tooling is sharp and of
the correct diameter before proceeding.

Transom Mount Bracket in Released

Position

Note:  Will not
work at speeds
above 40 MPH

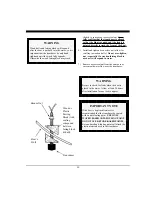
**WARNING**

Do not cut or splice your phased-array
transducer cables or remove the 9-pin
connectors.  Doing so will seriously
degrade the performance of your PC/View
and VOID YOUR WARRANTY.

Summary of Contents for PC/View

Page 1: ...INTERPHASE INTERPHASE PC VIEW for Windows OPERATION MANUAL...

Page 2: ...rward Scanning Sonar and your satisfaction is very important to us We welcome any comments or suggestions that you might have about this equipment It is very important that you complete and return the...

Page 3: ...hing the Bracket 10 Mounting the Transducer 11 Thru Hull Transducer Installation 13 Selecting a Location 13 Using a Fairing Block 14 Thru Hull Mounting 15 Acoustic Interface Module Installation 17 Sof...

Page 4: ...Gain Adjustment 30 Range Adjustment 31 Using the Alarm 31 Adjusting the Viewing Area 32 Sector Width and Steer 32 Scan Mode and Method 33 Zoom 33 Adjusting the Depth Tracker 34 Surface Masking 34 Thre...

Page 5: ...ference 44 Theory of Operation 44 Sonar Basics 44 Phased Array Technology 45 Maintenance 47 Troubleshooting Guide 48 Interference Problems 49 Specifications 50 How To Obtain Service 51 Index 52 Warran...

Page 6: ...vides a Limited Warranty on the PC View Forward Scanning Sonar Please read this warranty reprinted at the back of this manual and closely follow its terms and conditions should your PC View require re...

Page 7: ...12VDC Power Supply Cable 04 0001 008 PC View Software Diskettes 2 52 1001 002 Operation Manual 25 1049 000 Transducer Options Description Part Number Two Transom Transducers 200 kHz Vertical Scan T1...

Page 8: ...OT allow any sol vents i e gasoline acetone to come in contact with the transducer s as this may dissolve the plastic housing In the single thru hull configuration all 16 elements are enclosed in a si...

Page 9: ...lways remain sub merged regardless of the speed of the boat 4 The transducer s should not be mounted where it could be damaged by underwater obstacles or when loading the vessel on a trailer 5 DO NOT...

Page 10: ...ation 18 to 24 outboard of the propeller center line and prefer ably on the down stroke side of the propeller For dual engine installation choose a location just off the center line of the vessel Atta...

Page 11: ...nd position the flat top surface of the transducer so that it is parallel to the waterline as shown on the follow ing page Mount the bracket on the hull as shown in the dia grams at right and on the f...

Page 12: ...actually using the PC View on the water you may need to readjust the transducers mounting for optimum performance Refer to the discussion of Transducer Mount Cor rections on page 24 Waterline Transdu...

Page 13: ...dead rise angle to make instal lation easiest a On displacement hulls sailboats trawlers etc locate the transducer about 1 3 aft along the wa terline Generally this provides the best compro mise betwe...

Page 14: ...must be mounted so that it s bronze stem is as perpendicular to the water line as possible If necessary use a fairing block to properly position the transducer Using a Fairing Block Nearly all vessels...

Page 15: ...side and outside to insure that the sealing compound will adhere properly to the hull Select a marine grade bedding caulking compound and use according to the instructions 3 Remove the bronze hex nut...

Page 16: ...nd between faring block hull Boat s Hull Bronze Nut WARNING Wood hulls and fairing blocks will expand after the boat is put back into the water so it is important that the transducer be only hand tigh...

Page 17: ...dule Connect the red wire to the positive terminal and the black wire to the negative terminal of your boat s 12 VDC battery 3 Connect one end of the parallel cable to the con nector labeled PARALLEL...

Page 18: ...r 1 Exit all programs that are currently running 2 Insert the PC View Disk 1 into your computer s A drive or B drive 3 From the Start Bar select Run Browse to find Setup exe on the A or B drive or typ...

Page 19: ...remove Disk 1 from your floppy drive and insert Disk 2 6 The Setup program will prompt you to restart your computer after it has completed the installation You do not have to restart your computer im...

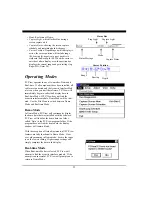
Page 20: ...lect and display data Take the following steps to adjust PC View for basic operation 1 Set defaults as described below Be sure that Auto Gain and Auto Range are off 2 Select a display see p 26 3 Selec...

Page 21: ...Width is approximately 12 degrees in both the vertical and horizontal scan modes The diagrams at right and below show the approximate width of the vertical and horizontal scanning beams at different d...

Page 22: ...ure which saves the current screen to the hard disk see p 35 About PC View which displays the software version number and Alarm Reset which turns off the depth alarm after it has been triggered see p...

Page 23: ...ew does not find the acoustic interface module Demo Mode will be initi ated Use the File Menu to switch between Demo Mode and Real time Mode Demo Mode In Demo Mode PC View will continuously display th...

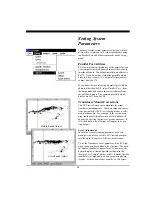
Page 24: ...ons The PC View software can compensate for minor transducer misalignments These are important correc tions particularly if PC View is being used as a colli sion avoidance aid For example if the verti...

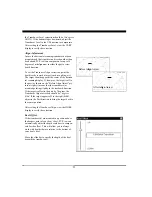
Page 25: ...is off to the port as shown on the Before Align Adjust pic ture at right it means that the transducer was mounted pointing slightly in the starboard direction If the target is offset to the port by 7...

Page 26: ...Color and Units controls using the Setup menu Both parameters are consistent in PC View regardless of which scanning display window is ac tive The units are also consistent in the depth win dow but th...

Page 27: ...27 Horizontal Display Vertical Display Downlooker Display Vertical Split Screen Display Horizontal Split Screen Display...

Page 28: ...ng and tilted downward from horizontal by about 10 degrees see figure at left center The horizontal scan is shown with the transducer at the bottom of the display window and the se lected range extend...

Page 29: ...e window The down looker data occupies one quarter of the horizontal dimension of the window and the vertical scan occu pies the remainder of the space Both portions of the display are equivalent in f...

Page 30: ...y PC View can set and vary the Gain and Range settings automatically It is important to note that each scanning direction has its own Gain and Range settings To change the Gain and Range settings for...

Page 31: ...t Auto Range is on The default setting is off In the manual mode PC View allows you to choose one of twelve preset Ranges Range can be varied between 25 and 1400 feet 8 and 420 meters or 4 and 224 fat...

Page 32: ...ox or by clicking on the yellow light bulb in the Tool bar Adjusting the Viewing Area PC View provides several features which allow you to modify the look of the display windows These features can be...

Page 33: ...PC View allows for two scanning methods a tradi tional Swept mode and a Hopped mode where the beam direction hops to different areas in a pseudo random fashion Hopped mode is useful for getting a fas...

Page 34: ...e Setup menu Surface Masking The Surface Masking feature allows you to specify a range near the water surface in which the depth tracker will ignore any incoming returns The de fault Surface Masking i...

Page 35: ...r sched uled screen capture if there is less than 20 megabytes of space remaining on your hard disk Whenever PC View does a screen capture the screen capture indicator to the left of the screen captur...

Page 36: ...83 Setup from the File menu click in the check box labeled Enable NMEA 0183 Input and select the se rial port to which navigation input is connected When NMEA 0183 input is enabled PC View will look f...

Page 37: ...C View uses the following four sen tence types DPT Depth with Keel Offset This sentence in cludes the water depth in meters relative to the transducer followed by the offset from the trans ducer in me...

Page 38: ...epth information out a se rial port as well click in the box labeled Output to Serial Port and select a serial port from the pull down menu PC View will automatically configure the protocol of the sel...

Page 39: ...tion about your system be sure that the PC View hardware is connected to your computer and turned on before selecting Run Diagnostics from the File menu To save the results of the diagnostics click on...

Page 40: ...it pulse and the time it took to receive the return echo it can determine the location of the object or bottom that created the return echo As the PC View sequentially steps through the scan sector th...

Page 41: ...View display as a vertical line or arc Transducer Sidelobe Effect The PC View s transducer like all transducers does not form a perfect beam of acoustic energy Some of the energy is contained in areas...

Page 42: ...degrees from the water s surface see the diagrams at left and on p 21 This downward angle is designed to help reduce the effects of surface noise clutter when the water is choppy and to allow easier m...

Page 43: ...diagram a channel is imaged The deepest point of the channel ahead of the vessel is indicated by the gap in the bottom echoes Forward Imaging Capabilities If the horizontal range setting is greater th...

Page 44: ...ge pulse of voltage down the cable to the transducer the transducer will vibrate and the resulting acoustic vibrations will travel through the water until they strike an object such as the bottom or s...

Page 45: ...in a different direction By selectively using each piezoceramic element the transducer has the ability to point or look in as many different directions as there are piezoceramic elements After approxi...

Page 46: ...ctions For example using an 8 element phased array the PC View is capable of steering the acoustic beam in over 90 different directions Conventional fixed beam technology would have required the use o...

Page 47: ...A HIGHER AMP RATING If the fuse continues to blow check the polarity of your 12 VDC power source If the polarity is correct check with the Technical Service Department at 408 477 4944 3 In order to pr...

Page 48: ...terface Module and your computer and that the Acoustic Interface Module is on Check to see that the proper parallel port address is selected Select Run Real time from the File menu Screen remains blan...

Page 49: ...ator filter to smooth the alternator s output signal Interference may also be caused by radiation from other nearby equipment and can be detected by turning off all other equipment and observing the P...

Page 50: ...ppy drive 10 MB available hard disk space Depth Ranges Overlapping ranges 0 to 30 ft min 0 to 800 ft max Forward Ranges Overlapping forward ranges 0 50 ft min to 0 1 200 ft max Transmit Frequency 200...

Page 51: ...2880 Research Park Drive Suite 140 Soquel CA 95073 In addition to speed your repair please fill out the following tear this page out of the manual or photocopy it and tape it to your unit for our tech...

Page 52: ...gnostics 39 Displays 26 30 Depth Window 30 DOWN Downlooker 28 29 HORZ Horizontal Scan 28 Index HSPLIT Horizontal Split Screen 29 Interpreting 40 43 VERT Vertical Scan 28 VSPLIT Vertical Split Screen 2...

Page 53: ...Basics 44 Specifications 50 spray shield 12 split screen displays 29 33 Status Bar 23 Surface Masking 34 system parameters 24 25 T Theory of Operation 40 44 Threshold 34 time varied gain 30 41 Toolbar...

Page 54: ...54 W Warranty 6 7 55 Z Zoom 33...

Page 55: ...ich have been repaired or altered outside the Interphase factory Any costs incurred with transducer replacement are specifically excluded from this warranty other than the cost of the transducer itsel...

Page 56: ...56...
Reviews: