DCS 300 User’s Manual
7-34
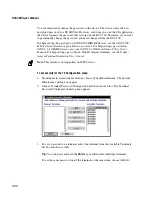
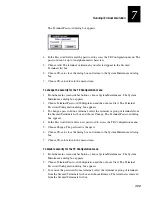
To remove the password from all the terminals at the same time, choose Remove
All. All the terminals are removed from the Secured Terminals list box and appear
in the Available Terminals list box.
4. Choose Close to close the dialog box and return to the System Maintenance dialog
box.
5. Choose Close to return to the main screen.
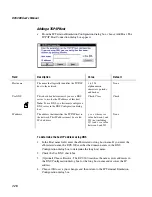
To verify that security is set
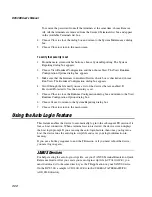
1. From the main screen sidebar buttons, choose System Reporting. The System
Reporting dialog box appears.
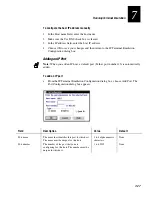
2. Choose View Runtime Configuration and then choose Start. The View Runtime
Configuration Options dialog box appears.
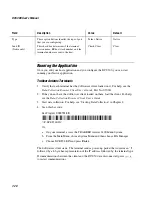
3. Make sure that the Intermec controllers/Devices check box is checked and choose
Run View. The Runtime Configuration dialog box appears.
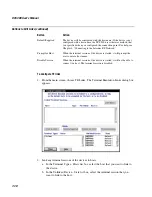
4. Scroll through the file until you see a list of the devices that are enabled. If
Password Protected is Yes, then security is set.
5. Choose Close to close the Runtime Configuration dialog box and return to the View
Runtime Configuration Options dialog box.
6. Choose Cancel to return to the System Reporting dialog box.
7. Choose Close to return to the main screen.
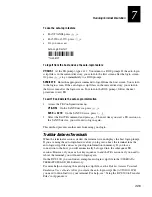
Using the Auto Login Feature
This feature enables the device to automatically log into the subsequent TE session if it
loses a host connection. When a terminal session is started, the device screen displays
the host login prompt. If you are using the auto-login feature, then once you log into a
host, the device runs the auto-login script file and saves your login information in
memory.
If you use a hot key sequence to end the TE session or if you must reboot the device,
you must log in again.
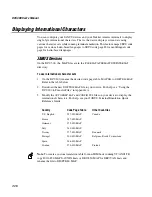
JANUS Devices
For help creating the auto-login script file, see your JANUS Terminal Emulation Quick
Reference Guide. After you create your auto-login script file (
AUTOLOG.SCR
), you
must download it to the same directory as the TE application on your JANUS device.
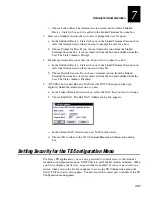
On the DCS 300, a sample
AUTOLOG.SCR
is in the
\USERDATA\TERMAPPS\TE\
ADD_FILE
directory.
Summary of Contents for DCS 300
Page 1: ...P N 067296 005 User s Manual DCS300 ...
Page 4: ...DCS 300 User s Manual blank ...
Page 16: ...DCS 300 User s Manual ...
Page 22: ...DCS 300 User s Manual ...
Page 23: ...Getting Started 1 ...
Page 24: ...DCS 300 System Manual blank ...
Page 42: ...blank ...
Page 43: ...Learning About the DCS 300 2 ...
Page 44: ...DCS 300 User s Manual blank ...
Page 68: ...blank ...
Page 69: ...Connecting to the Upline Network 3 ...
Page 70: ...DCS 300 System Manual 3 2 blank ...
Page 94: ...blank ...
Page 95: ...Connecting to the Intermec RF Network 4 ...
Page 96: ...DCS 300 System Manual blank ...
Page 134: ...blank ...
Page 135: ...Connecting to the 9180 and the Intermec CrossBar Network 5 ...
Page 136: ...DCS 300 System Manual blank blank ...
Page 158: ...DCS 300 System Manual blank ...
Page 159: ...Running Data Collection Browser 6 ...
Page 160: ...DCS 300 System Manual blank ...
Page 171: ...Running Terminal Emulation 7 ...
Page 172: ...DCS 300 System Manual blank ...
Page 209: ...Running Peer to Peer Applications 8 ...
Page 210: ...DCS 300 System Manual blank ...
Page 232: ...blank ...
Page 233: ...Running Terminal Sessions 9 ...
Page 234: ...DCS 300 System Manual blank ...
Page 258: ...DCS 300 System Manual 9 26 blank ...
Page 259: ...Running Screen Mapping 10 ...
Page 260: ...DCS 300 System Manual 10 2 blank ...
Page 269: ...Running Screen Mapping 10 11 10 Screen 3 Screen 4 Main Host Screen Screen 5 ...
Page 333: ...Troubleshooting 11 ...
Page 334: ...DCS 300 System Manual blank ...
Page 372: ...blank ...
Page 373: ...Specifications and Other Helpful Information A ...
Page 374: ...DCS 300 System Manual B 2 blank ...
Page 391: ...Upgrading the DCS 300 and Devices B ...
Page 392: ...DCS 300 System Manual blank ...
Page 411: ...How the DCS 300 Routes Transactions C ...
Page 412: ...DCS 300 System Manual blank ...
Page 430: ...blank ...
Page 431: ...Index I ...
Page 432: ...DCS 300 System Manual I 2 blank ...


