Interactive Technologies SceneStation User Manual Download Page 66

60  |  

Using the Programmer's Remote

SceneStation Installation and Programming Guide

Button Edit Mode

The Button Edit Mode is used to edit the properties of a button.  The properties of a button include 

its function and the preset it activates.
The following sections describe how to edit the various properties of a button.

Set a Button’s Preset

Each button activates a preset.  To change the preset that a button activates, begin 

by pressing 

EDIT

, and then press the physical button you want to change.

The button on the station you are editing will quickly flash White.
Then, press the two-digit number of the preset you want the button to activate (from 

00 to 64).
The button will now activate the specified preset and the station returns to the Idle Mode.

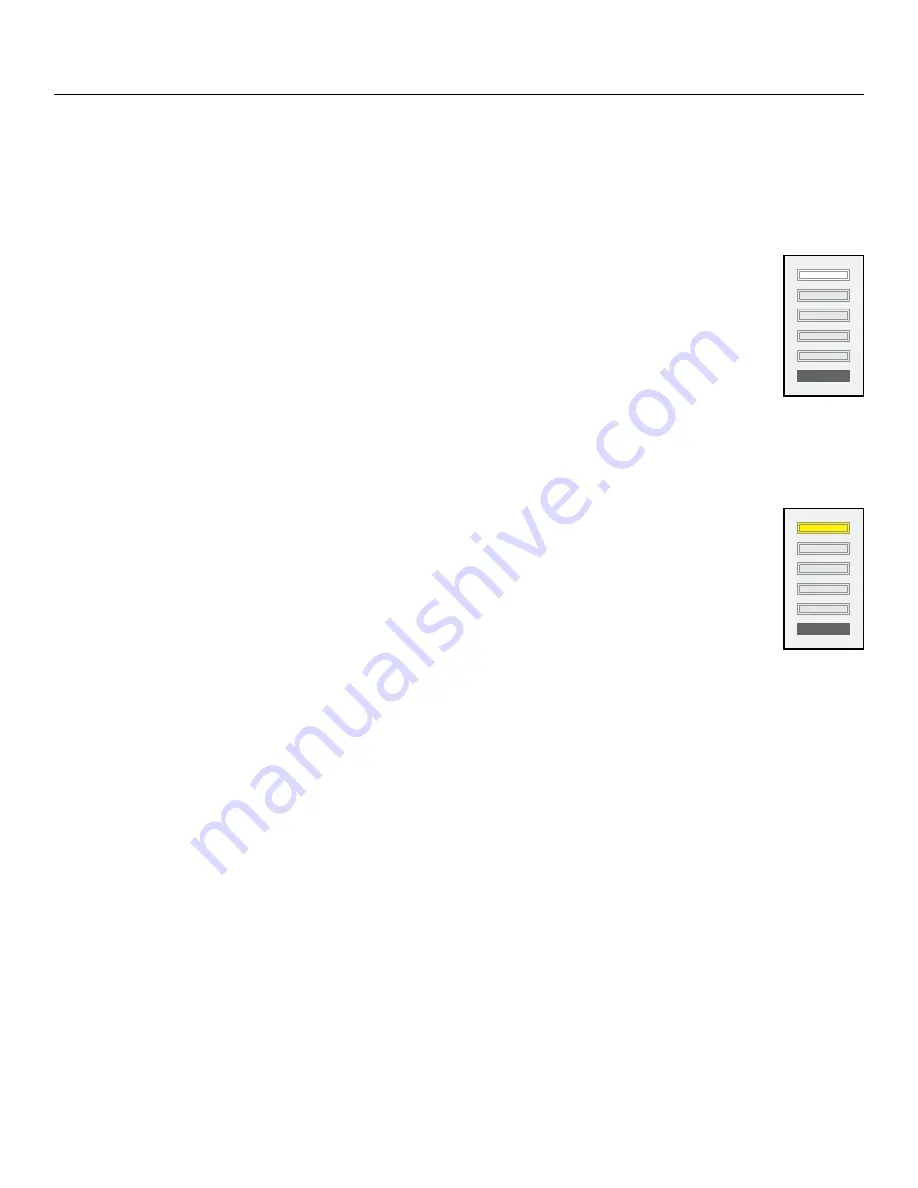
Set a Button’s Function

Each button uses its Button Function to determine how it will activate a preset.  To 

change the function of a button, begin by pressing 

EDIT

, and then press the physi-

cal button you want to change.
The button on the station you are editing will quickly flash White.
Next, press 

OPTION

 to switch to the Button Function mode.  The button will begin 

to quickly flash Yellow.
Finally, press one of the digits below to change the button’s function:

 • 1 = Normal

 - The button will activate its preset.

 • 2 = Toggle

 - The button will toggle the specified preset on and off.  If the button is not 

active, a press will activate the preset.  If the button is active, a press will deactivate the 

preset.

 • 3 = Sequential

 - The button will activate the specified preset when pressed.  Then, while 

the button is active, each additional press will step manually from the current preset to 

the next preset.  This function follows the normal sequence of presets on each press, 

including loops and repeat counts.  This function is useful for making a single button 

able to select one of several different presets.

 • 4 = Latched

 - The button will activate the specified preset only if the button is not cur-

rently active.  This function is useful for making sure that a second press of a button 

doesn’t restart a chase or loop of presets.

Summary of Contents for SceneStation

Page 1: ...SceneStation User s Manual Version 3 0 Second Edition Distributor www techni lux com Phone 407 857 8770 Fax 407 857 8771 Email sales techni lux com...

Page 2: ...respective owners The SceneStation firmware design and documentation are copyrighted by Interactive Technologies Inc The firmware used in SceneStation embodies valuable trade secrets proprietary to I...

Page 3: ...9 Hardware Configuration 11 Configuration Display 11 Dip Switch Settings 11 Left Switch Bank 12 Right Switch Bank 13 Using SceneStation Studio 15 Managing Stations 16 Offline Stations 17 Copying Stat...

Page 4: ...Previous Preset 27 None 27 Enable Programmer s Remote 27 Allow Editing 28 Direct Access Preset Codes 28 Buttons 29 Button List 29 Name 29 Function 30 None 30 Normal 30 Toggle 30 Sequential 30 Latched...

Page 5: ...Panel Lockout Dip Switch 47 SceneStation Studio DMX Options 47 Using the Programmer s Remote 49 Playback Mode 50 Activating Presets 50 Adjusting the Grandmaster 50 Stepping Through Presets 51 Locking...

Page 6: ...xample 3 Set Timing Parameters for a Preset 70 Example 4 Program a Button to Toggle a Preset 71 Example 5 Create a Loop 72 Example 6 Change the Indicator Color for a Preset 73 Example 7 Program a Butt...

Page 7: ...mmable RGB LED with hundreds of color and blinking options Wireless Control Stations contain an 2 4 GHz wireless module for triggering buttons between multiple stations and for communication with a ho...

Page 8: ...sed the word Preset can be interchanged with either Scene or Cue For example in Entertainment Lighting where users typically use lighting control consoles they may think of each of Preset as a Cue and...

Page 9: ...RGBW RGBAW and single channel dimmers Each effect has one or more user adjustable properties that can customize the effect For example an effect s Rate Direction Attack Decay Smoothness and more can...

Page 10: ...another adjust the brightness of the station and program presets buttons and their properties Users can teach a universal remote control popular with home theater setups to trigger presets in a Scene...

Page 11: ...d to fit different styles and needs Easy Installation SceneStation was designed for easy installation It fits neatly into a standard single gang electrical box and only requires two connections one fo...

Page 12: ...6 Introduction SceneStation Installation and Programming Guide...

Page 13: ...es are also available If desired SceneStation can also be mounted in a 3rd party Decora style wall plate however you may need additional mounting screws if using your own wall plate Power for the stat...

Page 14: ...Data Red Optional DMX Input Connect to First DMX Fixture Dimmer or Power Supply DMX signals then daisy chain through each unit DMX Output Optional input from DMX console or controller Power Input Non...

Page 15: ...re required The Portable Enclosure houses a SceneStation and provides a DC power input jack for connect ing an AC Adaptor as well as both Male and Female 5 pin XLR connections for connection to DMX ne...

Page 16: ...10 Installation SceneStation Installation and Programming Guide...

Page 17: ...ossible configurations All LEDs Red Stand Alone Non Wireless Model SS 105 please note that this model is no longer available All LEDs Green Wireless Model SS 205 or SS 305 Dip Switch Settings Nearly a...

Page 18: ...te Enables a DMX termination resistor on the DMX port This should only be necessary when the SceneStation is at the end of a long line of DMX devices receiving DMX data from another source Normally th...

Page 19: ...tion Studio 5 IR Direct Preset Codes When turned On this switch enables the Direct Preset Codes feature This feature enables additional IR codes that directly activate any of the 64 presets in the sta...

Page 20: ...14 Hardware Configuration SceneStation Installation and Programming Guide...

Page 21: ...ent that allows the user to change settings and program buttons and presets all in a graphical format Offline Editor Configuration files can be created edited and saved without requiring a station or...

Page 22: ...s Wireless Stations Any stations that are discovered wirelessly by the USB RF Adaptor will appear in the list and include the following information Station The user defined name of the station Show Th...

Page 23: ...the proper PIN number has been entered Offline Stations SceneStation Studio can also create new station files or open station files stored on the computer for offline editing A new offline station ca...

Page 24: ...Studio will ask if you want to perform the copy operation When copying from one station to another the user is presented with the following options Copy and Sync The data is copied from the dragged s...

Page 25: ...he buttons on the chosen SceneStation with each button appearing with its live button color Each button can be clicked to wirelessly send a button press to the actual station Whatever function that wo...

Page 26: ...on in the list view you can either click on the Edit Station button or double click on the station in the list view The first time you try to edit a station that s online SceneStation Studio will firs...

Page 27: ...the station s preset parameters such as Name Fade and Follow Times Loop Repeat and Indicator colors Levels Edits each preset s DMX channel levels DMX Options Sets various DMX related options for the...

Page 28: ...Open menu option is selected the user will be presented with a choice to either open the file as a new station or to import the data from the file into the station you re editing If you choose to Imp...

Page 29: ...sed to provide a simple descriptive name for the show This name is simply for your own convenience Security PIN The Station PIN is a security feature If a station has a PIN number set then future atte...

Page 30: ...oss Enable Grandmaster The station s Grandmaster is the overall intensity level of the DMX channel values being output from the station The Grandmaster can be adjusted from 0 to 100 by using the IR re...

Page 31: ...arker Three ambient light levels can be chosen High Medium and Low Receive Wireless Commands from other Stations If this station is to receive wireless button commands from another station this settin...

Page 32: ...tor window is used to view and or modify the following station parameters Enable User s Remote Is this option is enabled the User s Remote can be used to control the station If disabled the User s Rem...

Page 33: ...ss Zero first for example 0 then 7 to activate preset 7 Up Down Arrows Function This option selects the behavior of the Up and Down arrow buttons on the User s Remote The choices are Grandmaster Up Do...

Page 34: ...with the Programmer s Remote is disabled Choose Default to use the option as chosen by the corresponding DIP Switch on the back of the station Direct Access Preset Codes If this option is enabled the...

Page 35: ...f this window is a list of the buttons available on this station Select a button to edit its parameters The top section of the button list shows the physical front panel buttons on the station The low...

Page 36: ...This function is useful for making a single button able to select one of several different presets Latched The button will activate the specified preset only if the button is not currently active This...

Page 37: ...if you want a button to wirelessly operate another station that s listening to Group 3 then select 3 When a button is operating a preset on another station the LED indicator of this button will provi...

Page 38: ...g the presets for a live station that is wirelessly connected to SceneStation Studio the station will output the DMX scene that is currently selected in the Preset List The first item in the list is a...

Page 39: ...Any amount of time from 0 01 seconds up to 24 hours may be specified To cause a preset to appear immediately with no fade time specify a fade time of zero 0 SceneStation also supports Split Fade Times...

Page 40: ...oop To Preset property to create loops Loop To Preset Normally when stepping from preset to preset either manually with a Sequential button or auto matically with a follow time presets step in numeric...

Page 41: ...Decay and Depth The following list describes the behavior of the available effects Color Cycle The hue of each color in the scene is rotated around the color wheel producing a dynamic rainbow effect S...

Page 42: ...n when the preset is not active and a Flash Pattern which is one of several different flashing patterns for when the preset is active Use the popup menus to select one of many different colors for the...

Page 43: ...presets available on this station Select a preset to edit its levels When editing the presets for a live station that is wirelessly connected to SceneStation Studio the station will output the DMX sce...

Page 44: ...right hand side of the window is a pane that can be toggled between Level Editor and Patch Editor When set to Level Editor this pane will show controls that are used to set colors or channel values de...

Page 45: ...nd Blue RGB components of a light fixture or as the dimmer intensity channel for a fixture etc To view the Patch Editor make sure the toggle button is switched to the Patch Editor setting The Patch Ed...

Page 46: ...fixture that includes RGB RGBA RGBW or similar color capability is selected a graphical color picker becomes available Capturing DMX Input If you are editing a wirelessly connected station you can use...

Page 47: ...Detected The chosen actions in this group are taken whenever the station detects that another source of DMX has become active on the DMX link The station always stops outputting its own DMX signal bu...

Page 48: ...om the held scene to the user s chosen scene Snap to Current Preset The station will immediately begin outputting the scene that is currently selected on the station No crossfade will be performed Fad...

Page 49: ...Panel Snapshot Feature on page 45 Available options for this control are Default The Front Panel Snapshot feature will be enabled or disabled by the Dip Switch settings on the back of the station See...

Page 50: ...44 Using SceneStation Studio SceneStation Installation and Programming Guide...

Page 51: ...or 3 seconds Step 3 The buttons will begin to flash Green You can release the buttons Step 4 Press one of the flashing Green buttons to record the scene It will briefly light Green by itself to acknow...

Page 52: ...tton corresponds to the slowest fade time with three options in between The following table shows the fade time choices Button Color Fade Time 1 Red 0 seconds immediate 2 Rose 0 3 seconds 3 Magenta 1...

Page 53: ...Dip Switch Dip switch 3 of the Right switch bank can be turned ON to lock out the front panel recording functions This switch will only lock out the recording functions if the dip switch setting is n...

Page 54: ...48 Using the Front Panel Snapshot Feature SceneStation Installation and Programming Guide...

Page 55: ...es a DMX snapshot Switches to channel number entry during scene editing Option Used to choose an option Power Turns the station on or off Copy Copies the properties of one preset to another Lock Locks...

Page 56: ...st to make the preset a two digit number For example to activate Preset 1 press 0 then 1 Another option for single digit presets is to press the preset number and then ENTER For example to activate Pr...

Page 57: ...a number one less than the current preset Locking Station Buttons To lock the front panel buttons on a station press the LOCK button The odd numbered LEDs on the station will briefly flash Red when t...

Page 58: ...roperties is being edited Fade Time Red Follow Time Yellow Loop To Green Scene Cyan Repeat Magenta Indicator see below To select which property of a preset is being modified press one of the six prope...

Page 59: ...ill be the current channel Use the RIGHT and LEFT arrow buttons to step to the next or previous channel To quickly bump the current channel s level to 100 or back to 0 press the BUMP button To jump to...

Page 60: ...ation also supports Split Fade Times A Split Fade Time is actually two fade times one time that is used for channels that are increasing in value and another time used for channels that are decreasing...

Page 61: ...FOLLOW 30 In the example above the preset will automatically activate the next preset 30 seconds after this preset is activated Presets can follow each other in a simple sequential manner or follow t...

Page 62: ...D on the station will blink Green the same color as the Scene button on the remote Then press the number of the preset you want this preset to loop to For example to create a short loop that causes pr...

Page 63: ...n enter a repeat count from 0 to 255 A repeat count of zero will cause the loop to always be taken For example to create a short loop that causes presets to execute in the order 1 2 3 1 2 3 1 2 3 4 5...

Page 64: ...re are 20 colors to choose from Use the UP and DOWN arrow buttons to raise and lower the brightness of the color There are 4 brightness levels for each of the 20 colors To change between button states...

Page 65: ...urrent preset After copying the information the preset is not saved yet The station remains in the Preset Edit mode so you can edit any of the properties before they re saved Press ENTER to save the c...

Page 66: ...ess the physi cal button you want to change The button on the station you are editing will quickly flash White Next press OPTION to switch to the Button Function mode The button will begin to quickly...

Page 67: ...Toggle The button will toggle the specified preset on and off as a special pile on overlay on top of the main preset that may also be active Scenes are output from SceneStation by combining the channe...

Page 68: ...n If no DMX input is detected all LEDs will briefly flash Red Then enter the two digit preset number to record the current DMX channel values into For example to record the incoming DMX values into Pr...

Page 69: ...a four digit PIN number for added security If enabled this PIN number is required to access the station s programming from the SceneStation Studio software and also for allowing stations to remotely...

Page 70: ...ng this setting To have the station Fade to Black enter 00 To have the station Activate a Preset enter the two digit preset number of the desired preset for example 07 To have the station Snap to the...

Page 71: ...grammed with a single DMX channel set to 100 Preset 1 has Channel 1 at 100 Preset 2 has Channel 2 at 100 etc This operation cannot be undone 982 Recall Built In Show 2 When this option is chosen the s...

Page 72: ...66 Using the Programmer s Remote SceneStation Installation and Programming Guide...

Page 73: ...can use these examples when programming a SceneStation with either the SceneStation Studio software or with the Programmer s IR Remote Example 1 Create a Preset Example 2 Assign a Preset to a Button E...

Page 74: ...y fields Press SCENE to enter the Scene Edit mode Then use the UP DOWN RIGHT LEFT and BUMP buttons to select channels and raise and lower their levels The CHANNEL and LEVEL buttons can be used to dire...

Page 75: ...physical button you want to program The button will quickly flash White Enter the preset number of the Preset you want this button to activate Preset 1 in this example Choose Preset 1 from the Preset...

Page 76: ...type a number or use the Up Down arrows Select the time units Seconds Minutes or Hours In this example enter 3 5 and choose Seconds in the pop up menu Press FADE then enter the desired Fade Time in se...

Page 77: ...button you want to program The button will quickly flash White Enter the preset number of the Preset you want this button to activate Preset 2 in this example Choose Preset 2 from the Preset pop up me...

Page 78: ...nd then the two digit Preset number 03 Set the Fade Time to 3 seconds Enter the time into the Fade Time field In this example enter 3 and choose Seconds in the pop up menu Press FADE then enter the de...

Page 79: ...menu Use the RIGHT and LEFT arrows to select the Red color and use the UP and DOWN arrows to change the brightness to 100 Note that the top LED on the station shows the active color for the preset Ch...

Page 80: ...enter the preset to loop to In this example enter 10 Store the changes to Preset 10 N A Press ENTER to save the changes Select the Button to be programmed In this example we ll use Button 2 Switch to...

Page 81: ...SceneStation Installation and Programming Guide Programming Examples 75...

Page 82: ...76 Programming Examples SceneStation Installation and Programming Guide...

Page 83: ...y buttons as shown in the following table within 3 seconds Desired Code Property Button 1 SCENE 2 INDICATOR 3 REPEAT 4 FADE 5 FOLLOW 6 LOOP Step 4 Press ENTER The LED on the remote will blink twice to...

Page 84: ...78 Appendix A Pairing The Programmer s Remote SceneStation Installation and Programming Guide...

Page 85: ...m code and a six bit data byte If the button is held down this frame is transmitted continuously Each unique button press transmits a different toggle bit The system code can be one of six different u...

Page 86: ...ilable to send to SceneStation for advanced functionality Button RC5 Data Byte Button RC5 Data Byte EDIT 00 7 15 OPTION 01 8 16 POWER 02 9 17 RECORD 03 CLEAR 18 COPY 04 0 19 LOCK 05 DECIMAL 1A CHANNEL...

Page 87: ...of the station s 64 presets This feature may be enabled by a dip switch setting on the back of the station or by using the SceneStation Studio software Discrete Preset codes use system code 18 Then ea...

Page 88: ...82 Appendix B IR Code Specifications SceneStation Installation and Programming Guide...

Page 89: ...ivated in one of two ways When the station powers up hold Button 1 down Continue to hold down this button until after the startup rainbow pattern sequence has finished and the station enters the Firmw...

Page 90: ...allation and Programming Guide If other combinations of colors appear you either have a Beta or non released version of firmware in your station or you can check for updated versions of this manual Pr...

Page 91: ...second farthest from the IR window The Self Test can be activated at any time using the Programmer s Remote Press EDIT OPTION 962 Testing LED Indicators While the Self Test mode is operating all five...

Page 92: ...s of the buttons If RGB LED lighting fixtures are attached to the station these fixtures will output the same colors that the buttons are displaying If a button is pressed on the station the intensity...

Page 93: ...slates to the SceneStation remote code being received from the remote SceneStation Code RC5 System Code Button 1 Button 2 Button 3 Button 4 Button 5 Remote Code 1 1D White White White White Remote Cod...

Page 94: ...88 Appendix D Self Test Mode SceneStation Installation and Programming Guide...

Page 95: ...DISCLAIMED Some juris dictions do not allow limitations on how long an implied warranty lasts so the above limitation may not apply to You This warranty gives You specific legal rights and You may als...

Page 96: ...90 Appendix E Warranty Information SceneStation Installation and Programming Guide...

Reviews: