


ControLinc Owner’s Manual
Page 3 of 15
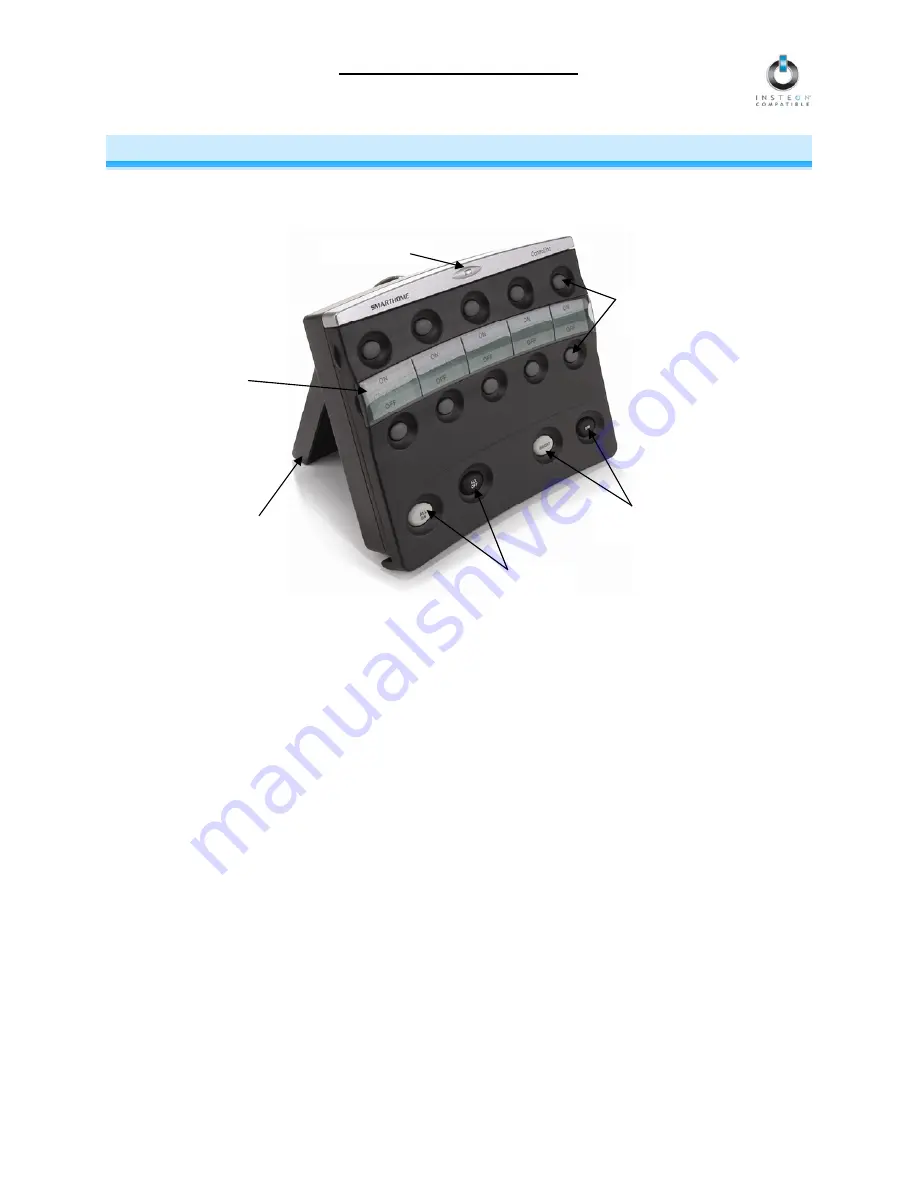
ABOUT CONTROLINC
ControLinc allows you to use the power of INSTEON to control your home, all from a convenient tabletop
controller. ControLinc is also backwards-compatible with legacy X10 devices.
Status LED
On/Off button
pair
Customizable
label
Key ControLinc Features
Bright/Dim
buttons
All On/All Off
buttons
Hinged
stand
•
Setup is easy – Links to other INSTEON devices in minutes
•
Controls up to five INSTEON scenes
•
Status LED and beeper shows INSTEON setup mode activity
•
Control X10 devices
•
Stores setup state in memory so settings aren’t lost during power outages
•
Two-year
warranty
What is Included with ControLinc
•
ControLinc – INSTEON Tabletop Controller
•
Quick-Start
Guide


