


4
touching the metal earthing objects (such as the unpainted metal surface on the rack).
2)
Please do not take electrostatic sensitive components that are not ready to be installed
for application out of the antistatic package materials.
3)
While working, please touch the earthing conductor or the unpainted metal surface on
the cabinet regularly to remove any static electricity from the body that may damage
the internal components.
7.
Upon receiving the proper authorization from Inspur and dismounting the internal
components, please pay attention to the following:
1)
Switch the system power supply off and disconnect the cables, including all connections
of the system. When disconnecting the cables, please hold the connector of the cables
and slowly pull the plugs out. Never pull on the cables.
2)
The products need to completely cool down before dismounting the host cover or
touching the internal components.
3)
During the dismounting process, avoid making large movement ranges to prevent
damage to the components or scratching arms.
4)
Handle components and plug-in cards with care. Please do not touch the components
or connection points on the plug-in cards. When handling the plug-in cards or
components, firmly grab the edges of the plug-in cards and components, and/or their
metal fixed supports.
8.
During the process of rack installation and application, please pay attention to the followings:
1)
After the rack installation is finished, please ensure that the stabilizers have been fixed
to the rack and supported to ground, and the weight of the rack is firm on ground.
2)
Always load from the bottom up, and load the heaviest items first.
3)
When pulling out the components from the rack, apply slight force to keep the rack balanced.
4)
When pressing down the release latch and the rail of components is sliding, please be
careful; as the sliding may hurt your fingers.
5)
Do not overload the AC power supply branch circuits in the rack. The total load of the
rack should not exceed 80% of the ratings of the branch circuits.
6)
Ensure that components in the rack have good ventilation conditions.
7)
When repairing components in the rack, never step on any other components.
9.
After receiving the server, please refer to the label on the top cover to remove the shipping
screws on both sides of the chassis and then install it on the rack, to avoid damage to the
handles when you open the GPU BOX later without removing the screws.
Summary of Contents for AGX-5
Page 1: ...Inspur Server User Manual NF5888M5 AGX 5 V1 1 ...
Page 18: ...12 shown below ...
Page 22: ...16 ...
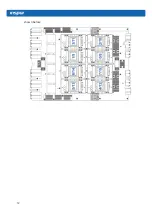
Page 37: ...31 Cabling Note Please route the cables according to the purchased machine configuration ...
Page 46: ...40 Fig 2 11 Fig 2 12 Fig 2 13 ...
Page 113: ...BMC settings 107 ...
Page 116: ...110 ...
Page 118: ...112 One key collect log One key collect log ...
Page 123: ...BMC settings 117 ...
Page 139: ...BMC settings 133 ...
Page 142: ...136 ...
Page 144: ...138 ...
Page 149: ...BMC settings 143 ...


