


24
Step 3: Install the assembled heatsink module onto the CPU socket, and the position marked
by “1” should be aligned with the triangle mark on the CPU socket. Tighten the screws
according to the sequence of 1, 2, 3, and 4.
Notes:
● It is required to coat thermal grease evenly onto the contact position between CPU
heatsink and CPU.
● During fixing CPU heatsink, it is required to fasten bolts according to the sequence accordingly.
Note:
The pins in the processor socket are fragile. The damage of each pin may cause the
replacement of the whole motherboard.
6.3 Memory option
Note:
This server does not support mixing DIMMs.
All DIMMs installed in the server must be the same type.
Summary of Contents for AGX-5
Page 1: ...Inspur Server User Manual NF5888M5 AGX 5 V1 1 ...
Page 18: ...12 shown below ...
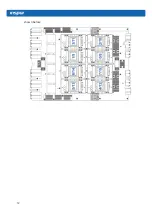
Page 22: ...16 ...
Page 37: ...31 Cabling Note Please route the cables according to the purchased machine configuration ...
Page 46: ...40 Fig 2 11 Fig 2 12 Fig 2 13 ...
Page 113: ...BMC settings 107 ...
Page 116: ...110 ...
Page 118: ...112 One key collect log One key collect log ...
Page 123: ...BMC settings 117 ...
Page 139: ...BMC settings 133 ...
Page 142: ...136 ...
Page 144: ...138 ...
Page 149: ...BMC settings 143 ...


