


NanoPhotometer
®
P-Class
User Manual
Version 2.1
Page 21 / 70
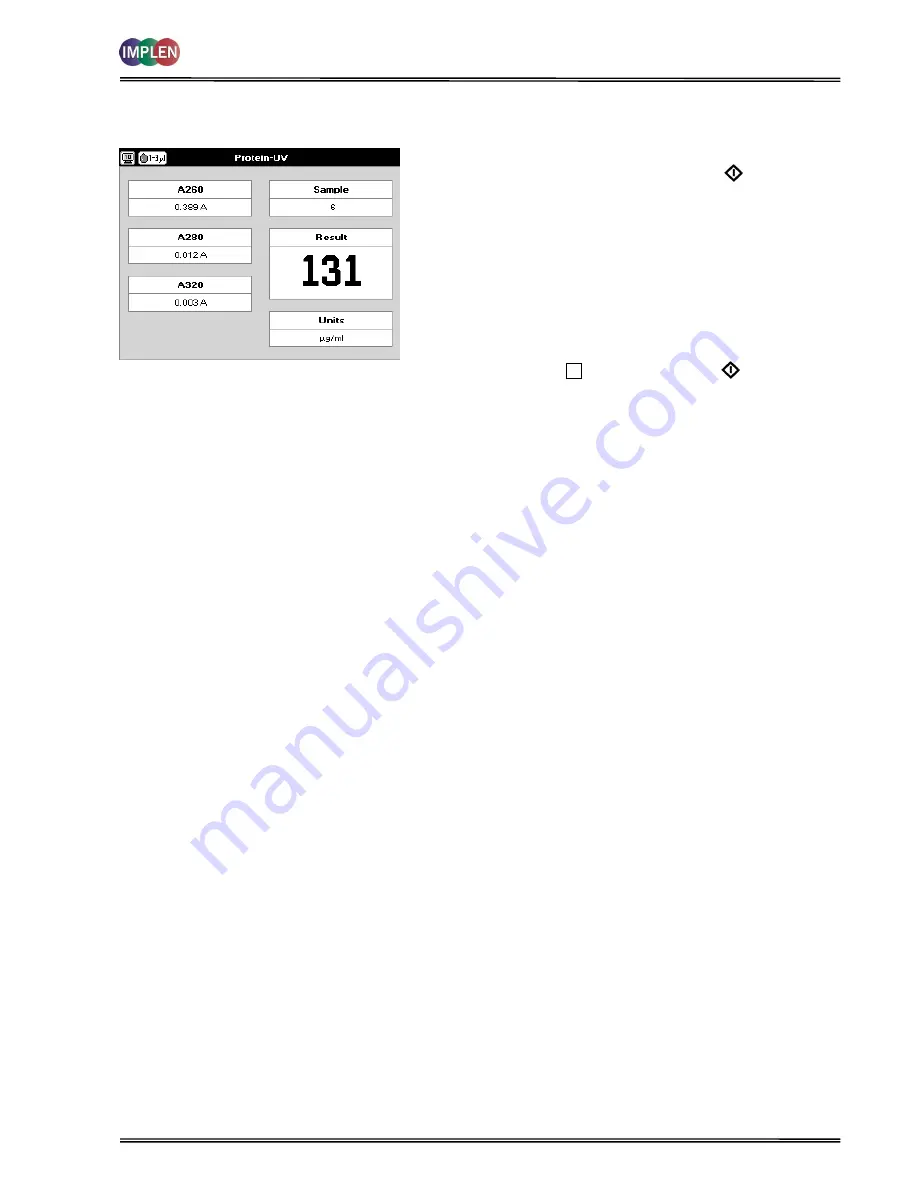
Results Screen
Results Screen
Step 10
Apply/insert the reference sample. Press
Blank
Key. This
will be used for all subsequent samples until changed.
Step 11
Apply/insert sample and press
Sample
. This measures
at both 260 and 280 nm wavelengths and displays the
result. Protein concentration is calculated (corrected by
background wavelength value if selected).
Step 12
If the absorbance value of the sample is not in the linear
range a “Warning message” will pop up and “Instruction”
will be displayed in the top left corner of the result screen.
Please refer to 3.2 Software instructions/important
information on page 11 for further information.
Step 13
Repeat for all samples.
Step 14
Press
Menu/Options
to display available Options which are
described on page 8.
Step 15
Press
Escape
and confirm with
Yes
to return to the
Protein
folder
To change parameters, print or save methods press the Menu/Options button. The options menu will be opened. For
further explanation please see 2.3 Keypad and display on page 6 (P 300) and 7 (P330 / P 360).