TANK-870AI Embedded System
Page 40
3.8 Powering On/Off the System
WARNING:
Make sure a power supply with the correct input voltage is being fed into
the system. Incorrect voltages applied to the system may cause damage to
the internal electronic components and may also cause injury to the user.
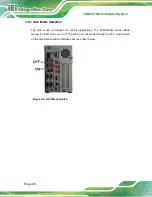
Power on
the system: press the power button for 3 seconds
Power off
the system: press the power button for 6 seconds
Figure 3-30: Power Button
3.9 Power
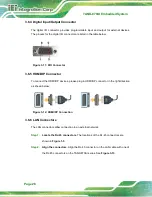
There are two power connectors on the rear panel. Power 1 connector is a 3-pin terminal
block that supports ACC On signal. Power 2 connector is a DIN connector that can directly
connect to a power adapter. The supported power input voltages are:
Power 1 (terminal block)
: 9 V~ 36 V
Power 2 (DC jack)
: 9 V ~ 36 V
Summary of Contents for TANK-870AI SERIES
Page 14: ...TANK 870AI Embedded System Page XIV BIOS Menu 31 PCH Azalia Configuration Menu 99 ...
Page 15: ...TANK 870AI Embedded System Page 1 Chapter 1 1 Introduction ...
Page 27: ...TANK 870AI Embedded System Page 13 Chapter 2 2 Unpacking ...
Page 33: ...TANK 870AI Embedded System Page 19 Chapter 3 3 Installation ...
Page 57: ...TANK 870AI Embedded System Page 43 4 System Motherboard Chapter 4 ...
Page 69: ...TANK 870AI Embedded System Page 55 Chapter 5 5 BIOS ...
Page 114: ...TANK 870AI Embedded System Page 100 Appendix A A Regulatory Compliance ...
Page 119: ...TANK 870AI Embedded System Page 105 Appendix B B BIOS Options ...
Page 123: ...TANK 870AI Embedded System Page 109 Appendix C C Terminology ...
Page 127: ...TANK 870AI Embedded System Page 113 Appendix D D Safety Precautions ...
Page 132: ...TANK 870AI Embedded System Page 118 Appendix E E Digital I O Interface ...
Page 135: ...TANK 870AI Embedded System Page 121 Appendix F F Hazardous Materials Disclosure ...

