Part 1 - Getting Started
27
One Push
Set / Move to Preset
Device Menu supported
by the camera
•
The exact PTZ protocol supported by the camera
must be specified in order to use the NVR's PTZ
controls.
•
Drag and drop to reposition the PTZ Tools window.
•
Select the icon to hide the PTZ Tools window.
Dewarping Control (NVR)
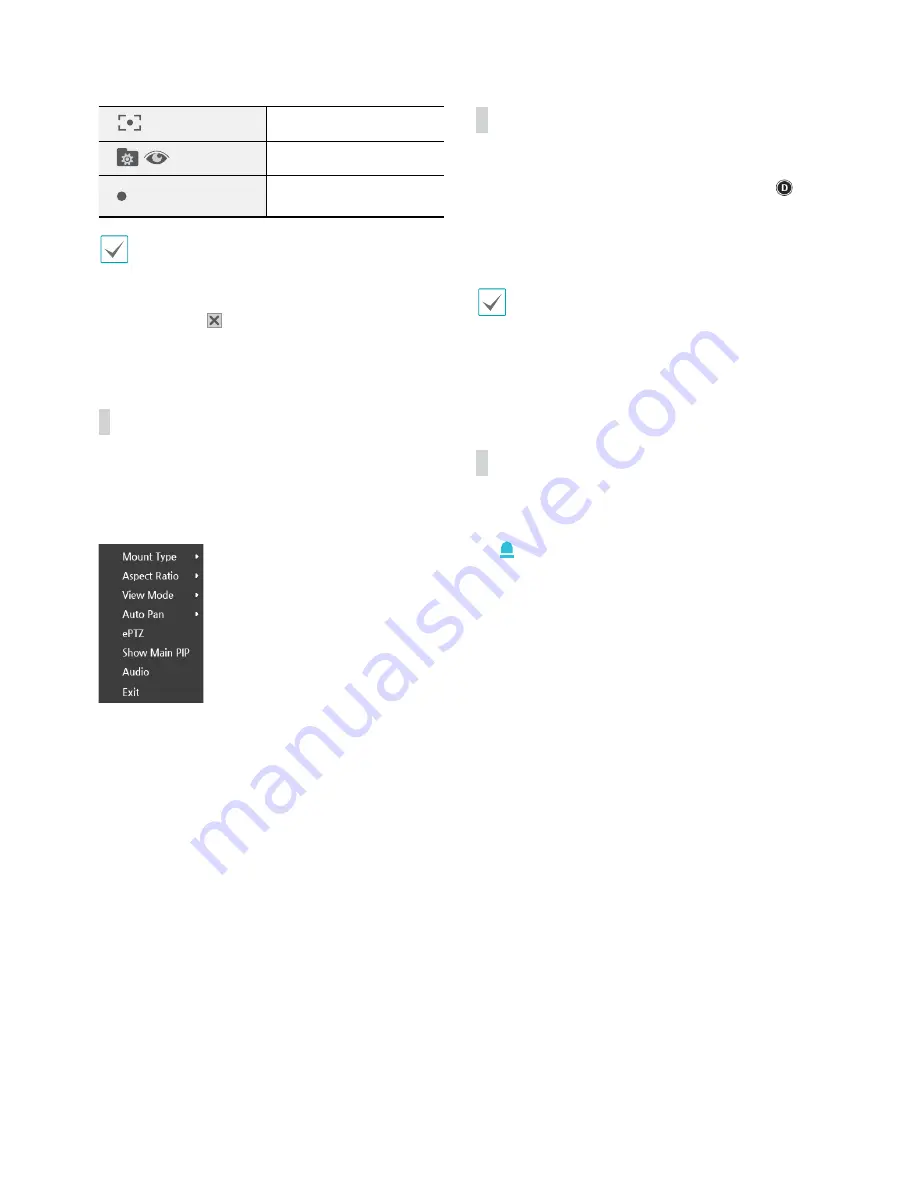
Use this feature to dewarp the fisheye image on NVR.
image. While in live mode and search mode, right-click
on the mouse to select Dewarping from the context
menu. The screen is changed to the Dewarping mode.
●
Mount Type
: Choose a position that the camera
is mounted. The available Screen Type changes
depending on this setting.
●
Aspect Ratio
: Select the proper image aspect ratio.
●
View Mode
: Select the layout, Main View, Main +1,3,5
panes mode and panoramic mode.
●
Auto Pan
: Set to pan the camera automatically. +,- for
direction and numbers for speed
●
ePTZ
: Control Pan, Tilt, and Zoom function. Dragging
the mouse, the size of dragging indicates the speed of
PTZ.
–
Left button drag
: Left/Right (Pan control), Up/
Down (Tilt control)
–
Right button drag
: Zoom control
●
Show Main PIP
: Shows PIP (Picture in Picture) view to
select the area easily in the main view screen.
●
Audio
: Enable/disable audio. Audio playback of the
selected camera is available in full screen mode only.
Dewarping Control (Camera)
While in Live mode, right-click on the mouse to select
Dewarping(camera) from the context menu. The
icon will begin to flash on the selected camera’s OSD
window. You can change the direction by dragging on
the mouse. In order to select dewarping type and mode,
Video
(Camera - Advanced Setup) must first be enabled.
•
This feature is supported only with Fisheye camera
connected on the DirectIP protocol.
•
Original mode does not support dewarping control
feature.
•
Configuring this feature requires an authorized user
login.
Event Monitoring
When an event occurs, the NVR automatically changes to
the camera screen linking event monitoring and shows
the icon on the system status area on the upper
right portion of the screen. To use the Event Monitoring
feature, navigate to
Display Setup > Main Monitor
and
enable
Event Monitoring
. Event Monitoring remains
in effect throughout the entire
Linked Time
. After that,
the NVR will return to the previous screen if a new event
does not take place. Pressing the
Layout
or a
Camera
button before the end of the
Linked Time
reverts the
system to Live mode.


