Part 1 - Getting Started
19
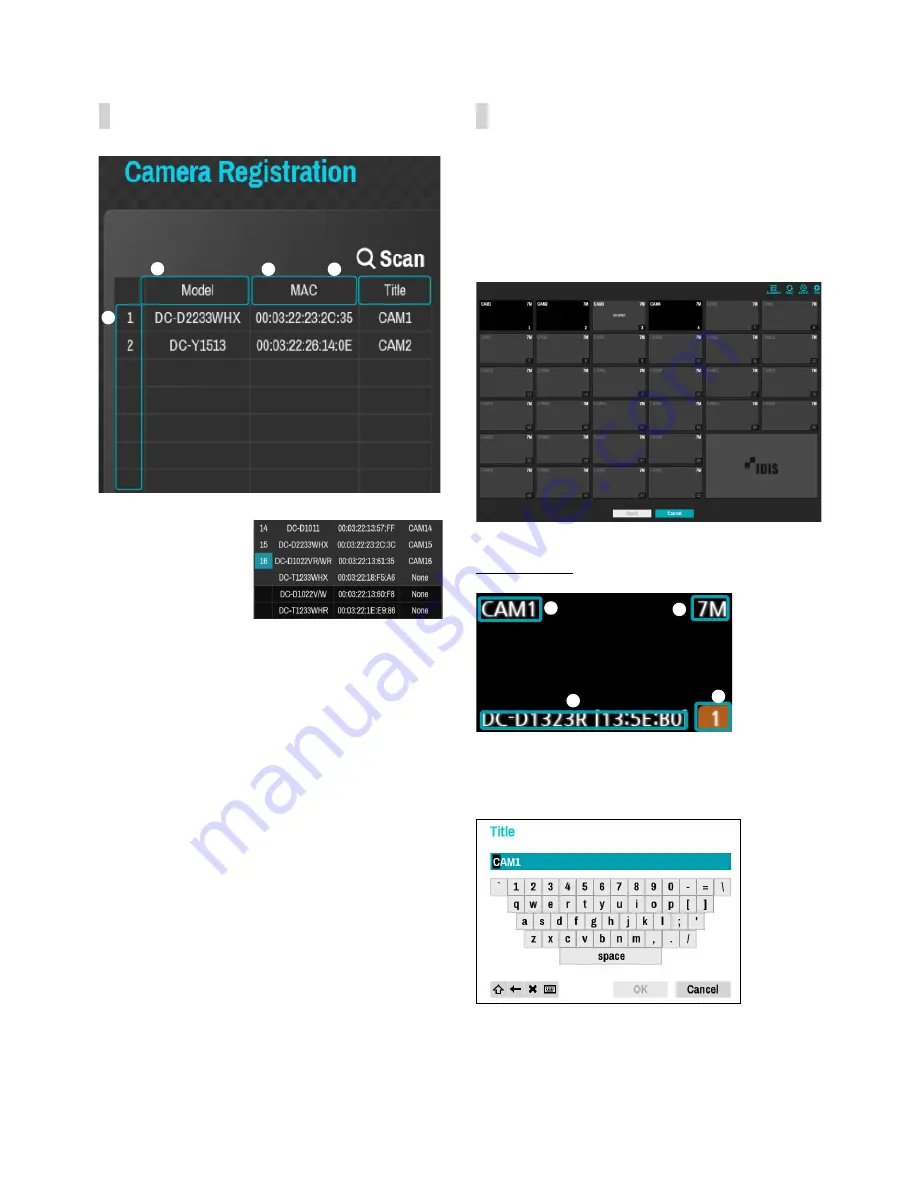
Camera List Area
1
2
3
4
Registered
Initial registration
other NVRs
(Registration X)
1
Screen Position/Registration Status
: Identifies the
camera’s position in the video display area. A blue
background indicates a camera that is available for
registration. A gray background indicates an already
registered camera. Other registered cameras are
shown in black background.
2
Model
: Indicates the camera’s model.
3
MAC
: Displays the 12 digits of the camera’s MAC
address.
4
Title
: Indicates the camera’s name. Changing a
camera’s name in the video display area updates the
camera list as well.
Following options can be accessed by right-clicking on a
camera list entry:
●
Add/Remove Camera
: Adds or removes the selected
camera. The Add Camera option is inactive if the
camera has already been added to the screen.
●
Authentication
: Enter the necessary camera login
info. This option is inactive for DirectIP / IDIS cameras
because they do not require logins. This option is
inactive for IDIS protocol only if the password is set.
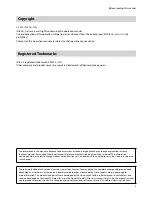
Video Display Area
Left-click on the video display area to toggle between
split screen and single screen modes.
Drag the camera screens around to rearrange them.
The maximum number of the channels that can be
registered on the NVR and the current registered camera
channels display on the upper left corner of each screen.
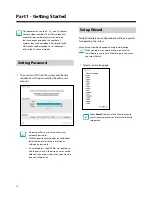
Camera Screen
1
2
3
4
1
Camera Title
Indicates the camera’s title. Left-click on the title to
edit the camera’s title.
2
MAC Address
Camera’s model and MAC address are shown if the
camera has not been registered to the NVR.


