Part 1 - Getting Started
16
–
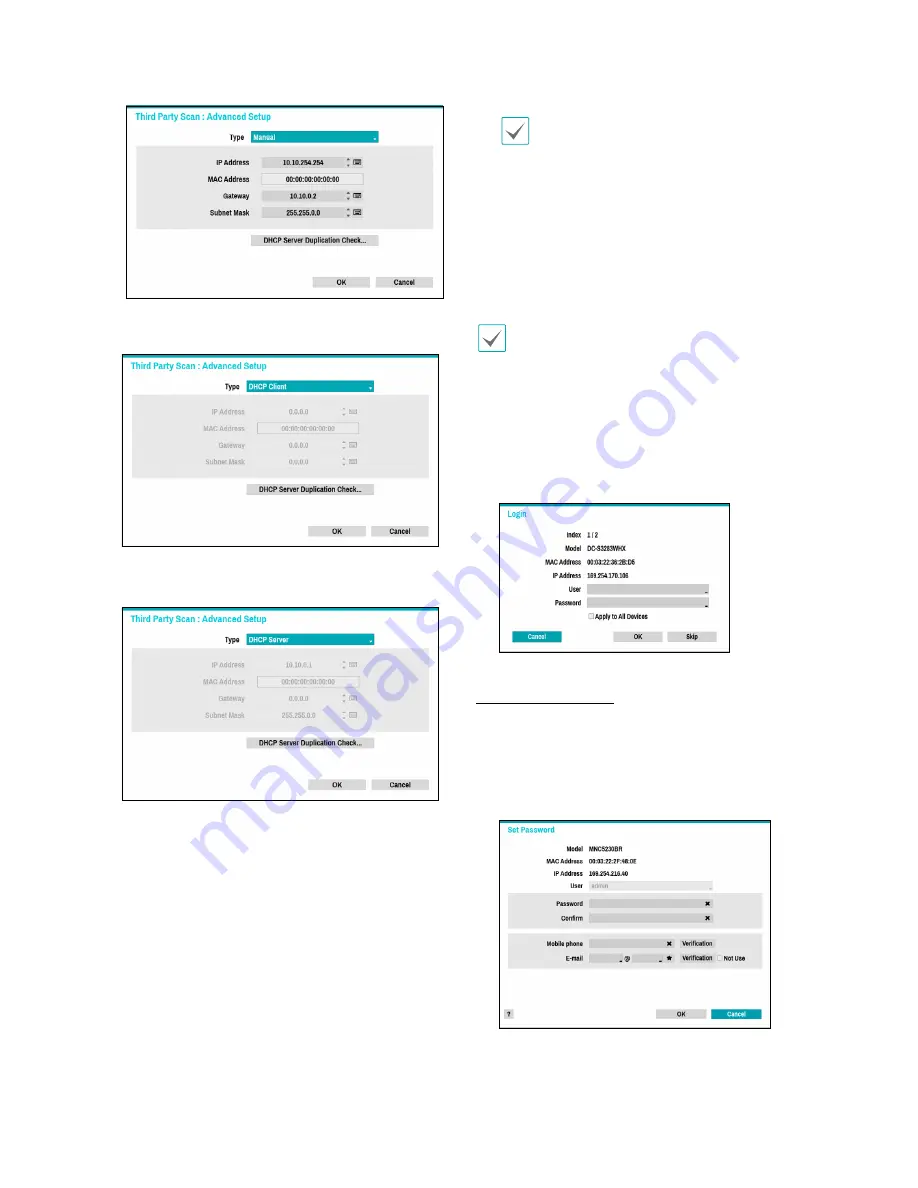
Manual:
Allows you to enter the IP address and
other network settings manually.
–
DHCP Client:
Retrieves an IP address and other
network settings automatically from a DHCP server.
–
DHCP Server:
It makes the NVR run as a DHCP
server. Check if there is another DHCP server on
the same network. If there is no DHCP server,
this option is enabled. The NVR allocates an IP
address automatically in the range of
10.10.0.128
to
10.10.254.254
by using DHCP to the camera
connected to the NVR’s VIDEO IN port. On
DHCP
Server
, Video In Network is connected between
NVR and network cameras only, so Gateway
does not have any meaning.
Subnet Mask
is
255.255.0.0(Class B).
•
When several NVRs exist in the same network,
only one of NVRs has to be run as a DHCP
server. If several DHCP servers are running, the
redundant IP may be allocated to the camera.
•
The range of 10.10.0.1 to 10.10.0.127 is not
recommened because NVR system already has
the IP address.
1
Select
Scan
to commence scanning.
Only cameras that are connected to the NVR via VIDEO
IN ports can be scanned and registered.
2
Select a camera from the scan list and then select
Add Camera
. The device login window will appear.
3
Enter a
User ID
and a
Password
for the selected
camera.
Set Camera Password
For IDIS protocol cameras that support changing and
finding the camera password, you must set the camera
password at the time of initial camera registration. The
email information is used to change and find the camera
password.


