


4 Measurement
7
MultiHandy 2025
Q
ui
ck
G
ui
de
•
Ve
rs
io
n
1.
0
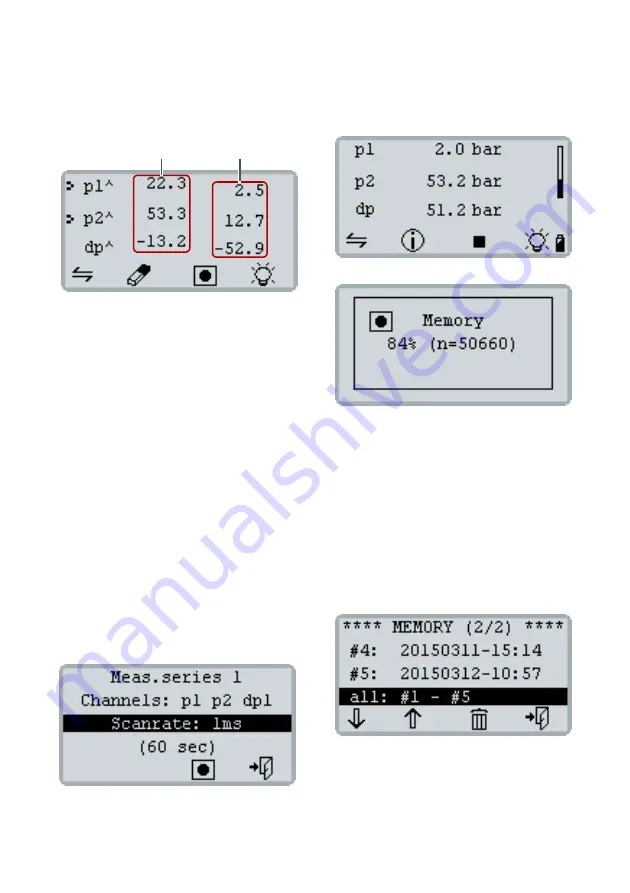
Min./max. Display
Pressing
[F1]
switches to min./max. display or back
to the current measurement values.
Pressing
[F2]
deletes the min./max. memory. The dis-
play immediately shows the current min./max. meas-
urement values.
4.2 Recording and deleting measurement
series
You can save up to five measurement series. You can
assess and save measurement series with the
HYDROlink6 software.
If you have already saved five measurement values in
the measuring instrument, you must delete measure-
ment series before you can save new measurement
series.
How to save a measurement series
1
Press
[F3]
.
2
If necessary, change the
Scanrate
using
[MENU]
.
3
Start the measurement series by pressing
[F3]
.
The display shows a progress bar on the right
side.
4
Press
[F2]
to display the current memory status.
The display automatically switches back after
5seconds. The measurement series automati-
cally ends after 60,000 measurement points.
5
Press
[F3]
to manually end the measurement se-
ries.
How to delete a measurement series
1
Press
[MENU]
to open the
MAIN MENU
.
2
Press
[F1]
to select the
Memory
entry and use
[MENU]
to open the
MEMORY
menu.
3
Press
[F1]
or
[F2]
to select a measurement series
of
all: #1 - #5
.
4
Press
[F3]
and confirm with
[F4]
.
The selected measurement series are deleted.
5
Press
[F4]
until the display shows the measure-
ment values again.
A
Maximum values
B
Minimum values
A
B


