


3 HYDROcenter
5
MultiHandy 2025
Q
ui
ck
G
ui
de
•
Ve
rs
io
n
1.
0
3 HYDROCENTER
HYDROcenter is a program for Windows.
HYDROcenter is your centre for all instruments and
software from HYDROTECHNIK.
Install HYDROcenter to receive automatic updates for
your measuring instrument as well as other software
(e.g. HYDROlink6).
System requirements
You need a PC or notebook with Internet connection
and an operating system of Windows 7 or higher.
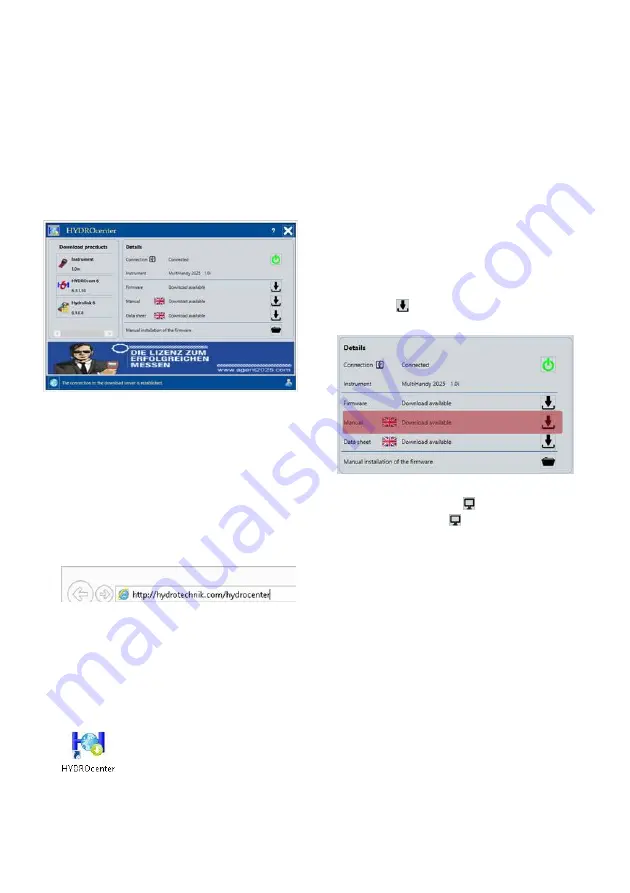
This is how you install the HYDROcenter software
1
Enter the following text into the address bar of
your Internet browser (e.g. Internet Explorer):
http://hydrotechnik.com/hydrocenter
2
Follow the instructions displayed there.
The installation file will be downloaded.
3
Run the installation file.
Confirm the confirmation prompts if applicable.
4
Follow the installation instructions.
The installation is complete when the link is dis-
played on the desktop.
How to connect your measuring instrument to
HYDROcenter
1
Connect the USB cable to the USB interface of the
measuring instrument.
2
Connect the other end of the USB cable to your
PC or notebook.
3
Switch the measuring instrument on by pressing
[F4]
.
4
Start the HYDROcenter program.
HYDROcenter detects the connected measuring
instrument and offers suitable downloads.
How to open the Operating Instructions
1
Click on the
download icon next to the
Manual
entry.
When the Operating Instructions are done down-
loading, it changes to the
icon.
2
Click on the open icon .
The Operating Instructions are opened in your
PDF viewer.
You can save the Operating Instructions on your
PC or notebook.


