


EN
1 Description of the measuring instrument
2
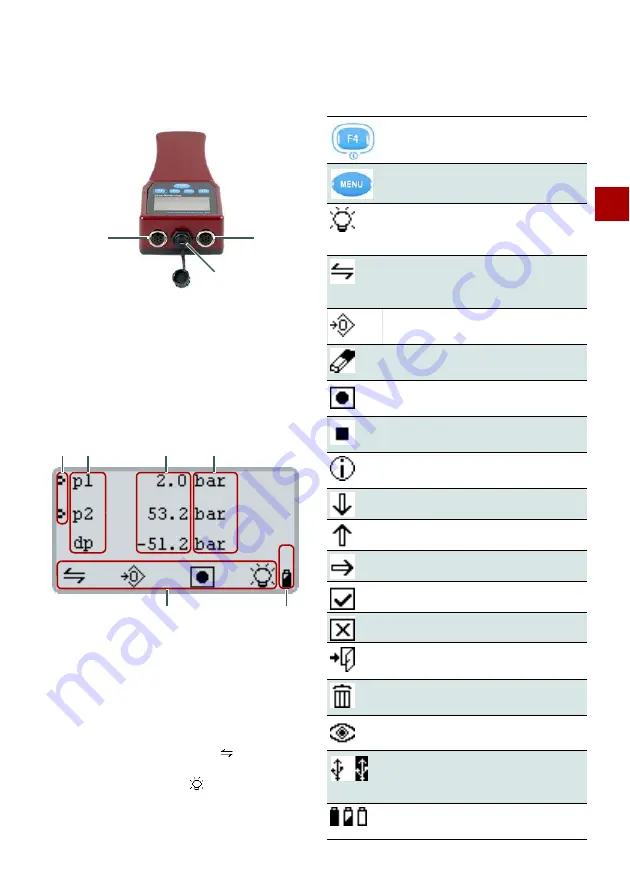
1.3 Connections
1.4 Display
The display shows measurement values, menu en-
tries, status icons and function key icons.
The measuring instrument shows the current meas-
urement values by default.
[F1]
/
switches to the
min./max. measurement values.
If
[F4]
shows the lamp icon
, the display illumina-
tion is switched on or off. Holding down the key
switches off the instrument.
[MENU]
displays the main menu.
1.5 Keys, icons and functions
A
Measurement channel 2
C
USB interface
B
Measurement channel 1
A
ISDS icon
E
Function key icons
B
Channel name
C
Measurement value
F
Status display
(battery/USB)
D
Unit of measurement
A
B
C
A
B
C
D
E
F
Switches instrument on.
Opens main menu.
Selects marked entry.
Switches display illumination on/off.
Switches instrument off (press for
2 seconds).
Changes view:
- Current measurement values
- Min./max. Measurement values
Sets zero point for all displayed chan-
nels.
Deletes all current min./max. measure-
ment values.
Starts the recording of a measurement
series.
Stops the recording of a measurement
series.
Displays the memory status during re-
cording of measurements.
Scrolls down.
Scrolls up.
Selects the next entry.
Confirms the entry.
Interrupts the current process.
Exits the menu.
Interrupts the current process.
Opens the menu for deleting measure-
ment series.
Switches the view of the selected meas-
urement or special channel on or off.
Displays USB status:
•
Instrument connected with USB.
•
Instrument is communicating via USB.
Displays battery status:
Full, half-full, empty.


