Installing
the
blade
server
Complete
the
following
steps
to
install
a
blade
server
into
the
BladeCenter
unit:
1.
Read
the
safety
information
beginning
on
page
and
2.
If
you
have
not
done
so
already,
install
any
options.
See
for
further
information.
3.
Select
the
bay
for
the
blade
server.
4.
If
the
bay
that
you
selected
contains
blade
fillers,
remove
the
blade
fillers.
When
you
remove
blade
fillers
from
a
blade
bay
in
the
BladeCenter
unit
do
not
discard
the
blade
fillers.
You
need
the
blade
fillers
if
you
ever
remove
the
blade
server
or
during
repair
or
upgrades.
For
future
use,
store
the
blade
fillers
in
a
static-protective
environment.
To
help
ensure
proper
cooling,
performance,
and
system
reliability,
do
not
operate
the
BladeCenter
unit
for
more
than
1
minute
without
a
blade
server
or
blade
fillers
installed
in
each
blade
bay.
5.
Make
sure
that
the
release
levers
on
the
blade
server
are
in
the
open
position
(perpendicular
to
the
blade
server).
6.
Slide
the
blade
server
into
the
bay
until
it
stops.
The
spring-loaded
doors
further
back
in
the
bay
that
cover
the
bay
opening
move
out
of
the
way
as
you
insert
the
blade
server.
7.
Push
the
release
levers
on
the
front
of
the
blade
server
to
the
closed
position.
8.
A
set
of
user
labels
comes
with
the
BladeCenter
unit.
Use
them
to
write
identifying
information
for
each
blade
server;
then
place
the
label
on
the
BladeCenter
unit.
See
your
BladeCenter
unit
documentation
for
the
exact
location.
Important:
Do
not
place
the
label
on
the
blade
server
or
in
any
way
block
the
ventilation
holes
on
the
blade
server.
9.
Turn
on
the
blade
server
(see
The
power-on
LED
on
the
blade
server
changes
from
the
slowly-flashing
state
to
a
continuously
lit
(steady)
state.
10.
If
this
is
the
initial
installation
of
the
blade
server,
install
the
operating
system.
Use
the
installation
instructions
that
come
with
the
operating
system.
For
more
information,
see
11.
Check
http://www.ibm.com/support/us/en/
for
any
software
or
firmware
updates.
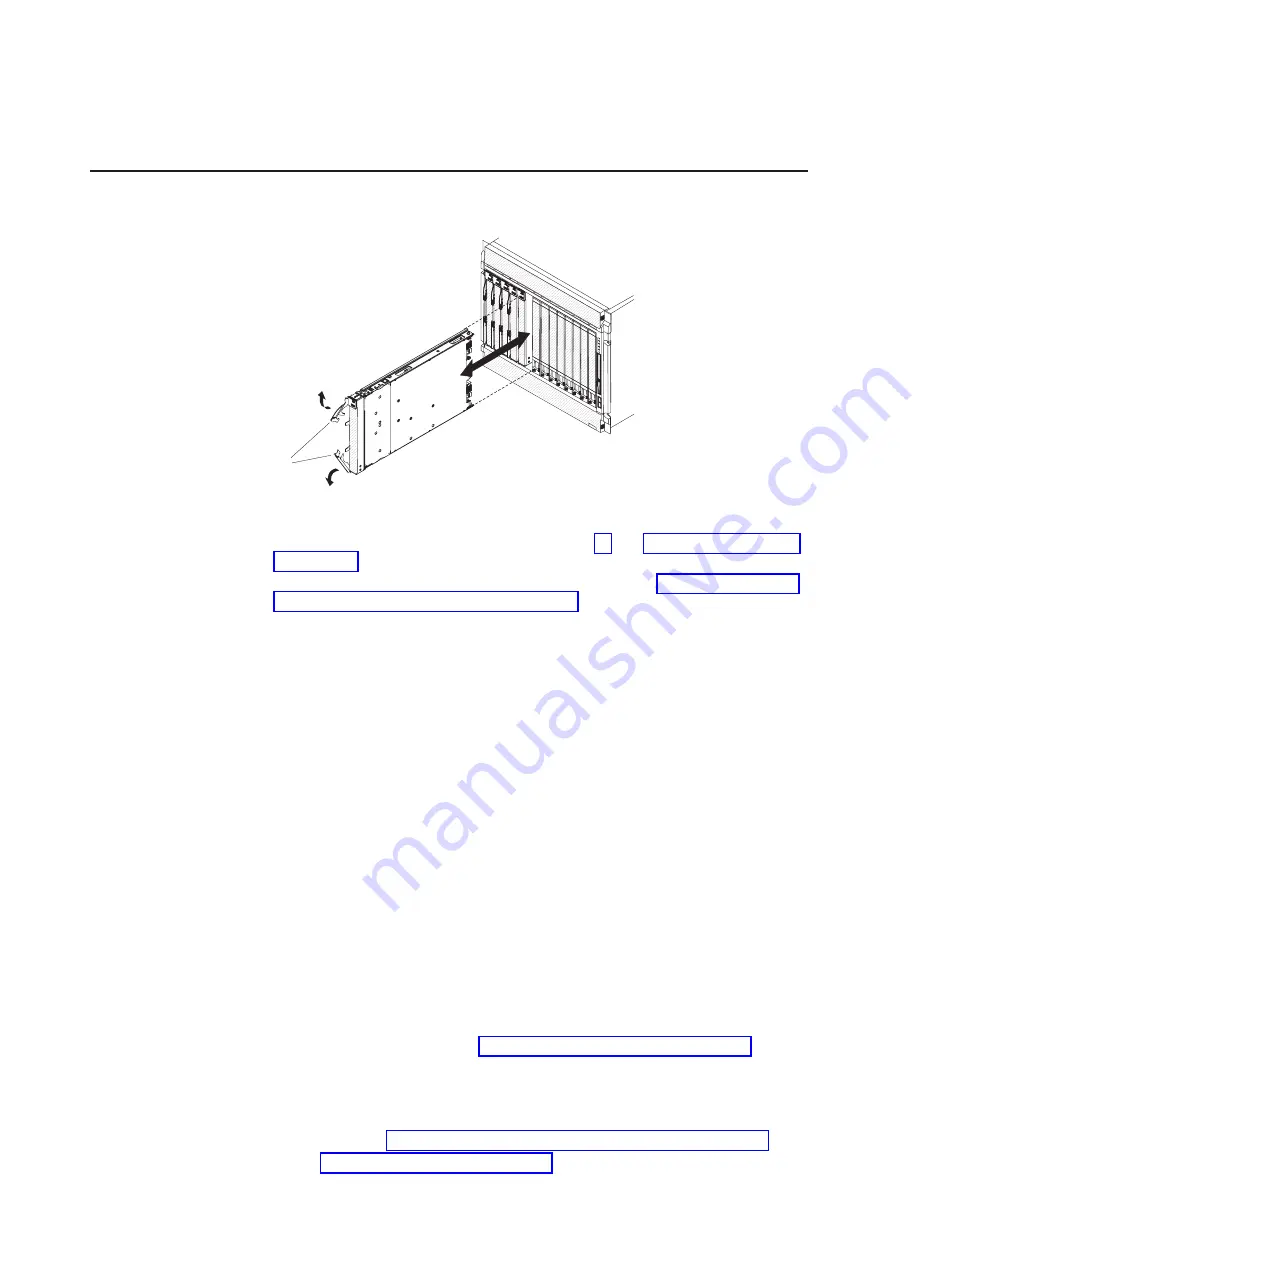
Release-
handles
open
Figure
7.
Inserting
the
blade
server
into
the
BladeCenter
unit
16
BladeCenter
QS22
Type
0793:
Installation
and
User’s
Guide
Summary of Contents for QS22 - BladeCenter - 0793
Page 3: ...BladeCenter QS22 Type 0793 Installation and User s Guide...
Page 8: ...vi BladeCenter QS22 Type 0793 Installation and User s Guide...
Page 30: ...14 BladeCenter QS22 Type 0793 Installation and User s Guide...
Page 34: ...18 BladeCenter QS22 Type 0793 Installation and User s Guide...
Page 54: ...38 BladeCenter QS22 Type 0793 Installation and User s Guide...
Page 70: ...54 BladeCenter QS22 Type 0793 Installation and User s Guide...
Page 84: ...68 BladeCenter QS22 Type 0793 Installation and User s Guide...
Page 112: ...96 BladeCenter QS22 Type 0793 Installation and User s Guide...
Page 113: ......
Page 114: ...Part Number 44R5161 1P P N 44R5161...


