


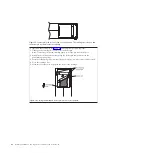


Appendix D. Repairing a cartridge
Attention:
Use a repaired tape cartridge only to recover data and move it to
another cartridge. The continued use of a repaired cartridge might void the drive
and cartridge warranties.
If the leader pin in your cartridge becomes dislodged from its pin-retaining spring
clips or detaches from the tape, you must use the IBM Leader Pin Reattachment
Kit (part number 08L9129) to reposition or reattach it.
Important:
Do not reattach the pin if you must remove more than 7 m (23 ft) of
leader tape.
The following sections describe typical cartridge problems.
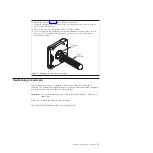
Examples of cartridge problems
Example: Split cartridge case (see “Inspect the cartridge” on page 45)
If the cartridge case is damaged. There is a high possibility of media damage and
potential loss. Complete the following steps:
1.
Look for signs of cartridge mishandling.
2.
Use the IBM Leader Pin Reattachment Kit (part number 08L9129) to correctly
seat the pin.
3.
Use data recovery procedures to minimize the chance of data loss.
4.
Review the media-handling procedures.
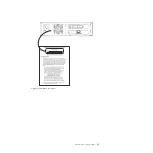
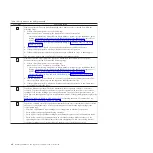
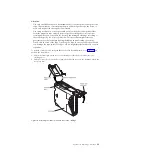
Example: Improper placement of the leader pin (see Figure 15 on page 66)
The leader pin is misaligned. Complete the following steps:
1.
Look for cartridge damage.
2.
Use the IBM Leader Pin Reattachment Kit (part number 08L9129) to correctly
seat the pin.
3.
Use data recovery procedures to minimize the chance of data loss.
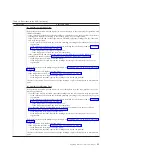
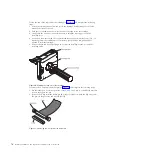
Repositioning a leader pin
To place the leader pin in its proper position, you will need the following tools
v
Plastic or blunt-end tweezers
v
Cartridge manual rewind tool (from the Leader Pin Reattachment Kit, part
number 08L9129)
A leader pin that is improperly seated inside a cartridge can interfere with the
operation of the drive. Figure 15 on page 66 shows a leader pin in the incorrect
and correct positions.
© Copyright IBM Corp. 2011
65
Summary of Contents for L5X
Page 2: ......
Page 10: ...viii Half High LTO Gen 5 SAS Tape Drive Installation and User s Guide...
Page 14: ...xii Half High LTO Gen 5 SAS Tape Drive Installation and User s Guide...
Page 16: ...xiv Half High LTO Gen 5 SAS Tape Drive Installation and User s Guide...
Page 58: ...40 Half High LTO Gen 5 SAS Tape Drive Installation and User s Guide...
Page 71: ...Figure 14 RID tag on rear panel Chapter 5 Resolving problems 53...
Page 72: ...54 Half High LTO Gen 5 SAS Tape Drive Installation and User s Guide...
Page 76: ...58 Half High LTO Gen 5 SAS Tape Drive Installation and User s Guide...
Page 90: ...72 Half High LTO Gen 5 SAS Tape Drive Installation and User s Guide...
Page 102: ...84 Half High LTO Gen 5 SAS Tape Drive Installation and User s Guide...
Page 119: ......
Page 120: ...Part Number 60Y1487 Printed in USA 1P P N 60Y1487...


