Installing a high-speed I/O module
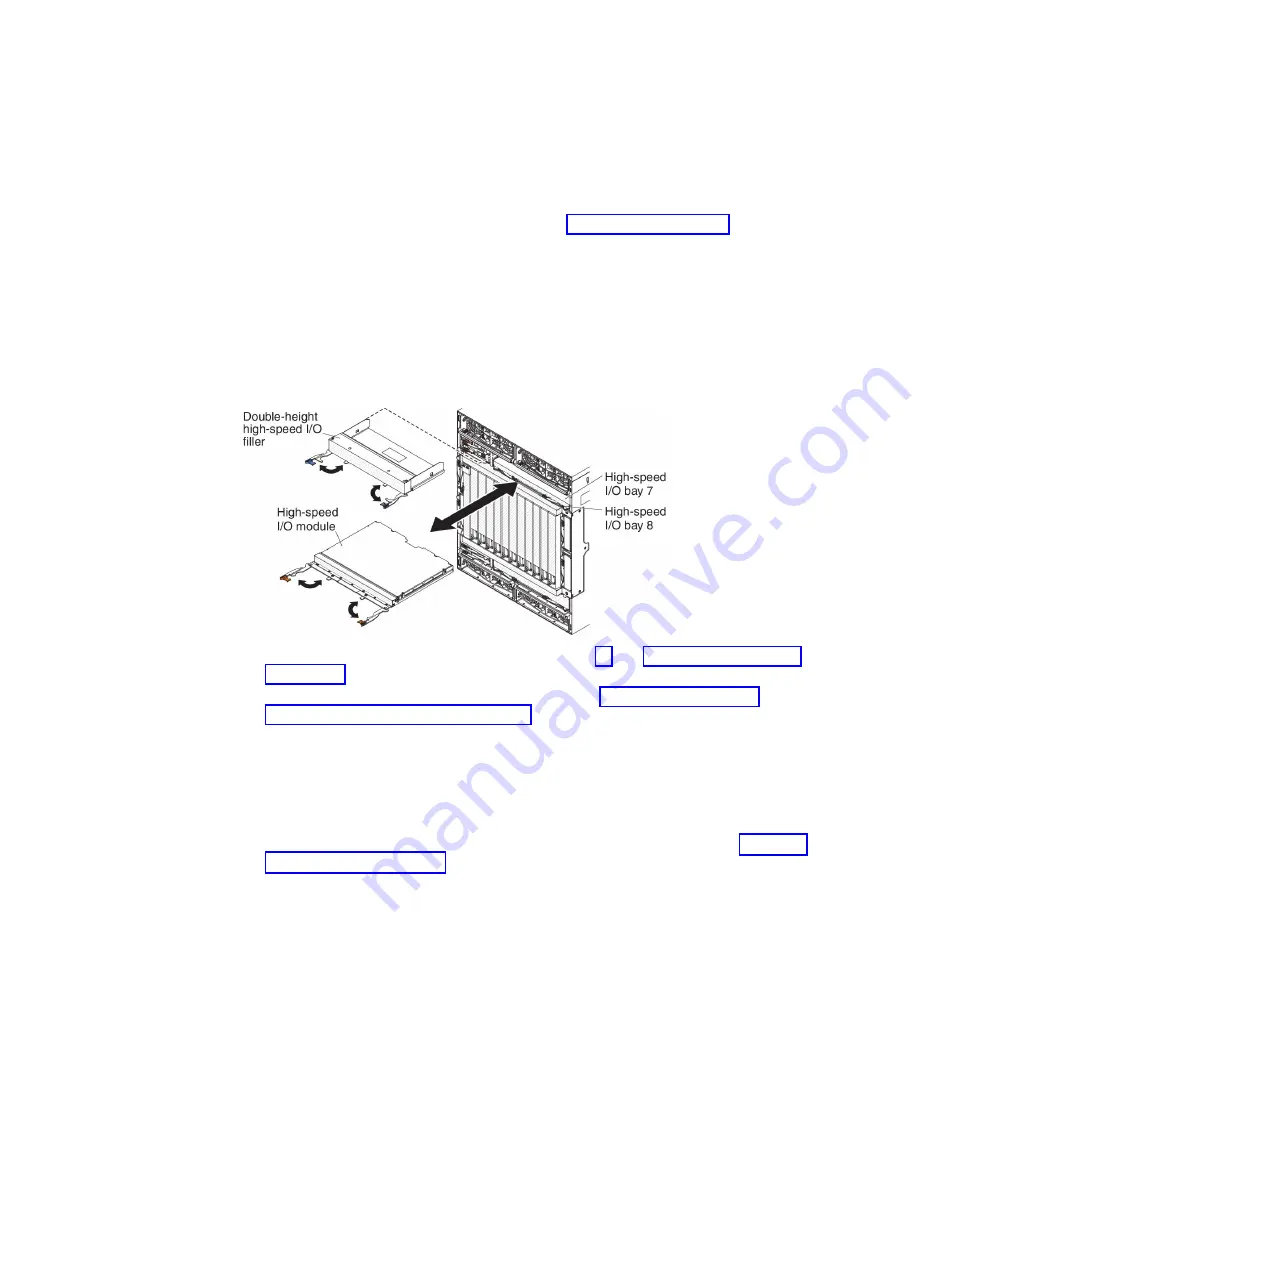
The BladeCenter HT unit has four hot-swap high-speed I/O module bays that are
compatible with three types of I/O modules (see “Rear view” on page 16 for the
location of the I/O module bays). See the
Installation and User’s Guide
for a
description of the types of modules that can be used in each bay.
Notes:
1. Before you install a new I/O module, read the documentation that comes with
the module for detailed instructions.
2. Power modules must be present in all four power bays.
To install a high-speed I/O module or filler, complete the following steps.
1. Read the safety information that begins on page vii and “Installation guidelines”
2. Install the high-speed I/O-module interposer. See “Installing a high-speed
I/O-module interposer tray” on page 67 for more information.
3. Make sure that the high-speed I/O module release handles are in the open
position.
4. Slide the module into the module bay until it stops.
5. Push the release handle or handles to the closed position.
6. Reconnect all cables to the module.
7. Install the bezel that was removed during the removal procedure. See “Installing
a bezel collar” on page 45 for more information.
72
BladeCenter HT Type 8740 and 8750: Problem Determination and Service Guide
Summary of Contents for BladeCenter HT 8740
Page 1: ...BladeCenter HT Type 8740 and 8750 Problem Determination and Service Guide ...
Page 2: ......
Page 3: ...BladeCenter HT Type 8740 and 8750 Problem Determination and Service Guide ...
Page 8: ...vi BladeCenter HT Type 8740 and 8750 Problem Determination and Service Guide ...
Page 48: ...30 BladeCenter HT Type 8740 and 8750 Problem Determination and Service Guide ...
Page 118: ...100 BladeCenter HT Type 8740 and 8750 Problem Determination and Service Guide ...
Page 142: ...124 BladeCenter HT Type 8740 and 8750 Problem Determination and Service Guide ...
Page 150: ...132 BladeCenter HT Type 8740 and 8750 Problem Determination and Service Guide ...
Page 156: ...138 BladeCenter HT Type 8740 and 8750 Problem Determination and Service Guide ...
Page 157: ......
Page 158: ... Part Number 00V9904 Printed in USA 1P P N 00V9904 ...


