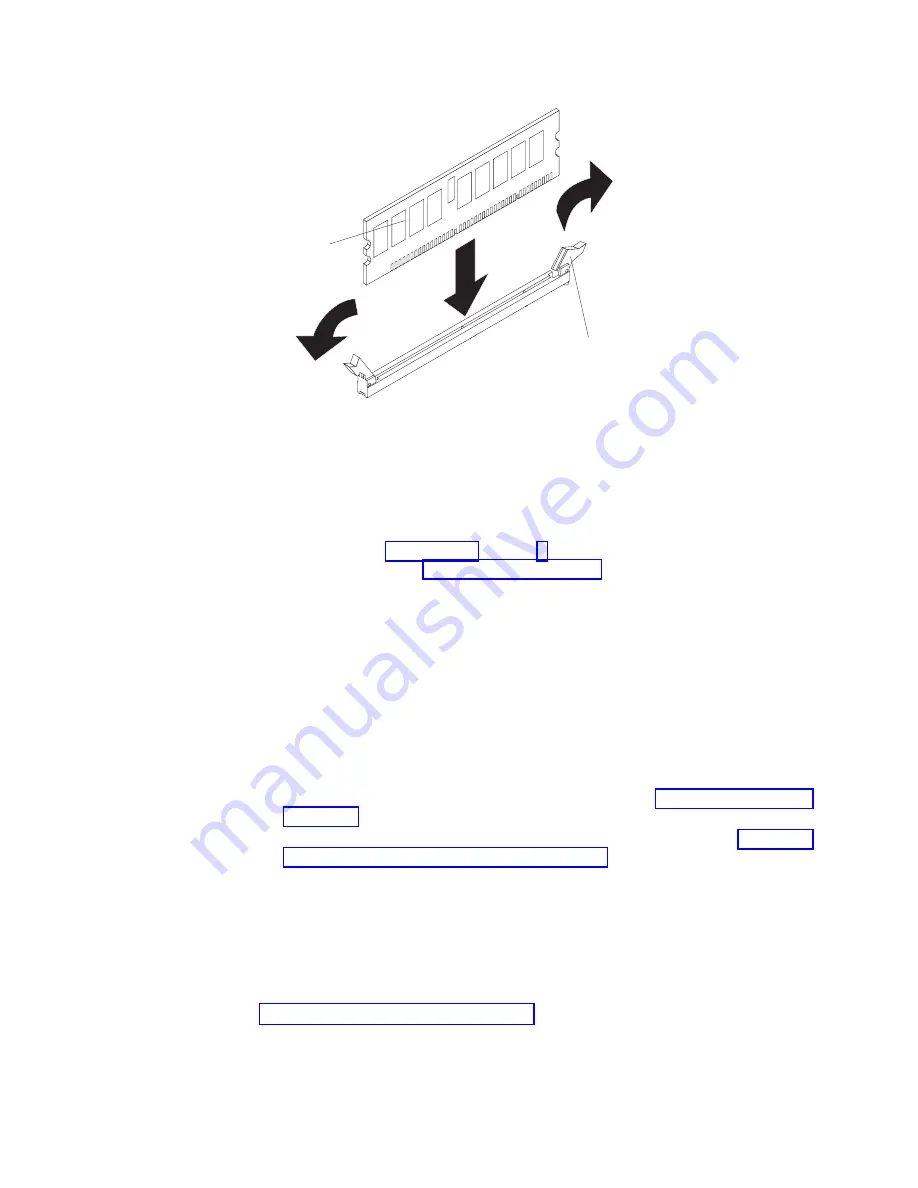
DIMM
Retaining
clip
9.
Insert
the
DIMM
into
the
connector
by
aligning
the
edges
of
the
DIMM
with
the
slots
at
the
ends
of
the
DIMM
connector.
Firmly
press
the
DIMM
straight
down
into
the
connector
by
applying
pressure
on
both
ends
of
the
DIMM
simultaneously.
The
retaining
clips
snap
into
the
locked
position
when
the
DIMM
is
seated
in
the
connector.
If
there
is
a
gap
between
the
DIMM
and
the
retaining
clips,
the
DIMM
has
not
been
correctly
inserted;
open
the
retaining
clips,
remove
the
DIMM,
and
then
reinsert
it.
10.
Repeat
steps
through
to
install
the
second
DIMM
of
the
pair;
then,
continue
with
for
instructions
on
how
to
install
a
memory
card.
Installing
a
memory
card
The
server
supports
up
to
four
memory
cards.
Each
memory
card
must
have
at
least
one
pair
of
DIMMs.
You
can
hot-add
one
memory
card
to
each
of
the
memory
power
buses,
provided
your
operating
system
supports
that
function.
At
least
one
memory
card
with
one
pair
of
DIMMs
must
be
installed
in
the
server
to
operate
correctly.
To
install
a
memory
card,
complete
the
following
steps:
1.
Read
the
safety
information
that
begins
on
page
v
and
2.
Remove
the
front
cover
(tower
model
only),
and
the
top
cover
(see
3.
Make
sure
that
the
locking
levers
on
the
edge
of
the
memory
card
are
fully
open,
and
insert
the
memory
card
into
an
open
memory-card
connector
on
the
microprocessor
board.
4.
Press
the
memory
card
into
the
connector.
5.
Close
the
small
locking
lever;
then,
close
the
large
locking
lever.
If
you
have
other
options
to
install
or
remove,
do
so
now;
otherwise,
go
to
Chapter
2.
Installing
options
15


